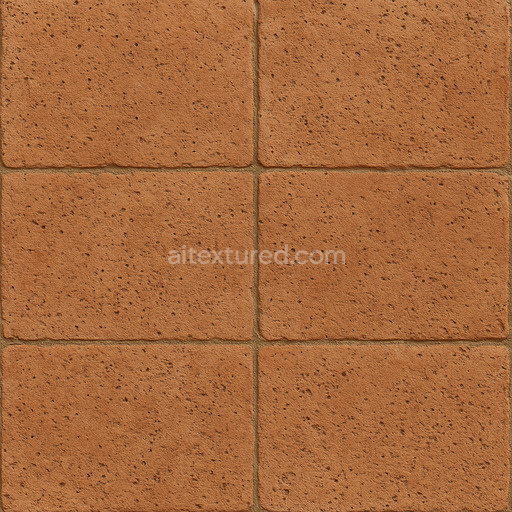
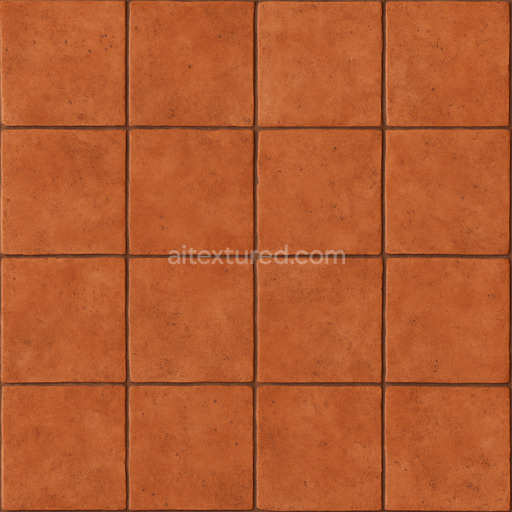
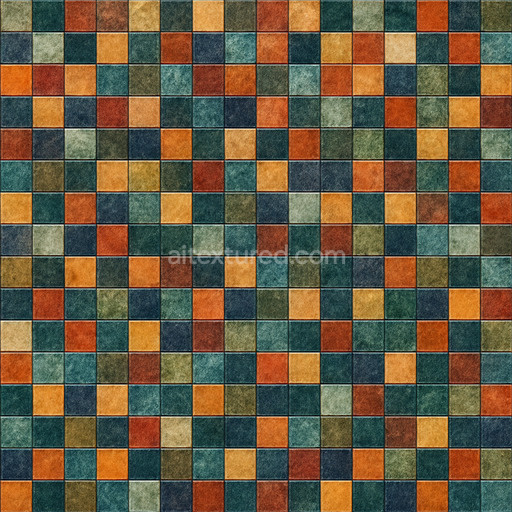
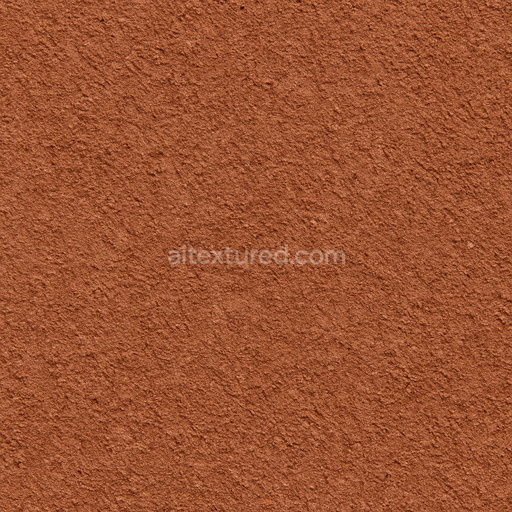
Terracotta Tile Rustic Porous
Seamless texture (tileable) · PNG, WEBP, PBR ZIP. License: AITextured Free Commercial License (FCL) v1.1. Free personal and commercial use. Raw resale, standalone redistribution, mirroring/scraping, competing asset packs, and AI/ML training are not allowed without written permission. Attribution is not required, but appreciated..

| ID | old-worn-ceramic-tiles |
|---|---|
| Category | Ceramic-tile |
| Formats | PNG, WEBP, PBR ZIP |
| Size | 1k (1024x1024px), 2k (2048x2048px), 4k (4096x4096px), 8k (8192x8192px) |
| Color | sRGB |
| Tileable | Yes |
The Old Worn Ceramic Tiles Texture authentically captures the intricate material composition and weathered character of aged ceramic wall tiles making it an exceptional selection for architectural visualization digital art game design and 3D modeling projects. These tiles are traditionally formed from a ceramic base substrate primarily made of fired clay minerals that offer both durability and a robust structural foundation. The surface finish is achieved through mineral-based glazes incorporating pigments and oxide layers which impart the distinctive aged color tones and subtle variations found across the tile surfaces. Over extended periods environmental exposure and natural wear induce changes in porosity alongside surface imperfections such as fine cracks chips and areas where the glaze has faded or worn thin. This complex interplay of material and time is meticulously reflected across the texture’s PBR channels: the BaseColor (Albedo) map showcases nuanced color shifts and fading pigments; the Normal map recreates delicate surface relief and unevenness; Roughness defines the characteristic matte worn finish of long-used ceramic; Metallic remains consistently low aligning with the non-metallic nature of ceramic materials. Ambient Occlusion enhances the perception of depth in cracks and crevices while the Height/Displacement map captures subtle elevations and depressions perfect for realistic rendering of distressed tiles.
Designed for versatility and high fidelity this seamless PBR texture is available in resolutions up to 8K ensuring exceptional detail that holds up under close inspection in rendering engines such as Blender Unreal Engine and Unity. Its seamless tiling capability allows for infinite repetition across extensive wall surfaces without visible seams making it ideal for both rustic and modern architectural scenes. The texture’s authentic portrayal of weathered ceramic surfaces conveys a rich sense of history and craftsmanship adding depth and realism to interior and exterior walls alike. Featuring intricate patterns and a gently distressed appearance this texture enhances visual storytelling by reflecting the natural aging process of ceramic tiles providing designers and artists with a valuable asset for creating historically resonant and visually compelling environments.
When applying this texture adjusting the UV scale to closely match the real-world dimensions of ceramic tiles will significantly enhance realism. Fine-tuning the roughness parameter allows control over the balance between remaining polished glaze areas and matte weathered patches while subtle use of height or parallax mapping accentuates the depth of chips and cracks for added tactile dimension. The careful consideration of material composition including fired clay substrates mineral pigments and oxide-based glazes ensures that this texture not only visually represents worn ceramic surfaces but also reacts authentically to varied lighting conditions. This makes it an essential resource for artists designers and architects aiming to faithfully recreate the complex surface detail and timeless character of old worn ceramic tiles within their digital projects.
Import the texture maps into Blender with sRGB color space for albedo/base color and Non-Color for normal, roughness, metallic, AO, height, and ORM maps. Connect normal maps through a Normal Map node, then adjust UV scale with a Mapping node so the material repeats naturally on your model.
For the full step-by-step setup, see How to Use Seamless Textures in Blender. Browse related material examples in wood, concrete, and metal.
Yes. This texture is designed as a seamless tileable PBR material, so it can repeat across large surfaces without visible borders.
You can download PNG/WEBP versions and use 1K, 2K, 4K and 8K download options when available on the page.
Yes. The download options and engine-mapped ZIP workflow are designed for Blender, Unreal Engine, Unity Standard, URP and HDRP material pipelines.
Yes. The texture is available under the AITextured free commercial license. Review the license page for redistribution and AI-training restrictions.


Generate, preview, and export seamless PBR materials for Blender, Unity, and Unreal Engine—directly in your browser.
AI text-to-texture: type a prompt and get a seamless, tileable base image ready for PBR workflows (great starting point for materials).
Create a full PBR set (Normal, Roughness, AO, Metallic, etc.) from a single image. Seamless and tiling-friendly.
Instant WebGL viewer: inspect materials on a sphere, plane, and cube. Check tiling and lighting in real time.
Re-packages maps per engine: Unreal (BaseColor + ORM), Unity (Mask/MetallicSmoothness), Blender (separate channels).
PNG ↔ JPG ↔ SVG: fast convert, SVG rasterize, embed/trace options, quality & background controls.