Versatile Seamless Fabric Textures Collection
Seamless texture (tileable) · PNG, WEBP, PBR ZIP. License: AITextured Free Commercial License (FCL) v1.1. Free personal and commercial use. Raw resale, standalone redistribution, mirroring/scraping, competing asset packs, and AI/ML training are not allowed without written permission. Attribution is not required, but appreciated..

| ID | terry-cloth-blue-absorbent-microfiber-terry-woven-textile |
|---|---|
| Category | Fabric |
| Formats | PNG, WEBP, PBR ZIP |
| Size | 1k (1024x1024px), 2k (2048x2048px), 4k (4096x4096px), 8k (8192x8192px) |
| Color | sRGB |
| Tileable | Yes |
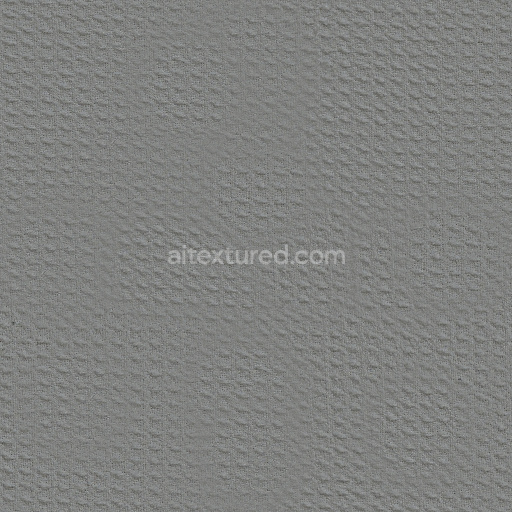
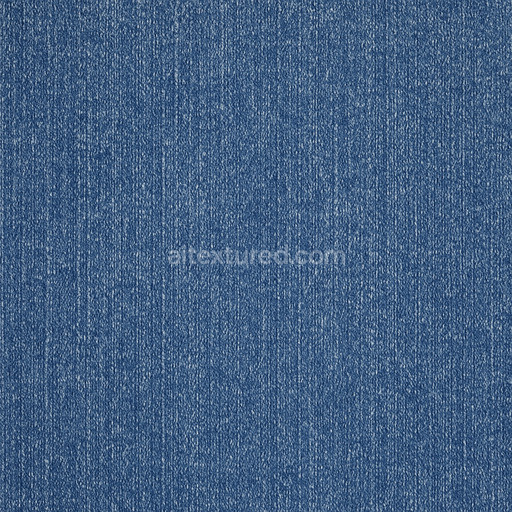
The absorbent microfiber terry cloth texture is a finely woven textile crafted primarily from polymer-based microfiber fibers expertly knitted into the characteristic looped structure of terry fabrics. This fabric’s composition features densely packed ultra-soft raised loops and looped fibers that provide exceptional plushness and superior moisture-wicking properties. The microfiber base substrate enhances the fabric’s porosity enabling rapid absorption and breathability while maintaining durability through traditional terry weaving techniques. Carefully integrated blue pigments are embedded within the fibers to ensure a consistent vibrant color that retains its richness under varied lighting conditions without fading or manual correction. The surface finish presents a natural soft matte appearance that highlights the subtle variations in fiber density and loop height emphasizing the fabric’s tactile depth and plush softness.*
In physically based rendering (PBR) workflows this terry woven textile is represented through a comprehensive set of optimized maps designed for realistic material simulation in both real-time and offline engines such as Blender Unreal Engine and Unity. The Albedo (BaseColor) map captures the vivid blue hues and subtle color shifts inherent to the dyed microfiber fibers. The Normal map intricately details the raised loops and knitted fiber structure delivering convincing surface depth and tactile realism. Roughness values are finely tuned to replicate the soft diffuse finish of terry cloth scattering light gently to avoid unwanted glossiness while the Metallic map remains minimal reflecting the non-metallic nature of the synthetic polymer fibers. Ambient Occlusion enhances the shadowed recesses within the looped fibers and fabric folds adding dimensionality and the Height (Displacement) map records the elevation differences from the raised loops supporting enhanced parallax and depth effects in compatible shaders.*
This seamless 3D texture is offered in ultra-high-resolution 4K format with an optional upgrade to 8K for projects demanding outstanding clarity and detail. Fully tileable and physically based it integrates seamlessly into modern digital content creation pipelines across platforms provided in flexible PNG and EXR formats for compatibility. For optimal realism it is recommended to carefully adjust the UV scale to maintain the natural size and proportion of the terry loops ensuring accurate fabric simulation. Additionally fine-tuning the roughness map according to the specific lighting environment will achieve balanced light scattering enhancing the fabric’s soft and absorbent qualities. This texture set is a reliable choice for rendering soft plush and absorbent microfiber terry cloth materials in demanding 3D projects.*
Import the texture maps into Blender with sRGB color space for albedo/base color and Non-Color for normal, roughness, metallic, AO, height, and ORM maps. Connect normal maps through a Normal Map node, then adjust UV scale with a Mapping node so the material repeats naturally on your model.
For the full step-by-step setup, see How to Use Seamless Textures in Blender. Browse related material examples in wood, concrete, and metal.
Yes. This texture is designed as a seamless tileable PBR material, so it can repeat across large surfaces without visible borders.
You can download PNG/WEBP versions and use 1K, 2K, 4K and 8K download options when available on the page.
Yes. The download options and engine-mapped ZIP workflow are designed for Blender, Unreal Engine, Unity Standard, URP and HDRP material pipelines.
Yes. The texture is available under the AITextured free commercial license. Review the license page for redistribution and AI-training restrictions.


Build, preview, and export seamless PBR materials. Generate full map sets from a single image, inspect them in a real-time WebGL viewer, and re-package maps for Unreal, Unity, and Blender—directly in your browser.
AI text-to-texture: type a prompt and get a seamless, tileable base image ready for PBR workflows (great starting point for materials).
Create a full PBR set (Normal, Roughness, AO, Metallic, etc.) from a single image. Seamless and tiling-friendly.
Instant WebGL viewer: inspect materials on a sphere, plane, and cube. Check tiling and lighting in real time.
Re-packages maps per engine: Unreal (BaseColor + ORM), Unity (Mask/MetallicSmoothness), Blender (separate channels).
PNG ↔ JPG ↔ SVG: fast convert, SVG rasterize, embed/trace options, quality & background controls.