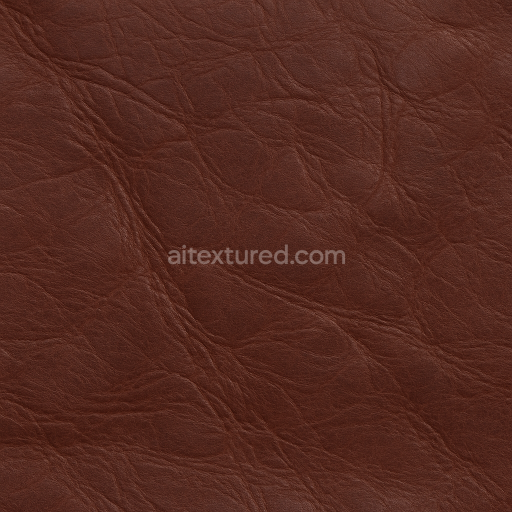
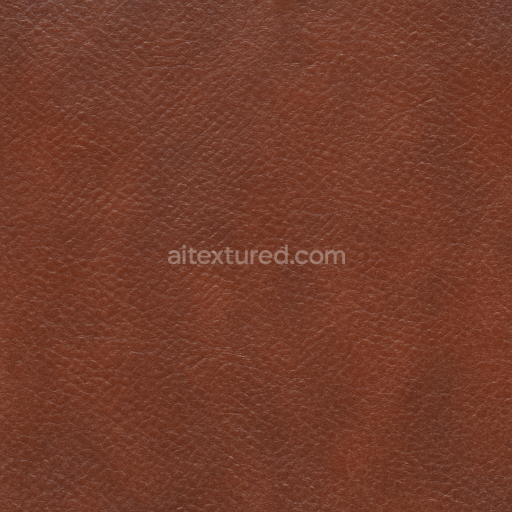
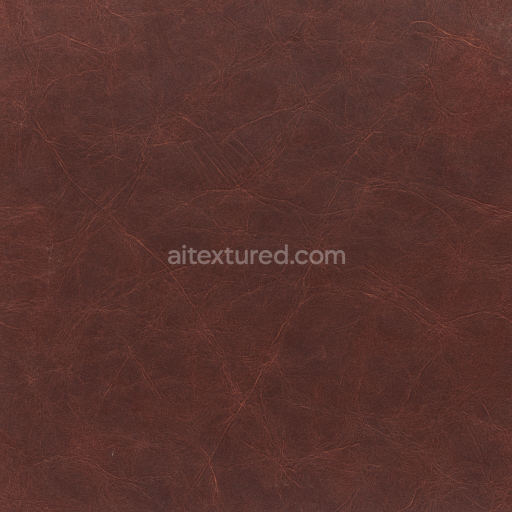
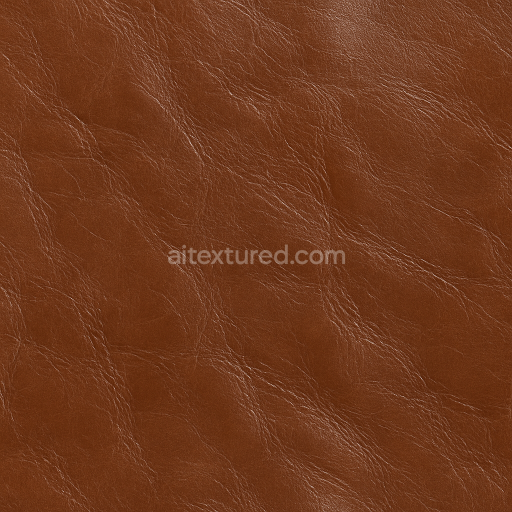
Vintage Oxblood Leather with Creased Grain
Seamless texture (tileable) · PNG, WEBP, PBR ZIP. License: AITextured Free Commercial License (FCL) v1.1. Free personal and commercial use. Raw resale, standalone redistribution, mirroring/scraping, competing asset packs, and AI/ML training are not allowed without written permission. Attribution is not required, but appreciated..

| ID | seamless-3d-texture-pbr-8k-semi-aniline-leather-with-patina-finish |
|---|---|
| Category | Furniture leather |
| Formats | PNG, WEBP, PBR ZIP |
| Size | 1k (1024x1024px), 2k (2048x2048px), 4k (4096x4096px), 8k (8192x8192px) |
| Color | sRGB |
| Tileable | Yes |
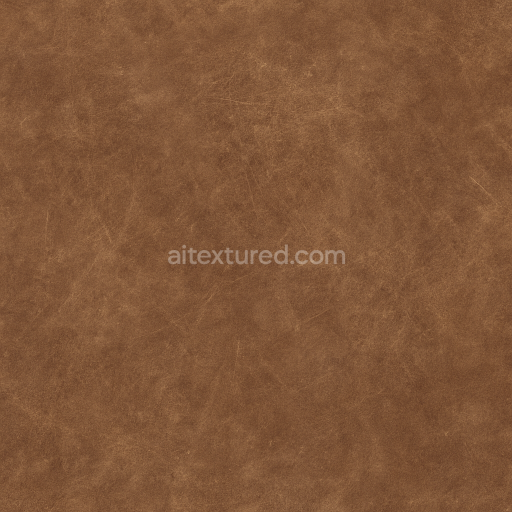
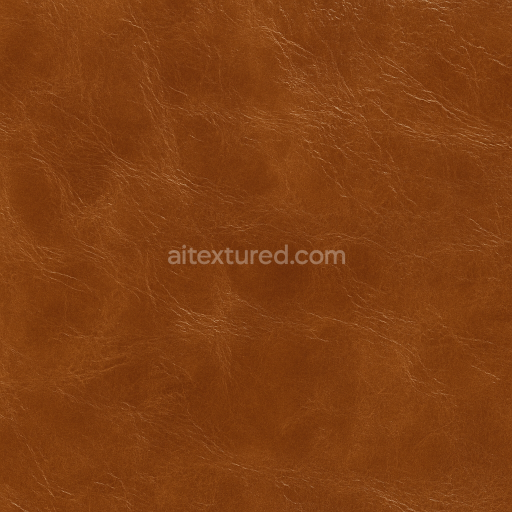
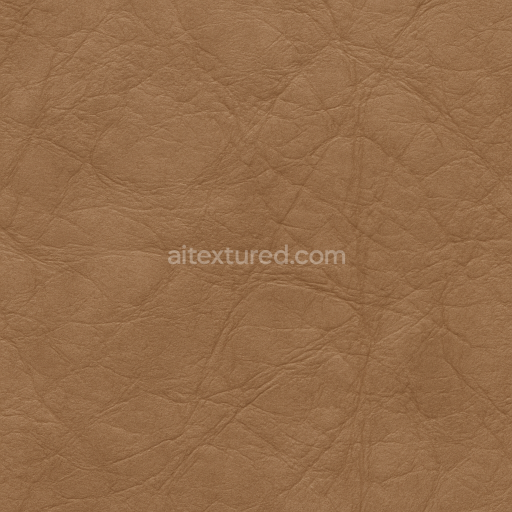
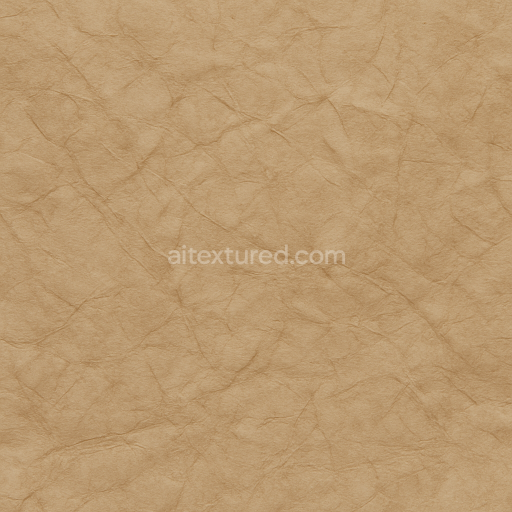
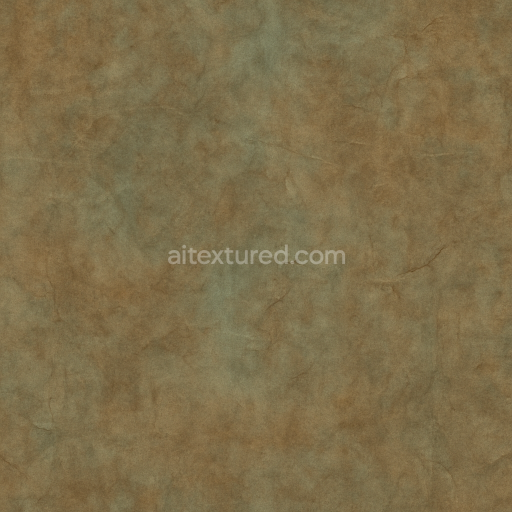
This seamless 3D texture presents a premium semi aniline leather material rendered in an ultra-high 8K resolution perfectly suited for PBR workflows in Blender Unreal Engine and Unity. The leather showcases a natural soft grain structure combined with an authentic patina finish that reflects subtle aging and wear patterns. The base substrate is organic primarily composed of fine collagen fibers with a carefully controlled grain orientation that results in a delicate yet durable surface. Pigments and dyes are delicately absorbed into the semi aniline surface allowing the natural texture and creases to remain visible beneath the matte finish which adds depth and realism without excessive shine.
In terms of material composition this semi aniline leather features a lightly treated surface with minimal binders or coatings preserving its porous quality and tactile authenticity. The patina effect is achieved through natural weathering and gentle abrasion creating nuanced color variations and soft creases that enhance vintage-inspired furniture and upholstery renders. The PBR channels effectively capture these characteristics: the BaseColor/Albedo map highlights subtle tonal shifts and pigment variations while the Normal and Height maps define the detailed grain and creased surface topology. Roughness values are tuned to emulate the matte finish diffusing light softly without glossiness and the Metallic channel remains minimal to non-existent reflecting leather’s organic non-metallic nature. Ambient Occlusion enhances the depth of folds and indentations contributing to a lifelike appearance.
This texture is ideal for digital artists and designers aiming to recreate classic leather surfaces with realistic wear and aging in virtual environments. The 8K resolution ensures that even close-up renders maintain exceptional detail and clarity making it suitable for high-end vintage furniture projects and interior visualizations. For optimal results it is recommended to adjust the UV scale to match the intended leather grain size and to fine-tune the roughness map slightly to control the matte finish’s subtle light diffusion. This approach will maximize realism and seamlessly integrate the texture into various 3D scenes whether in real-time engines or offline rendering pipelines.
Import the texture maps into Blender with sRGB color space for albedo/base color and Non-Color for normal, roughness, metallic, AO, height, and ORM maps. Connect normal maps through a Normal Map node, then adjust UV scale with a Mapping node so the material repeats naturally on your model.
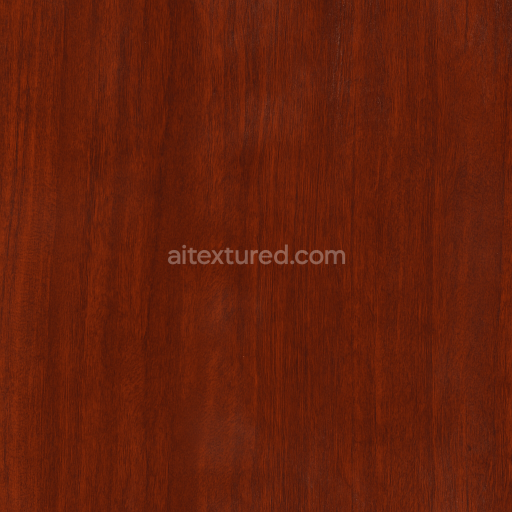
For the full step-by-step setup, see How to Use Seamless Textures in Blender. Browse related material examples in wood, concrete, and metal.
Yes. This texture is designed as a seamless tileable PBR material, so it can repeat across large surfaces without visible borders.
You can download PNG/WEBP versions and use 1K, 2K, 4K and 8K download options when available on the page.
Yes. The download options and engine-mapped ZIP workflow are designed for Blender, Unreal Engine, Unity Standard, URP and HDRP material pipelines.
Yes. The texture is available under the AITextured free commercial license. Review the license page for redistribution and AI-training restrictions.


Build, preview, and export seamless PBR materials. Generate full map sets from a single image, inspect them in a real-time WebGL viewer, and re-package maps for Unreal, Unity, and Blender—directly in your browser.
AI text-to-texture: type a prompt and get a seamless, tileable base image ready for PBR workflows (great starting point for materials).
Create a full PBR set (Normal, Roughness, AO, Metallic, etc.) from a single image. Seamless and tiling-friendly.
Instant WebGL viewer: inspect materials on a sphere, plane, and cube. Check tiling and lighting in real time.
Re-packages maps per engine: Unreal (BaseColor + ORM), Unity (Mask/MetallicSmoothness), Blender (separate channels).
PNG ↔ JPG ↔ SVG: fast convert, SVG rasterize, embed/trace options, quality & background controls.