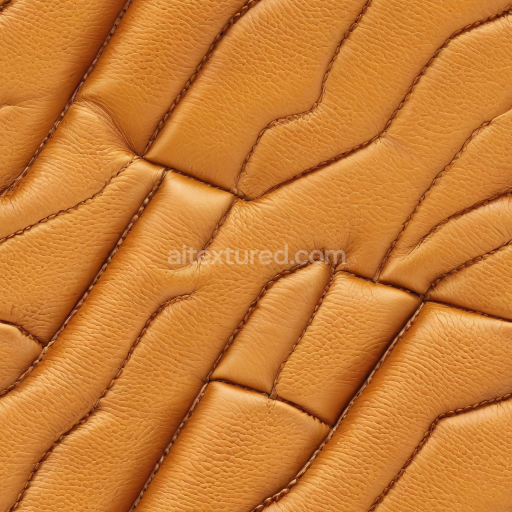
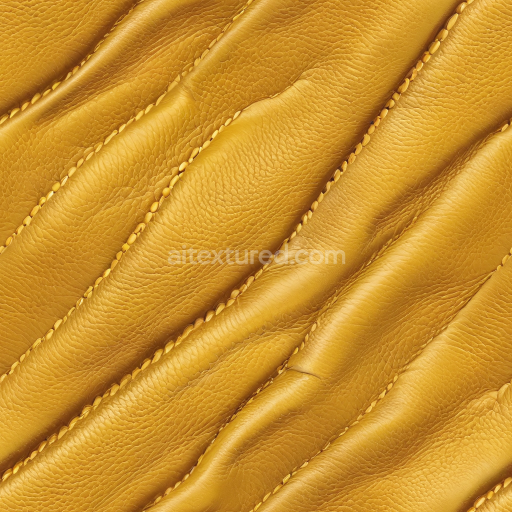
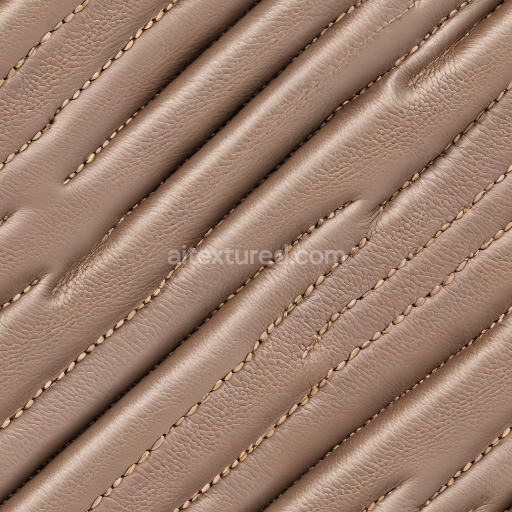
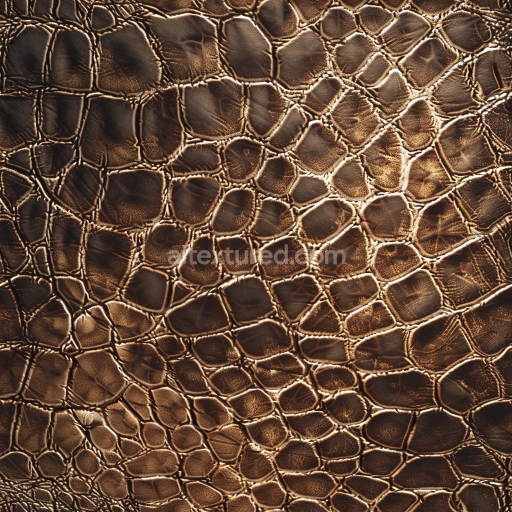
Quilted Light Brown Leather PBR Texture with Detailed Grain and Raised Panels
Seamless texture (tileable) · PNG, WEBP, PBR ZIP. License: AITextured Free Commercial License (FCL) v1.1. Free personal and commercial use. Raw resale, standalone redistribution, mirroring/scraping, competing asset packs, and AI/ML training are not allowed without written permission. Attribution is not required, but appreciated..

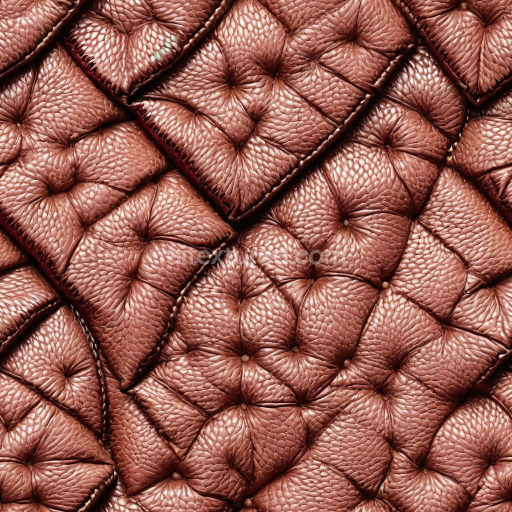
| ID | ostrich-leather-quill-bumps |
|---|---|
| Category | Leather |
| Formats | PNG, WEBP, PBR ZIP |
| Size | 1k (1024x1024px), 2k (2048x2048px), 4k (4096x4096px), 8k (8192x8192px) |
| Color | sRGB |
| Tileable | Yes |
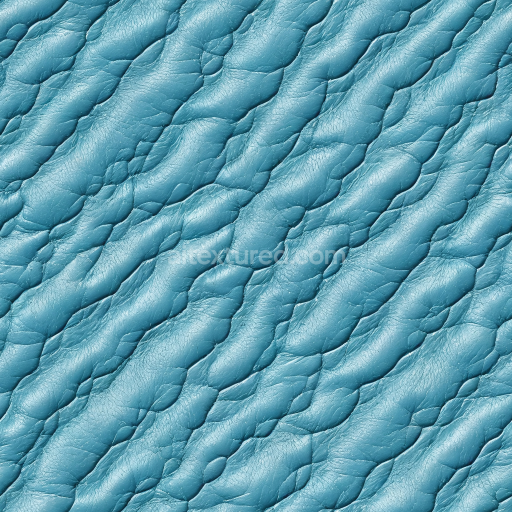
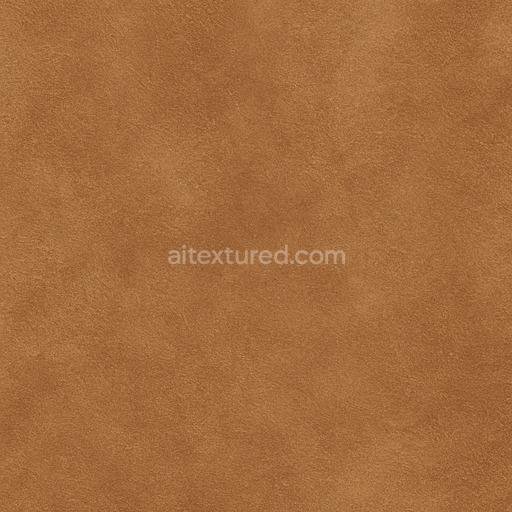
The ostrich leather quill bumps texture captures the distinct organic composition of genuine ostrich leather characterized by its unique arrangement of quill follicles embedded in a fine-grained natural leather substrate. This exotic leather’s surface features subtle raised bumps where the quills once emerged creating a tactile irregular pattern that enhances realism. The base material is a supple polymer-rich collagen matrix typical of high-quality leather treated with natural pigments and dyes that produce a warm earthy base color reflected in the BaseColor/Albedo map. The texture’s micro-structure and grain orientation are precisely represented in the Normal map conveying the depth and subtle elevation of each quill bump with exceptional clarity. Roughness and Ambient Occlusion maps simulate the leather’s semi-matte finish and the natural shadowing around the quill follicles while the Metallic channel remains minimal reflecting leather’s non-metallic organic nature. Height/Displacement maps provide additional surface relief enhancing the three-dimensional quality without compromising performance in real-time engines.
Meticulously AI-generated and designed specifically for modern PBR workflows this seamless ostrich leather quill bumps texture ensures structural cohesion and visual consistency even when applied to large UV islands. The tileable design eliminates visible seams allowing for flexible scaling across architectural visualization environment art and concept prototyping projects. With resolutions reaching up to 8K the texture delivers outstanding detail and microstructure suitable for high-fidelity 3D preview in Blender Unreal Engine and Unity. Its production-ready set includes all essential maps—BaseColor Normal Roughness Metallic Ambient Occlusion and Height/Displacement—providing versatility and ease of integration in diverse rendering pipelines. This PBR material ostrich leather quill bumps set accelerates leather material workflows by offering a realistic ready-to-use solution that maintains natural appearance under varied lighting conditions and rendering techniques.
For optimal results careful tuning of roughness and normal map intensity within your shading workflow is recommended to match the specific lighting environment of your scene. When working with large UV islands adjusting the UV scale can help balance the visibility of the quill bumps and prevent repetitive patterning preserving the texture’s natural irregularity. Leveraging the height or displacement maps adds subtle parallax effects enhancing the tactile depth and three-dimensionality of the leather surface without sacrificing real-time performance. This thoughtful integration of material properties and advanced AI generation techniques ensures the seamless ostrich leather quill bumps texture elevates the authenticity and immersive quality of your leather textures across various 3D applications.
Import the texture maps into Blender with sRGB color space for albedo/base color and Non-Color for normal, roughness, metallic, AO, height, and ORM maps. Connect normal maps through a Normal Map node, then adjust UV scale with a Mapping node so the material repeats naturally on your model.
For the full step-by-step setup, see How to Use Seamless Textures in Blender. Browse related material examples in wood, concrete, and metal.
Yes. This texture is designed as a seamless tileable PBR material, so it can repeat across large surfaces without visible borders.
You can download PNG/WEBP versions and use 1K, 2K, 4K and 8K download options when available on the page.
Yes. The download options and engine-mapped ZIP workflow are designed for Blender, Unreal Engine, Unity Standard, URP and HDRP material pipelines.
Yes. The texture is available under the AITextured free commercial license. Review the license page for redistribution and AI-training restrictions.

Build, preview, and export seamless PBR materials. Generate full map sets from a single image, inspect them in a real-time WebGL viewer, and re-package maps for Unreal, Unity, and Blender—directly in your browser.
AI text-to-texture: type a prompt and get a seamless, tileable base image ready for PBR workflows (great starting point for materials).
Create a full PBR set (Normal, Roughness, AO, Metallic, etc.) from a single image. Seamless and tiling-friendly.
Instant WebGL viewer: inspect materials on a sphere, plane, and cube. Check tiling and lighting in real time.
Re-packages maps per engine: Unreal (BaseColor + ORM), Unity (Mask/MetallicSmoothness), Blender (separate channels).
PNG ↔ JPG ↔ SVG: fast convert, SVG rasterize, embed/trace options, quality & background controls.