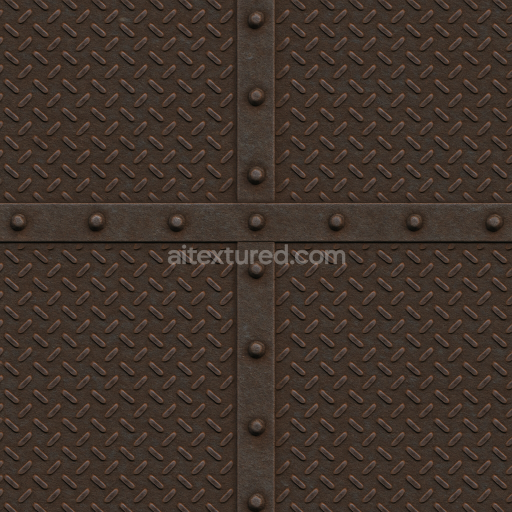
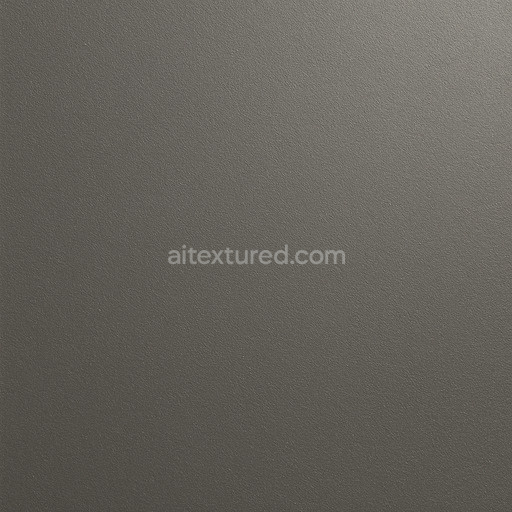
Seamless Metal PBR Texture - Metal Walkway Rough Dark Rusted Industrial
Seamless texture (tileable) · PNG, WEBP, PBR ZIP. License: AITextured Free Commercial License (FCL) v1.1. Free personal and commercial use. Raw resale, standalone redistribution, mirroring/scraping, competing asset packs, and AI/ML training are not allowed without written permission. Attribution is not required, but appreciated..

| ID | matte-aluminum-texture-seamless |
|---|---|
| Category | Metal |
| Formats | PNG, WEBP, PBR ZIP |
| Size | 1k (1024x1024px), 2k (2048x2048px), 4k (4096x4096px), 8k (8192x8192px) |
| Color | sRGB |
| Tileable | Yes |
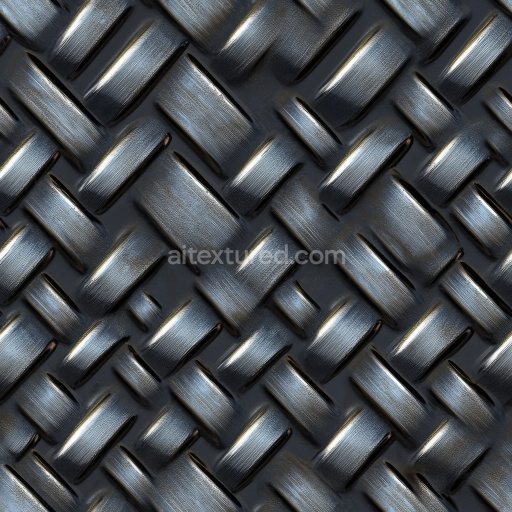
The Matte Aluminum Texture Seamless high resolution up to 8K showcases a carefully crafted metal surface designed to replicate the subtle fine-grained appearance of anodized aluminum with a low-reflective matte finish. This texture captures the base substrate’s metallic nature characterized by its smooth yet slightly brushed surface morphology where microscopic directional grain patterns and faint fiber orientation produce natural anisotropy. The surface exhibits minimal porosity and no visible oxidation preserving a clean industrial look common in modern architectural and product design. Coloration arises from thin oxide layers and natural aluminum pigments lending the texture a cool silvery-gray tone that maintains visual consistency across lighting scenarios and angles. This realism is reflected in the PBR channels: the BaseColor/Albedo map delivers a neutral evenly toned matte gray without specular color distortion; the Normal map encodes subtle directional grain and micro-scratches that enhance realism without overpowering; the Roughness map holds medium-high values ensuring diffused soft reflections typical of matte aluminum; the Metallic channel remains at full intensity to confirm the metal nature; the Ambient Occlusion map subtly darkens crevices and grain boundaries for depth; and the Height/Displacement channel provides gentle surface relief to simulate the micro-texture of brushed metal.
This high-resolution texture is seamless and tileable optimized at up to 8k resolution to ensure exceptional clarity and cohesion even when applied to large UV islands. Its design accommodates modern production pipelines making it ideal for quick look development environment art architectural visualization and concept prototyping where metal surfaces play a critical role. The seamless matte aluminum texture is fully compatible with Blender Unreal Engine and Unity delivering predictable repeatable results without visible tiling artifacts or distortion. The texture’s stability and clarity are enhanced by AI-driven refinement processes which avoid the repetitive patterns and artifacting common in auto-generated metal textures ensuring the asset integrates smoothly into diverse 3D scenes and materials collections.
When working with this tileable matte aluminum texture seamless high resolution up to 8K it is recommended to carefully match the texel density across your assets and maintain uniform UV scaling to prevent stretching or distortion of the brushed grain detail. Additionally fine-tuning the roughness channel can help tailor the surface reflectivity for specific lighting setups enhancing realism in both indoor and outdoor renders. Leveraging the height or displacement map subtly can add micro-relief improving the tactile feel of the metal in close-up shots without compromising performance. This texture is a versatile high-quality asset that enriches any metal textures library accelerating iteration speed while maintaining visual fidelity in 3D previews and final renders.
The seamless matte aluminum texture rendered in high resolution up to 8K offers a realistic PBR appearance enhanced by PBR texture technology to accurately replicate the subtle variations of matte aluminum surfaces.
Import the texture maps into Blender with sRGB color space for albedo/base color and Non-Color for normal, roughness, metallic, AO, height, and ORM maps. Connect normal maps through a Normal Map node, then adjust UV scale with a Mapping node so the material repeats naturally on your model.
For the full step-by-step setup, see How to Use Seamless Textures in Blender. Browse related material examples in wood, concrete, and metal.
Yes. This texture is designed as a seamless tileable PBR material, so it can repeat across large surfaces without visible borders.
You can download PNG/WEBP versions and use 1K, 2K, 4K and 8K download options when available on the page.
Yes. The download options and engine-mapped ZIP workflow are designed for Blender, Unreal Engine, Unity Standard, URP and HDRP material pipelines.
Yes. The texture is available under the AITextured free commercial license. Review the license page for redistribution and AI-training restrictions.


Build, preview, and export seamless PBR materials. Generate full map sets from a single image, inspect them in a real-time WebGL viewer, and re-package maps for Unreal, Unity, and Blender—directly in your browser.
AI text-to-texture: type a prompt and get a seamless, tileable base image ready for PBR workflows (great starting point for materials).
Create a full PBR set (Normal, Roughness, AO, Metallic, etc.) from a single image. Seamless and tiling-friendly.
Instant WebGL viewer: inspect materials on a sphere, plane, and cube. Check tiling and lighting in real time.
Re-packages maps per engine: Unreal (BaseColor + ORM), Unity (Mask/MetallicSmoothness), Blender (separate channels).
PNG ↔ JPG ↔ SVG: fast convert, SVG rasterize, embed/trace options, quality & background controls.