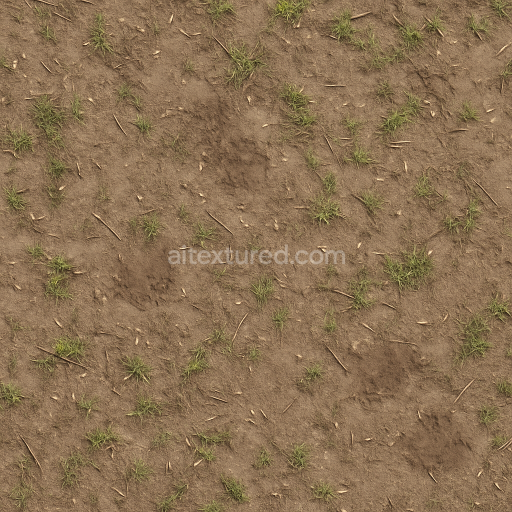
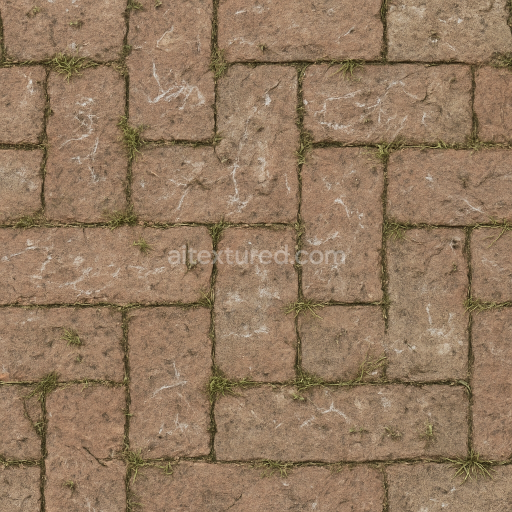
Dirt Dusty Surface With Muddy Spots And Scattered Seeds
Seamless texture (tileable) · PNG, WEBP, PBR ZIP. License: AITextured Free Commercial License (FCL) v1.1. Free personal and commercial use. Raw resale, standalone redistribution, mirroring/scraping, competing asset packs, and AI/ML training are not allowed without written permission. Attribution is not required, but appreciated..

| ID | seamless-3d-texture-pbr-8k-asphalt-cracked-dark-asphalt-with-faded-paint-and-rough-wear |
|---|---|
| Category | Park pavement |
| Formats | PNG, WEBP, PBR ZIP |
| Size | 1k (1024x1024px), 2k (2048x2048px), 4k (4096x4096px), 8k (8192x8192px) |
| Color | sRGB |
| Tileable | Yes |
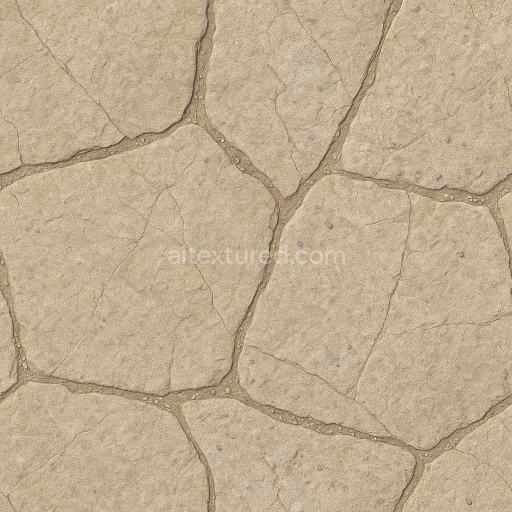
This seamless 3D texture showcases a high-quality photorealistic cracked dark asphalt surface rendered at an impressive 8k resolution to capture every minute detail. The base material consists primarily of mineral-rich aggregates bound together by bituminous organic binders typical of aged urban pavement. Over time natural weathering and oxidation have caused the dark asphalt substrate to develop a rough porous texture with visible cracks and fissures. Faded paint markings likely composed of pigment-based road paints with reduced opacity due to sun exposure and wear add an authentic layer of complexity. The surface finish appears matte with rough wear patterns and tire marks emphasizing the pavement’s exposure to environmental stress and heavy use. This texture’s intricate composition is thoroughly represented across its PBR channels: the BaseColor/Albedo channel captures the nuanced dark tones and subtle color variations from oxidation and pigment fading while the Normal map highlights the cracked uneven grain and surface irregularities. Roughness maps reflect the weathered coarse finish and the absence of metallic components is confirmed in the Metallic channel. Ambient Occlusion enhances depth perception around cracks and paint edges and the Height/Displacement map precisely conveys surface relief offering excellent parallax effect potential.
Designed for seamless tiling this texture is ideal for creating realistic urban park pathways and road surfaces in 3D visualizations and game environments. Its high-resolution 8k detail ensures clarity even in close-up renders making it perfectly suited for use in Unreal Engine Blender and Unity projects. The natural imperfections such as cracks faded paint and rough wear patterns not only enhance realism but also provide valuable visual cues for artists seeking authentic pavement surfaces. When integrating this texture consider adjusting the UV scale to balance detail density across large surfaces and fine-tuning the roughness to control reflectivity based on lighting conditions. Additionally leveraging the Height map for subtle parallax displacement can add immersive depth without excessive geometry complexity making this seamless cracked asphalt PBR texture a versatile and practical choice for a variety of realistic 3D scenes.
Import the texture maps into Blender with sRGB color space for albedo/base color and Non-Color for normal, roughness, metallic, AO, height, and ORM maps. Connect normal maps through a Normal Map node, then adjust UV scale with a Mapping node so the material repeats naturally on your model.
For the full step-by-step setup, see How to Use Seamless Textures in Blender. Browse related material examples in wood, concrete, and metal.
Yes. This texture is designed as a seamless tileable PBR material, so it can repeat across large surfaces without visible borders.
You can download PNG/WEBP versions and use 1K, 2K, 4K and 8K download options when available on the page.
Yes. The download options and engine-mapped ZIP workflow are designed for Blender, Unreal Engine, Unity Standard, URP and HDRP material pipelines.
Yes. The texture is available under the AITextured free commercial license. Review the license page for redistribution and AI-training restrictions.
Build, preview, and export seamless PBR materials. Generate full map sets from a single image, inspect them in a real-time WebGL viewer, and re-package maps for Unreal, Unity, and Blender—directly in your browser.
AI text-to-texture: type a prompt and get a seamless, tileable base image ready for PBR workflows (great starting point for materials).
Create a full PBR set (Normal, Roughness, AO, Metallic, etc.) from a single image. Seamless and tiling-friendly.
Instant WebGL viewer: inspect materials on a sphere, plane, and cube. Check tiling and lighting in real time.
Re-packages maps per engine: Unreal (BaseColor + ORM), Unity (Mask/MetallicSmoothness), Blender (separate channels).
PNG ↔ JPG ↔ SVG: fast convert, SVG rasterize, embed/trace options, quality & background controls.