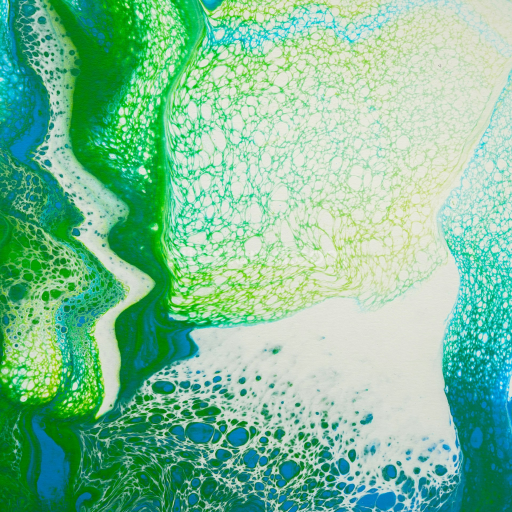
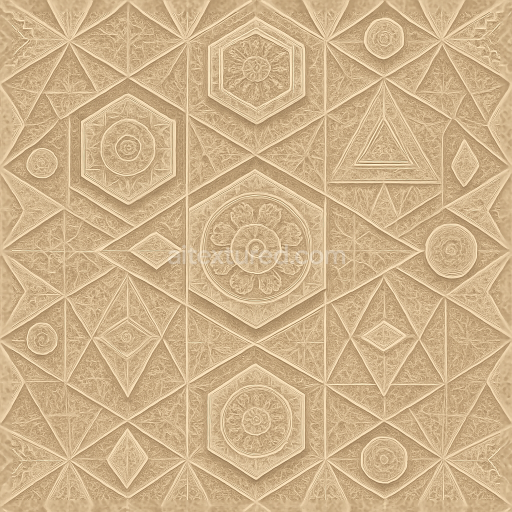
High Detail Abstract Blue and Green Plaster Texture
Seamless texture (tileable) · PNG, WEBP, PBR ZIP. License: AITextured Free Commercial License (FCL) v1.1. Free personal and commercial use. Raw resale, standalone redistribution, mirroring/scraping, competing asset packs, and AI/ML training are not allowed without written permission. Attribution is not required, but appreciated..

| ID | seamless-3d-texture-pbr-8k-fractal-geometric-gradient-blurred-noisy-speckled-grunge |
|---|---|
| Category | Abstract |
| Formats | PNG, WEBP, PBR ZIP |
| Size | 1k (1024x1024px), 2k (2048x2048px), 4k (4096x4096px), 8k (8192x8192px) |
| Color | sRGB |
| Tileable | Yes |
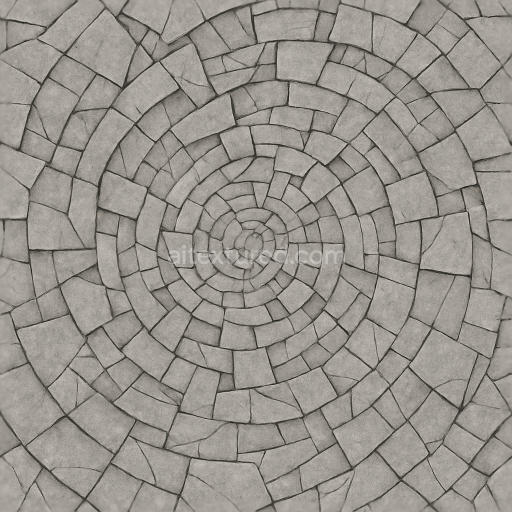
This seamless 3D texture presents a sophisticated fractal-inspired geometric pattern characterized by interlocking hexagonal forms subtly transitioning through a gradient of muted tones. The base material appears to be a weathered composite stone, combining fine mineral aggregates bound within a matte, cementitious substrate. This composite foundation imparts a sturdy, tactile quality with moderate porosity, evident in the dispersed speckled and noisy granules embedded within the surface. The distressed and grunge elements simulate natural wear and erosion, lending an organic irregularity to the otherwise precise geometric arrangement, while the blurred overlays soften edges, suggesting a slightly eroded or dusted finish.
The surface finish can be described as a low-sheen, brushed stone with faint oxidized patches that enhance the aged aesthetic. Colorants in this texture range from soft grays and muted earth tones to subtle blue-gray gradients, achieved through pigment dispersion within the substrate and slight surface staining effects. The fractal geometry is accentuated by height variations and fine displacement details that create depth and tactile variation, making the texture highly suitable for PBR workflows. The seamless nature ensures perfect tiling without visible borders, an essential feature for large-scale digital environments.
In terms of PBR channel composition, the BaseColor (Albedo) channel captures the intricate color gradations and speckled pigment distribution, providing a naturalistic and nuanced visual base. The Normal map encodes the geometric relief of the hexagonal fractal pattern and subtle surface abrasions, enhancing the 3D perception of the texture. Roughness is finely tuned to reflect the brushed stone’s low-gloss finish, balancing light diffusion and specular highlights without appearing too polished. The Metallic channel remains minimal or null, consistent with the non-metallic stone substrate. Ambient Occlusion enriches the shadowing within the geometric crevices, emphasizing depth and realism, while the Height/Displacement map delivers precise elevation data for parallax effects and enhanced surface detail.
Rendered at an impressive 8K resolution, this texture is optimized for use across major 3D platforms including Blender, Unreal Engine, and Unity, ensuring exceptional clarity and detail at close inspection. For practical application, it is advisable to adjust UV scaling carefully to maintain the integrity of the fractal geometry, avoiding distortion or excessive repetition. Additionally, fine-tuning the roughness channel can help adapt the texture to various lighting conditions, while blending height and normal maps can yield smoother transitions in parallax occlusion mapping, further enhancing the material’s realism in dynamic scenes.
Import the texture maps into Blender with sRGB color space for albedo/base color and Non-Color for normal, roughness, metallic, AO, height, and ORM maps. Connect normal maps through a Normal Map node, then adjust UV scale with a Mapping node so the material repeats naturally on your model.
For the full step-by-step setup, see How to Use Seamless Textures in Blender. Browse related material examples in wood, concrete, and metal.
Yes. This texture is designed as a seamless tileable PBR material, so it can repeat across large surfaces without visible borders.
You can download PNG/WEBP versions and use 1K, 2K, 4K and 8K download options when available on the page.
Yes. The download options and engine-mapped ZIP workflow are designed for Blender, Unreal Engine, Unity Standard, URP and HDRP material pipelines.
Yes. The texture is available under the AITextured free commercial license. Review the license page for redistribution and AI-training restrictions.


Generate, preview, and export seamless PBR materials for Blender, Unity, and Unreal Engine—directly in your browser.
AI text-to-texture: type a prompt and get a seamless, tileable base image ready for PBR workflows (great starting point for materials).
Create a full PBR set (Normal, Roughness, AO, Metallic, etc.) from a single image. Seamless and tiling-friendly.
Instant WebGL viewer: inspect materials on a sphere, plane, and cube. Check tiling and lighting in real time.
Re-packages maps per engine: Unreal (BaseColor + ORM), Unity (Mask/MetallicSmoothness), Blender (separate channels).
PNG ↔ JPG ↔ SVG: fast convert, SVG rasterize, embed/trace options, quality & background controls.