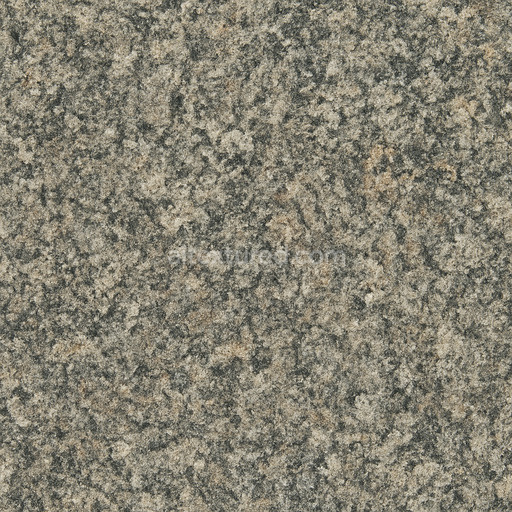
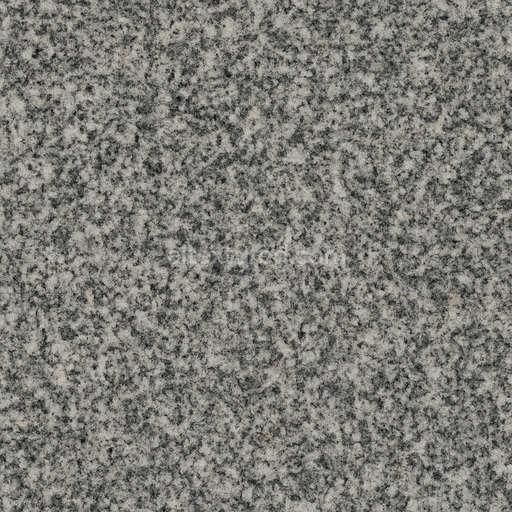
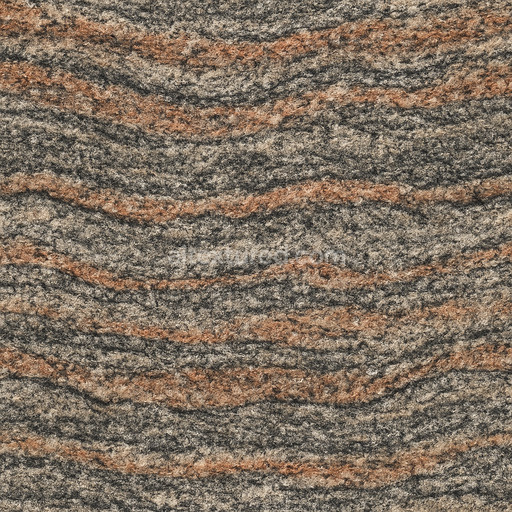
Aged Granite Seamless Texture
Seamless texture (tileable) · PNG, WEBP, PBR ZIP. License: AITextured Free Commercial License (FCL) v1.1. Free personal and commercial use. Raw resale, standalone redistribution, mirroring/scraping, competing asset packs, and AI/ML training are not allowed without written permission. Attribution is not required, but appreciated..

| ID | tiger-rock-cliff-boulder-rock-face-cave-weathered-landscape |
|---|---|
| Category | Granite |
| Formats | PNG, WEBP, PBR ZIP |
| Size | 1k (1024x1024px), 2k (2048x2048px), 4k (4096x4096px), 8k (8192x8192px) |
| Color | sRGB |
| Tileable | Yes |
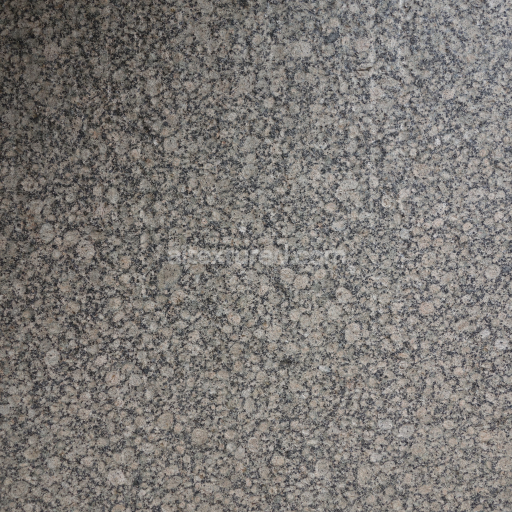
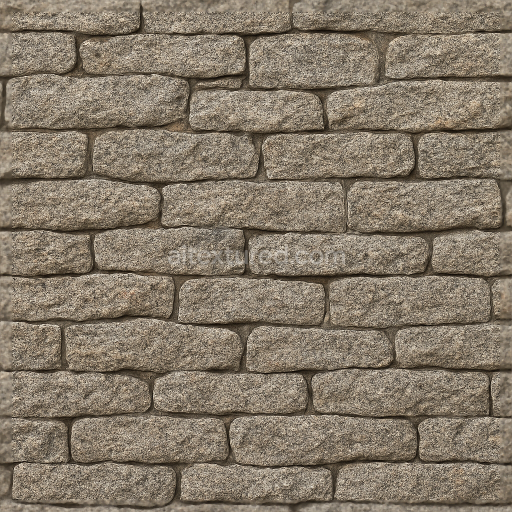
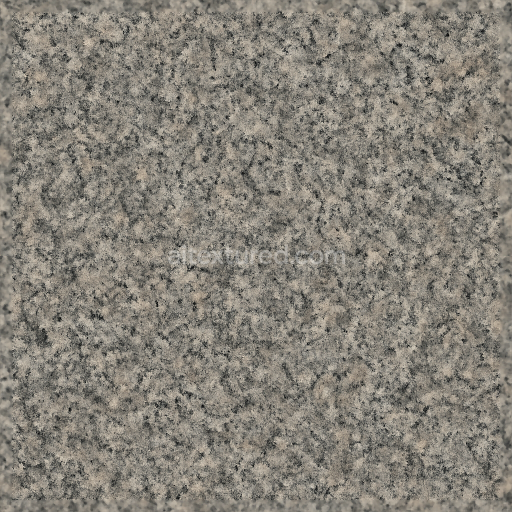
The Rock Terrain Natural — Solid Rugged Granite Rock Tiger texture is a highly detailed seamless 3D material expertly crafted to emulate the distinctive tiger rock formations characteristic of the Collection Namaqualand. Its core substrate consists of solid coarse-grained granite primarily composed of quartz feldspar and mica minerals. This natural stone features a weathered surface finish shaped by extensive exposure to outdoor mountain cliff boulder and cave environments. The texture reveals subtle porosity and erosion patterns that reflect the ruggedness of natural rock faces while the mineral grains and their varied orientation provide a tactile sense of roughness and unevenness. The color palette blends earthy greys and warm browns enriched with mineral oxidation and layered natural pigments adding depth and realism to any 3D outdoor landscape or rocky terrain scene.
Optimized for physically based rendering (PBR) workflows this tileable 3D texture includes comprehensive PBR maps essential for achieving photorealistic results. The Albedo (BaseColor) channel captures the authentic pigments and oxide layers of weathered granite while the Normal map simulates fine surface details such as cracks crevices and grain contours enhancing light interaction on rugged rock faces cliffs and boulders. The Roughness map balances smoother worn areas against coarse rugged patches fine-tuning specular highlights to convey natural weathering effects realistically. Ambient Occlusion deepens shadows within recessed crevices and caves grounding the material in believable outdoor lighting conditions. Height (displacement) maps provide subtle surface relief ideal for parallax effects without manual adjustments. Reflecting granite’s non-metallic nature the Metallic channel remains minimal ensuring accurate shading across Blender Unreal Engine and Unity platforms. Available in high-fidelity 4K resolution with an optional 8K upgrade and supplied in both PNG and EXR formats this seamless texture guarantees broad compatibility and exceptional detail for advanced digital content creation.
For optimal application in 3D projects featuring mountainous cliffside or rocky terrain adjusting the UV scale is recommended to preserve the natural grain size and fine detail of the solid granite substrate. Additionally slight tuning of roughness values can enhance the material’s response to varying lighting—whether diffused overcast skies or direct sunlight—thereby amplifying the weathered rugged look characteristic of tiger rock formations. This physically based seamless texture offers a versatile and realistic solution for artists and developers aiming to enrich outdoor landscapes with authentic rock terrain and natural granite elements inspired by the iconic Collection Namaqualand.
Import the texture maps into Blender with sRGB color space for albedo/base color and Non-Color for normal, roughness, metallic, AO, height, and ORM maps. Connect normal maps through a Normal Map node, then adjust UV scale with a Mapping node so the material repeats naturally on your model.
For the full step-by-step setup, see How to Use Seamless Textures in Blender. Browse related material examples in wood, concrete, and metal.
Yes. This texture is designed as a seamless tileable PBR material, so it can repeat across large surfaces without visible borders.
You can download PNG/WEBP versions and use 1K, 2K, 4K and 8K download options when available on the page.
Yes. The download options and engine-mapped ZIP workflow are designed for Blender, Unreal Engine, Unity Standard, URP and HDRP material pipelines.
Yes. The texture is available under the AITextured free commercial license. Review the license page for redistribution and AI-training restrictions.


Build, preview, and export seamless PBR materials. Generate full map sets from a single image, inspect them in a real-time WebGL viewer, and re-package maps for Unreal, Unity, and Blender—directly in your browser.
AI text-to-texture: type a prompt and get a seamless, tileable base image ready for PBR workflows (great starting point for materials).
Create a full PBR set (Normal, Roughness, AO, Metallic, etc.) from a single image. Seamless and tiling-friendly.
Instant WebGL viewer: inspect materials on a sphere, plane, and cube. Check tiling and lighting in real time.
Re-packages maps per engine: Unreal (BaseColor + ORM), Unity (Mask/MetallicSmoothness), Blender (separate channels).
PNG ↔ JPG ↔ SVG: fast convert, SVG rasterize, embed/trace options, quality & background controls.