
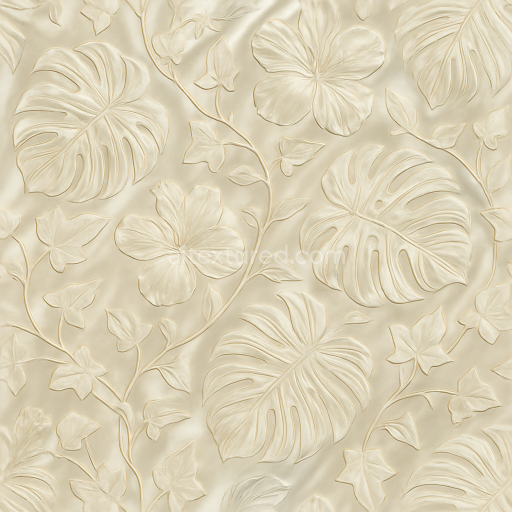
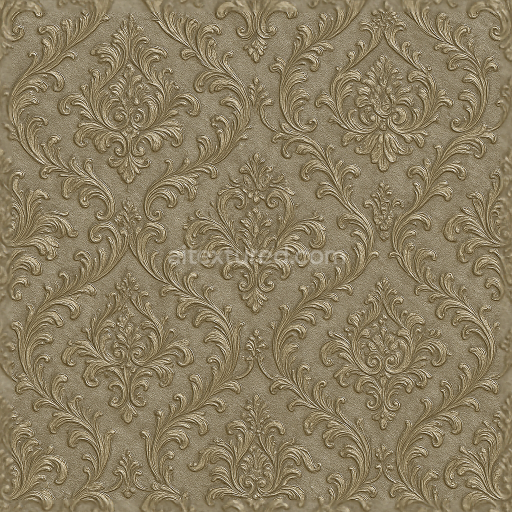
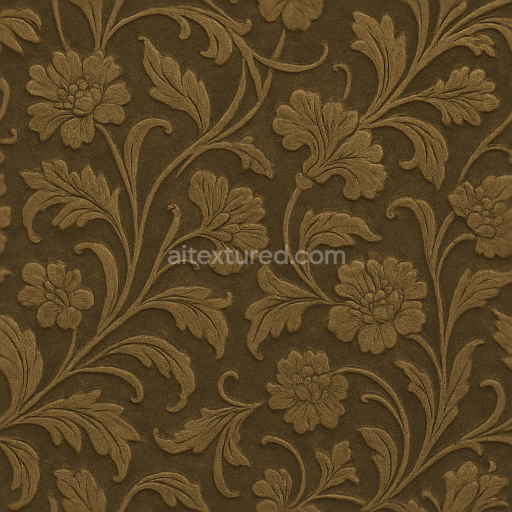
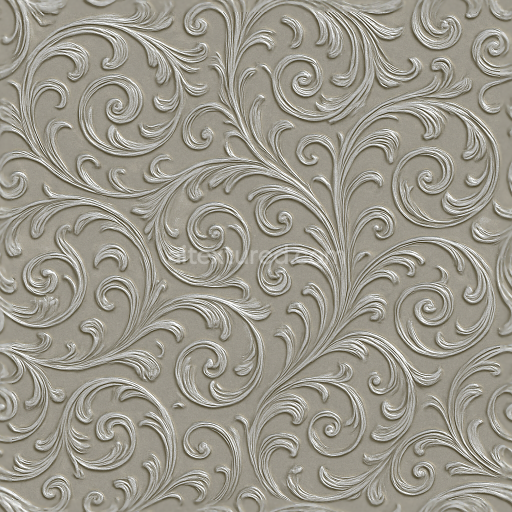
Floral Vines Wallpaper With Hand Painted Style
Seamless texture (tileable) · PNG, WEBP, PBR ZIP. License: AITextured Free Commercial License (FCL) v1.1. Free personal and commercial use. Raw resale, standalone redistribution, mirroring/scraping, competing asset packs, and AI/ML training are not allowed without written permission. Attribution is not required, but appreciated..

| ID | seamless-3d-texture-pbr-8k-wallpaper-with-luxurious-rococo-brocade-velvet-embossed-design |
|---|---|
| Category | Wallpaper |
| Formats | PNG, WEBP, PBR ZIP |
| Size | 1k (1024x1024px), 2k (2048x2048px), 4k (4096x4096px), 8k (8192x8192px) |
| Color | sRGB |
| Tileable | Yes |
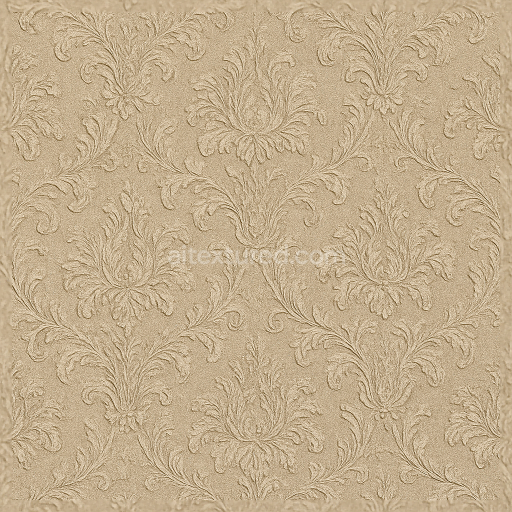
This seamless 3D texture depicts an opulent Rococo brocade wallpaper design masterfully embossed on a plush velvet substrate. The base material is a dense velvet fabric woven from fine silk and cotton fibers creating a soft yet durable textile foundation. The intricate brocade pattern is formed by raised ornamental motifs with swirling floral and arabesque shapes typical of Rococo aesthetics. The embossed velvet surface exhibits a subtle pile height variation contributing to the tactile depth and natural shadows seen in the relief. The textile's natural porosity is minimal as the dense weave and pile reduce air pockets and light penetration resulting in a rich opaque appearance with gentle light absorption.*
The composition includes a layered structure where the velvet forms the primary substrate enhanced by a binding resin that affixes the embossed pattern ensuring long-lasting relief stability without compromising softness. The brocade motifs incorporate metallic threads subtly interwoven within the velvet introducing fine highlights and a slight specular shimmer. Pigments used are deep jewel tones—such as burgundy gold and emerald green—applied through reactive dyes that offer excellent colorfastness and resistance to fading. The surface finish is matte velvet with a soft sheen capturing the luxurious tactile essence without excessive glossiness.*
In terms of PBR texture channels the BaseColor (Albedo) map faithfully reproduces the rich velvet hues and metallic thread highlights without baked-in shadows preserving realistic lighting interaction. The Normal map conveys the fine embossing detail and pile height variations simulating the tactile relief of the brocade motifs. Roughness values are moderate to low in the velvet areas reflecting the soft plush texture while metallic threads exhibit lower roughness and slight metallicity creating subtle specular reflections. The Metallic map identifies these threads distinctly enhancing realism. Ambient Occlusion captures the deep recesses between embossed patterns accentuating depth perception. Height/Displacement maps enable parallax effects enhancing the 3D relief impression when applied in real-time engines.*
Rendered at an ultra-high 8K resolution this texture ensures exceptional clarity of detail allowing for close-up inspection without pixelation or loss of pattern fidelity. It is optimized for seamless tiling making it suitable for large-scale applications in Blender Unreal Engine and Unity projects. For practical use it is recommended to carefully tune the UV scale to maintain pattern proportion and avoid distortion on curved surfaces. Adjusting roughness values can help balance the plush velvet softness with subtle metallic highlights while blending height and normal maps can enhance the embossed effect without creating unnatural depth artifacts.*
Import the texture maps into Blender with sRGB color space for albedo/base color and Non-Color for normal, roughness, metallic, AO, height, and ORM maps. Connect normal maps through a Normal Map node, then adjust UV scale with a Mapping node so the material repeats naturally on your model.
For the full step-by-step setup, see How to Use Seamless Textures in Blender. Browse related material examples in wood, concrete, and metal.
Yes. This texture is designed as a seamless tileable PBR material, so it can repeat across large surfaces without visible borders.
You can download PNG/WEBP versions and use 1K, 2K, 4K and 8K download options when available on the page.
Yes. The download options and engine-mapped ZIP workflow are designed for Blender, Unreal Engine, Unity Standard, URP and HDRP material pipelines.
Yes. The texture is available under the AITextured free commercial license. Review the license page for redistribution and AI-training restrictions.


Generate, preview, and export seamless PBR materials for Blender, Unity, and Unreal Engine—directly in your browser.
AI text-to-texture: type a prompt and get a seamless, tileable base image ready for PBR workflows (great starting point for materials).
Create a full PBR set (Normal, Roughness, AO, Metallic, etc.) from a single image. Seamless and tiling-friendly.
Instant WebGL viewer: inspect materials on a sphere, plane, and cube. Check tiling and lighting in real time.
Re-packages maps per engine: Unreal (BaseColor + ORM), Unity (Mask/MetallicSmoothness), Blender (separate channels).
PNG ↔ JPG ↔ SVG: fast convert, SVG rasterize, embed/trace options, quality & background controls.