
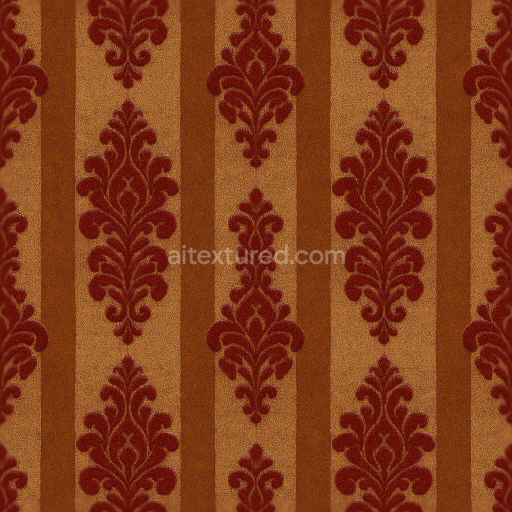
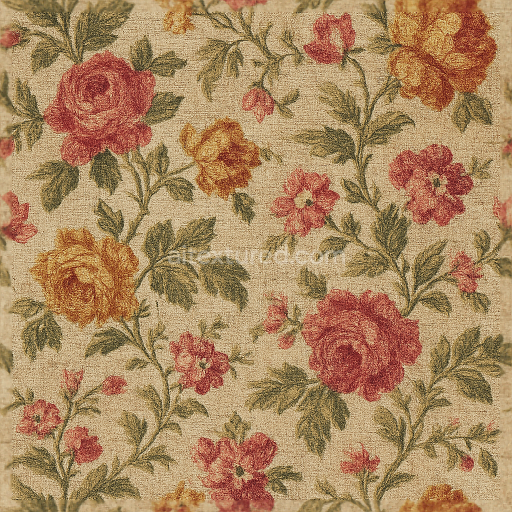
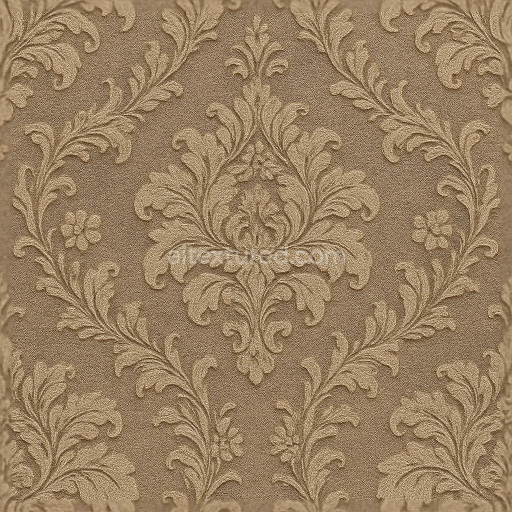
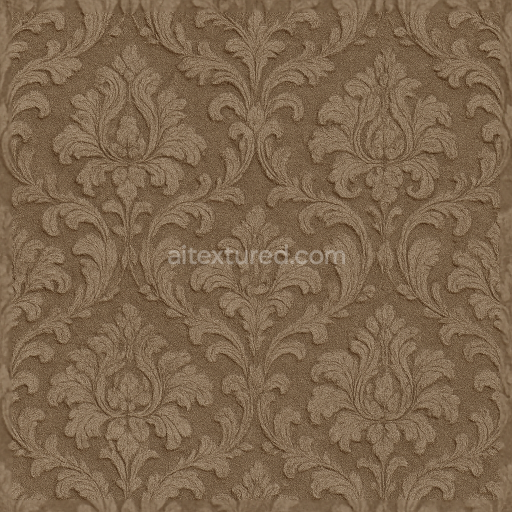
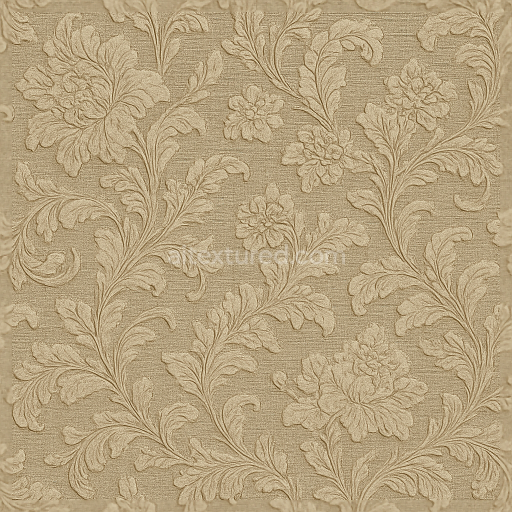
Wallpaper With Vintage Rococo Damask Distressed Cracked Paint
Seamless texture (tileable) · PNG, WEBP, PBR ZIP. License: AITextured Free Commercial License (FCL) v1.1. Free personal and commercial use. Raw resale, standalone redistribution, mirroring/scraping, competing asset packs, and AI/ML training are not allowed without written permission. Attribution is not required, but appreciated..

| ID | seamless-3d-texture-pbr-8k-classic-damask-tile-wallpaper-with-brocade-woven-fabric-and-metallic-glossy-sheen |
|---|---|
| Category | Wallpaper |
| Formats | PNG, WEBP, PBR ZIP |
| Size | 1k (1024x1024px), 2k (2048x2048px), 4k (4096x4096px), 8k (8192x8192px) |
| Color | sRGB |
| Tileable | Yes |
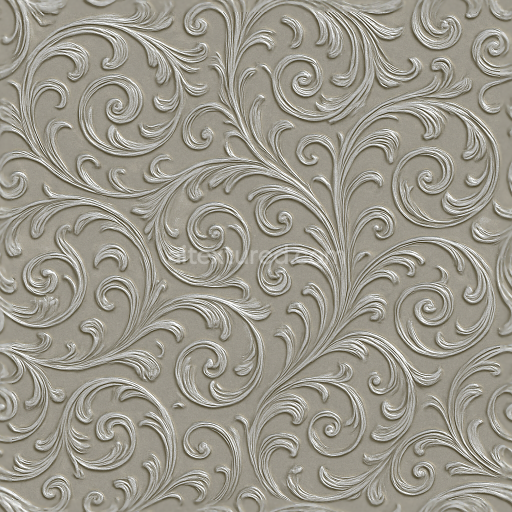
This seamless 3D PBR wallpaper texture showcases a meticulously crafted classic damask tile pattern inspired by traditional brocade woven fabrics. The base material emulates a richly textured textile substrate composed of tightly interlaced silk and cotton fibers creating a subtle yet intricate weave structure. The damask motifs are raised with a delicate embossed relief forming a repeating geometric tile layout that enhances the fabric’s tactile depth. The surface exhibits a refined metallic glossy sheen simulating a thin layer of polished metal threads woven into the brocade which catch the light and provide dynamic specular highlights without overpowering the textile’s softness. This combination yields a high-fidelity representation of a luxurious wall covering with authentic material complexity.
The composition of this texture includes a sturdy textile substrate acting as the base bound by natural adhesives mimicking the resinous compounds used in traditional fabric finishing. The fiber aggregates are densely packed to minimize porosity resulting in minimal weathering or wear characteristic of interior wallpapers. Colorants are carefully integrated into the base fibers and metallic elements using muted golds silvers and deep matte hues to enhance the damask pattern’s visual contrast. The surface finish balances the polished metallic threads with the matte woven fabric producing varied roughness levels captured precisely in the PBR channels. The BaseColor (Albedo) channel holds the rich color information of woven threads and metallic accents while the Normal map encodes the fine embossed relief and fabric grain. Roughness maps define the interplay between the soft textile areas and glossy metallic highlights. The Metallic channel isolates the reflective metal threads and Ambient Occlusion enhances the shadowing within the embossed patterns. Height/Displacement maps provide subtle elevation differences supporting realistic parallax effects.
Rendered at an ultra-high 8K resolution this texture offers exceptional detail suitable for close-up views in 3D applications. It is fully optimized and compatible with popular engines such as Blender Unreal Engine and Unity ensuring seamless integration into diverse workflows. The seamless tile pattern guarantees continuous repeatable motifs without visible borders ideal for large-scale wall surfaces and architectural visualizations.
For practical use it is recommended to carefully adjust the UV scaling to maintain the damask pattern’s elegance without distortion or pixelation. Tuning the roughness value allows for control over the metallic sheen intensity balancing realism and artistic intent. Additionally blending height and normal maps can enhance depth perception in environments supporting parallax occlusion mapping enriching the final visual impact of this classic brocade wallpaper texture.
Import the texture maps into Blender with sRGB color space for albedo/base color and Non-Color for normal, roughness, metallic, AO, height, and ORM maps. Connect normal maps through a Normal Map node, then adjust UV scale with a Mapping node so the material repeats naturally on your model.
For the full step-by-step setup, see How to Use Seamless Textures in Blender. Browse related material examples in wood, concrete, and metal.
Yes. This texture is designed as a seamless tileable PBR material, so it can repeat across large surfaces without visible borders.
You can download PNG/WEBP versions and use 1K, 2K, 4K and 8K download options when available on the page.
Yes. The download options and engine-mapped ZIP workflow are designed for Blender, Unreal Engine, Unity Standard, URP and HDRP material pipelines.
Yes. The texture is available under the AITextured free commercial license. Review the license page for redistribution and AI-training restrictions.


Generate, preview, and export seamless PBR materials for Blender, Unity, and Unreal Engine—directly in your browser.
AI text-to-texture: type a prompt and get a seamless, tileable base image ready for PBR workflows (great starting point for materials).
Create a full PBR set (Normal, Roughness, AO, Metallic, etc.) from a single image. Seamless and tiling-friendly.
Instant WebGL viewer: inspect materials on a sphere, plane, and cube. Check tiling and lighting in real time.
Re-packages maps per engine: Unreal (BaseColor + ORM), Unity (Mask/MetallicSmoothness), Blender (separate channels).
PNG ↔ JPG ↔ SVG: fast convert, SVG rasterize, embed/trace options, quality & background controls.