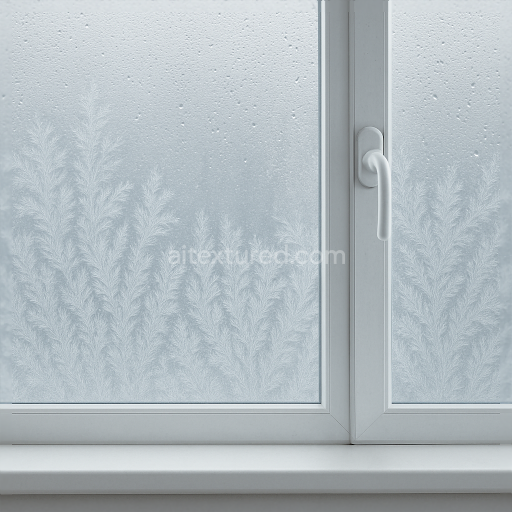
Seamless 8K PBR 3D texture of window frost pattern on frosted glass with subtle condensat…
Seamless texture (tileable) · PNG, WEBP, PBR ZIP. License: AITextured Free Commercial License (FCL) v1.1. Free personal and commercial use. Raw resale, standalone redistribution, mirroring/scraping, competing asset packs, and AI/ML training are not allowed without written permission. Attribution is not required, but appreciated..

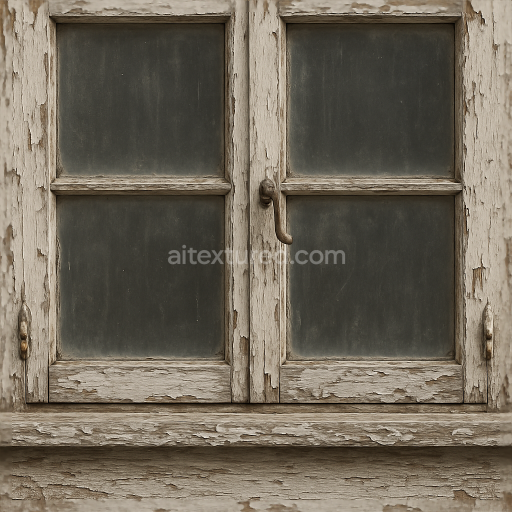
| ID | seamless-8k-pbr-3d-texture-of-arched-window-with-textured-glass-and-peeling-paint-on-old-wood-grain |
|---|---|
| Category | Window |
| Formats | PNG, WEBP, PBR ZIP |
| Size | 1k (1024x1024px), 2k (2048x2048px), 4k (4096x4096px), 8k (8192x8192px) |
| Color | sRGB |
| Tileable | Yes |
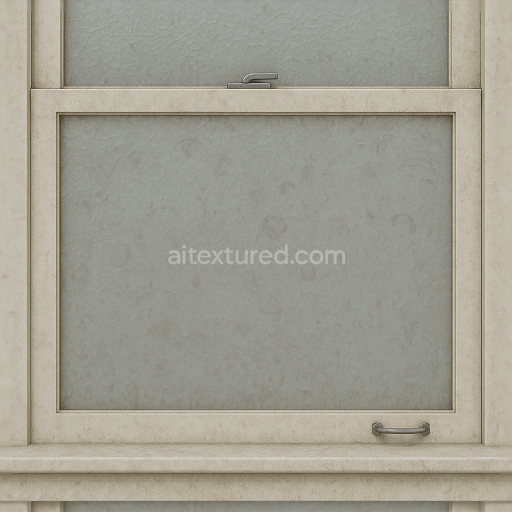
This seamless 8k PBR 3D texture depicts a classic arched window constructed from aged weathered wood featuring a distinct grain pattern shaped by years of exposure. The wood comprises a fibrous cellulose substrate bound by natural lignin and residual resins now partially degraded revealing a porous surface with peeling layers of weathered paint. The paint originally oil-based with mineral pigments exhibits cracking and flaking contributing to the tactile roughness and subtle color variation across the wooden frame. Visible elements such as the window sill latch and hinges showcase corrosion and oxidization on metal components adding an additional layer of complexity to the material composition. The arched geometry of the window frame follows smooth curved plank arrangements emphasizing the structural form with slight warping and imperfections that enhance realism.
The textured glass panes are characterized by a subtly frosted surface with micro-embossed patterns that diffuse light creating an irregular visual effect typical of old hand-crafted glass. This glass consists primarily of silica with embedded air bubbles and surface etching resulting in variable translucency and a matte finish. The surface finish of the glass is slightly roughened contributing to its distinctive tactile feel and visual complexity. The texture maps efficiently capture these material qualities across multiple PBR channels: the BaseColor (Albedo) channel defines the variations in wood tone peeling paint hues and glass translucency; the Normal map encodes the fine wood grain peeling edges and embossed glass detail; Roughness maps articulate the contrast between the smooth metallic hinges the coarse weathered wood and the matte glass surfaces. Metallic maps isolate the iron-based window latch and hinges while Ambient Occlusion enhances the depth perception around joints and recesses. Height and Displacement maps provide subtle surface relief for peeling paint flakes and wood grain undulations essential for close-up renderings.
Rendered at an 8k resolution this texture offers exceptional detail and clarity suitable for high-fidelity 3D models in Blender Unreal Engine and Unity environments. Its seamless tiling capability allows for flexible application across larger architectural surfaces without visible repetition. When applying this texture it is advisable to carefully adjust UV scaling to retain the natural proportions of the arched window and avoid distortion of the peeling paint details. Additionally fine-tuning the roughness values can help balance the reflective properties between the weathered wood and the textured glass while blending height and normal maps can enhance the perception of depth on the peeling paint edges for increased realism in both real-time and offline rendering workflows.
Import the texture maps into Blender with sRGB color space for albedo/base color and Non-Color for normal, roughness, metallic, AO, height, and ORM maps. Connect normal maps through a Normal Map node, then adjust UV scale with a Mapping node so the material repeats naturally on your model.
For the full step-by-step setup, see How to Use Seamless Textures in Blender. Browse related material examples in wood, concrete, and metal.
Yes. This texture is designed as a seamless tileable PBR material, so it can repeat across large surfaces without visible borders.
You can download PNG/WEBP versions and use 1K, 2K, 4K and 8K download options when available on the page.
Yes. The download options and engine-mapped ZIP workflow are designed for Blender, Unreal Engine, Unity Standard, URP and HDRP material pipelines.
Yes. The texture is available under the AITextured free commercial license. Review the license page for redistribution and AI-training restrictions.


Generate, preview, and export seamless PBR materials for Blender, Unity, and Unreal Engine—directly in your browser.
AI text-to-texture: type a prompt and get a seamless, tileable base image ready for PBR workflows (great starting point for materials).
Create a full PBR set (Normal, Roughness, AO, Metallic, etc.) from a single image. Seamless and tiling-friendly.
Instant WebGL viewer: inspect materials on a sphere, plane, and cube. Check tiling and lighting in real time.
Re-packages maps per engine: Unreal (BaseColor + ORM), Unity (Mask/MetallicSmoothness), Blender (separate channels).
PNG ↔ JPG ↔ SVG: fast convert, SVG rasterize, embed/trace options, quality & background controls.