Seamless 8K PBR 3D texture of frosted glass window with intricate frost patterns
Seamless texture (tileable) · PNG, WEBP, PBR ZIP. License: AITextured Free Commercial License (FCL) v1.1. Free personal and commercial use. Raw resale, standalone redistribution, mirroring/scraping, competing asset packs, and AI/ML training are not allowed without written permission. Attribution is not required, but appreciated..

| ID | seamless-8k-pbr-3d-texture-of-window-blinds-with-detailed-slats-and-window-frame-elements |
|---|---|
| Category | Window |
| Formats | PNG, WEBP, PBR ZIP |
| Size | 1k (1024x1024px), 2k (2048x2048px), 4k (4096x4096px), 8k (8192x8192px) |
| Color | sRGB |
| Tileable | Yes |
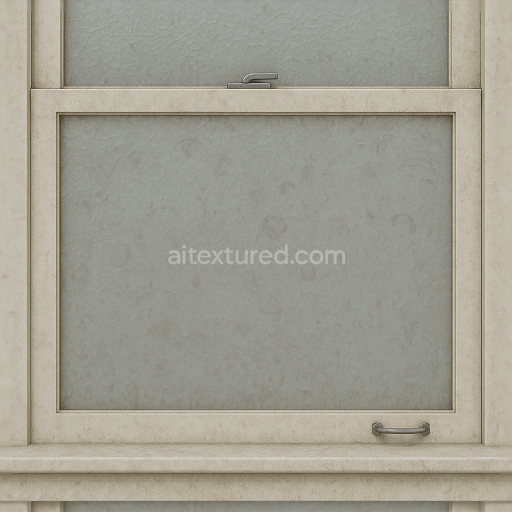
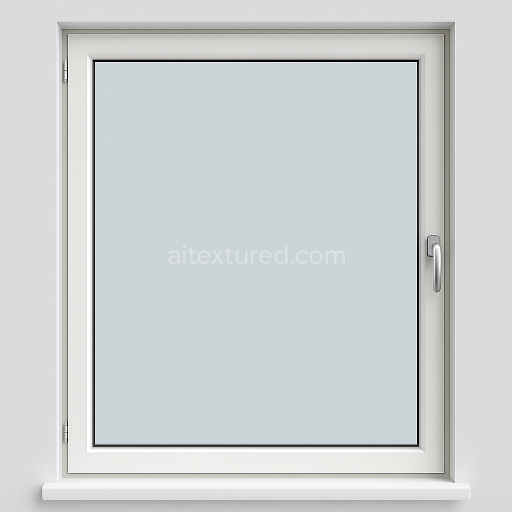
This seamless 8k PBR 3D texture presents a meticulously crafted depiction of classic window blinds integrated within a detailed window frame setup. The primary material suggested by the texture is painted wood or high-quality coated aluminum commonly used for window blinds and frames due to their durability and refined appearance. The slats exhibit a subtle laminated finish characterized by a smooth slightly glossy surface with gentle grain patterns that reflect the natural wood fibers or fine metallic brushing. The window sill latch handle lock and hinges are modeled with precision representing materials such as powder-coated metal or painted wood each with distinct surface treatments—ranging from matte to semi-gloss finishes—that contribute to the photorealistic quality of the texture. Adjacent window curtains introduce fabric elements with softly varied folds and weave patterns adding to the composite realism of the scene.
Structurally the slats of the blinds follow a uniform rectangular plank geometry arranged in parallel rows with consistent spacing that supports seamless tiling across diverse window sizes. The frame elements exhibit clean squared profiles with sharp edges and subtle bevels replicating typical joinery details found in real window assemblies. The texture’s composition reflects a layered substrate: a solid base material (wood or metal) bound with protective coatings or paint layers which act as binders and colorants. The surface is free from significant porosity or weathering effects implying a well-maintained indoor installation while minor surface imperfections and subtle dust accumulation are captured in the ambient occlusion and roughness maps to enhance depth and authenticity.
Mapping to PBR channels the BaseColor (Albedo) map conveys the nuanced coloration of the materials including the muted off-white or pastel tones of the blinds the natural wood hues or metallic grays of the frame and hardware and the soft fabric colors of the curtain. The Normal map accurately encodes the fine grain of the wood or brushed metal textures along with the intricate details of the hinges and latch mechanisms. Roughness variations reflect the differing finishes: smoother semi-gloss slats contrast with the more matte window sill and hardware components. The Metallic channel isolates the metal parts such as the latches locks and hinges while non-metallic areas like the blinds and curtains remain at zero metallic. Ambient Occlusion enhances the perception of depth around overlaps and crevices and the Height/Displacement map provides subtle relief for the slats’ edges and fabric folds improving realism in close-up renders.
This texture is optimized at 8k resolution ensuring exceptional detail suitable for high-fidelity visualization in Blender Unreal Engine and Unity. Its seamless nature allows for flexible application across various window dimensions without visible repetition making it ideal for interior architectural visualization and game asset texturing. For best results it is recommended to adjust the UV scale to maintain the natural proportion of slats relative to the overall window size and to fine-tune the roughness map in the shader to match the desired lighting conditions. Additionally blending height and normal maps can enhance the perception of depth on slats and curtain fabric especially when using parallax or tessellation techniques in real-time engines.
Import the texture maps into Blender with sRGB color space for albedo/base color and Non-Color for normal, roughness, metallic, AO, height, and ORM maps. Connect normal maps through a Normal Map node, then adjust UV scale with a Mapping node so the material repeats naturally on your model.
For the full step-by-step setup, see How to Use Seamless Textures in Blender. Browse related material examples in wood, concrete, and metal.
Yes. This texture is designed as a seamless tileable PBR material, so it can repeat across large surfaces without visible borders.
You can download PNG/WEBP versions and use 1K, 2K, 4K and 8K download options when available on the page.
Yes. The download options and engine-mapped ZIP workflow are designed for Blender, Unreal Engine, Unity Standard, URP and HDRP material pipelines.
Yes. The texture is available under the AITextured free commercial license. Review the license page for redistribution and AI-training restrictions.

Generate, preview, and export seamless PBR materials for Blender, Unity, and Unreal Engine—directly in your browser.
AI text-to-texture: type a prompt and get a seamless, tileable base image ready for PBR workflows (great starting point for materials).
Create a full PBR set (Normal, Roughness, AO, Metallic, etc.) from a single image. Seamless and tiling-friendly.
Instant WebGL viewer: inspect materials on a sphere, plane, and cube. Check tiling and lighting in real time.
Re-packages maps per engine: Unreal (BaseColor + ORM), Unity (Mask/MetallicSmoothness), Blender (separate channels).
PNG ↔ JPG ↔ SVG: fast convert, SVG rasterize, embed/trace options, quality & background controls.