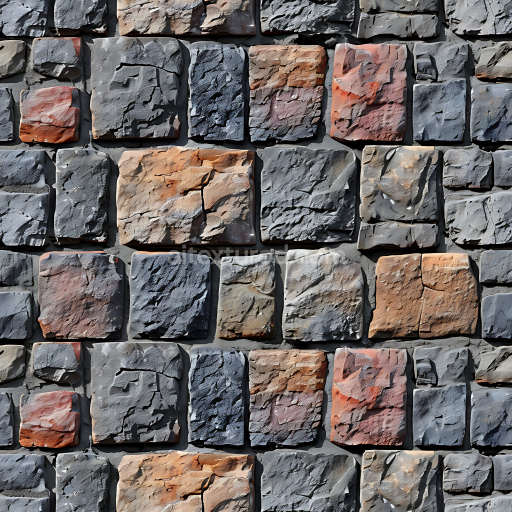
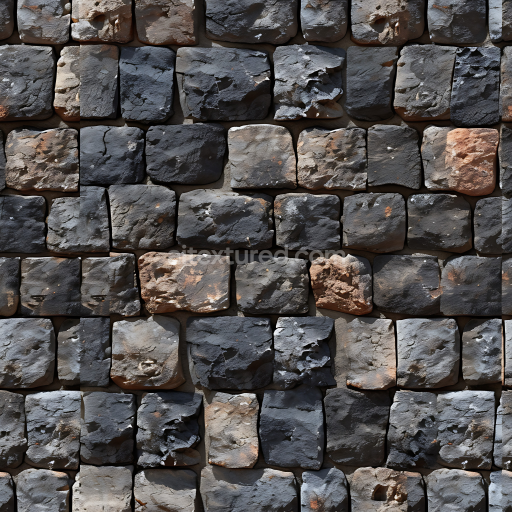
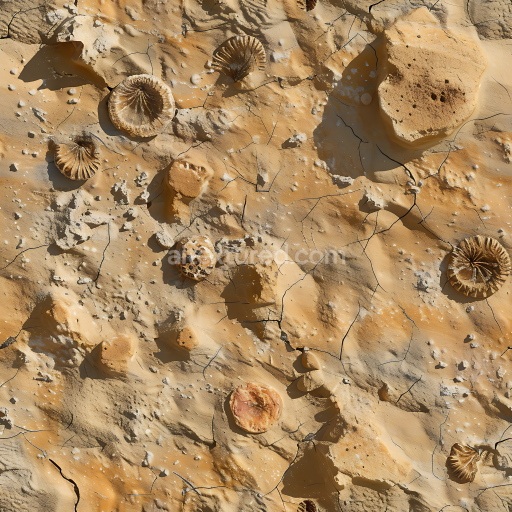
Weathered Stone Wall PBR Texture with Rustic Color Variations
Seamless texture (tileable) · PNG, WEBP, PBR ZIP. License: AITextured Free Commercial License (FCL) v1.1. Free personal and commercial use. Raw resale, standalone redistribution, mirroring/scraping, competing asset packs, and AI/ML training are not allowed without written permission. Attribution is not required, but appreciated..

| ID | seamless-3d-texture-pbr-8k-cobblestone-road-paved-stone-rough-stone-rustic-stone |
|---|---|
| Category | Stone |
| Formats | PNG, WEBP, PBR ZIP |
| Size | 1k (1024x1024px), 2k (2048x2048px), 4k (4096x4096px), 8k (8192x8192px) |
| Color | sRGB |
| Tileable | Yes |
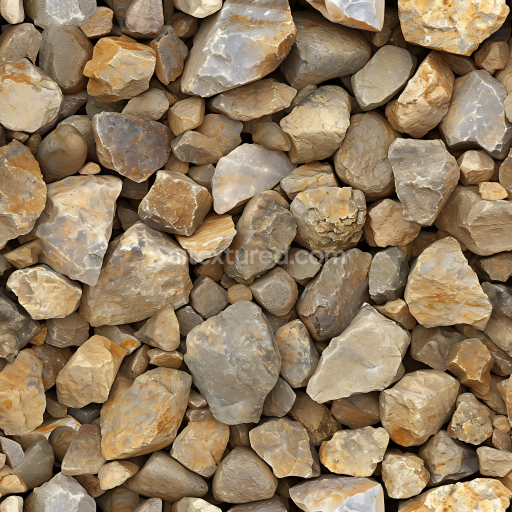
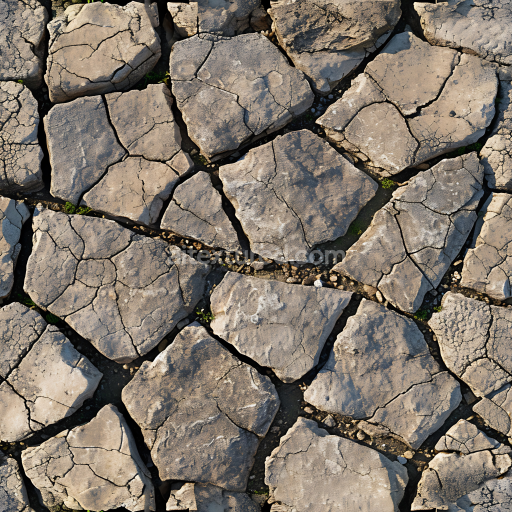
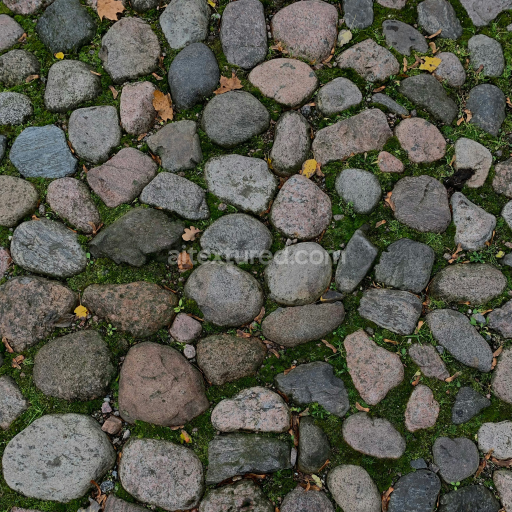
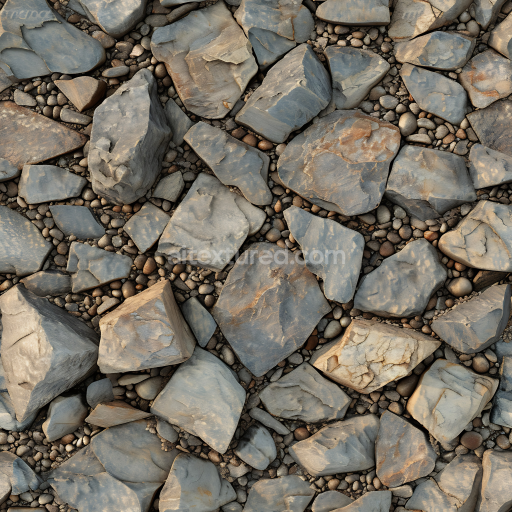
This seamless 8K PBR texture represents a meticulously crafted cobblestone road surface composed primarily of natural stone materials arranged in a classic irregular stone brick pattern. The base material consists of rough weathered granite and sandstone stones showcasing a rustic aged appearance with subtle variations in grain and porosity. These stones are laid atop a compacted dirt and sand substrate that acts as the binding medium simulating traditional paving methods where smaller aggregates and fine sediments fill the gaps between larger stones enhancing structural integrity and realism. The overall form highlights uneven hand-laid cobblestones with slightly rounded edges and occasional chips reflecting years of natural wear and exposure.
The texture’s surface finish is distinctly rough and matte emphasizing its porous and grainy characteristics which result from prolonged weathering and erosion. Coloration features a natural palette of muted earth tones—warm greys soft browns and subtle ochres—mimicking pigment variations found in aged stone surfaces exposed to outdoor conditions. The texture captures fine details such as micro-cracks moss accumulations and faint stains contributing to its authenticity. These details are carefully encoded across the PBR channels: the BaseColor (Albedo) map delivers accurate color and pigment distribution the Normal map conveys intricate stone grain and edge relief the Roughness map controls the non-reflective diffuse surface quality and the Height/Displacement map simulates the depth and uneven cobblestone elevations. Ambient Occlusion enhances shadowing within crevices while the Metallic channel remains near zero reflecting the non-metallic nature of natural stone.
Designed for seamless tiling this texture enables continuous application across large surfaces without visible repetition making it ideal for architectural visualization game environments and digital art projects requiring high-fidelity rustic stone surfaces. Its 8K resolution ensures exceptional clarity and detail suitable for close-up renders and dynamic lighting scenarios. Compatibility with Blender Unreal Engine and Unity is integral allowing straightforward integration into diverse 3D pipelines and real-time rendering workflows.
For practical implementation it is advisable to adjust the UV scale to match the real-world size of cobblestones typically around 10 to 15 centimeters per stone to maintain proportional accuracy. Additionally fine-tuning the roughness map can help balance the diffuse scattering and subtle wetness effects for different environmental contexts. When using height or parallax maps blending them carefully with the normal map will prevent excessive displacement artifacts while preserving the texture’s natural depth and tactile quality.
Import the texture maps into Blender with sRGB color space for albedo/base color and Non-Color for normal, roughness, metallic, AO, height, and ORM maps. Connect normal maps through a Normal Map node, then adjust UV scale with a Mapping node so the material repeats naturally on your model.
For the full step-by-step setup, see How to Use Seamless Textures in Blender. Browse related material examples in wood, concrete, and metal.
Yes. This texture is designed as a seamless tileable PBR material, so it can repeat across large surfaces without visible borders.
You can download PNG/WEBP versions and use 1K, 2K, 4K and 8K download options when available on the page.
Yes. The download options and engine-mapped ZIP workflow are designed for Blender, Unreal Engine, Unity Standard, URP and HDRP material pipelines.
Yes. The texture is available under the AITextured free commercial license. Review the license page for redistribution and AI-training restrictions.
Build, preview, and export seamless PBR materials. Generate full map sets from a single image, inspect them in a real-time WebGL viewer, and re-package maps for Unreal, Unity, and Blender—directly in your browser.
AI text-to-texture: type a prompt and get a seamless, tileable base image ready for PBR workflows (great starting point for materials).
Create a full PBR set (Normal, Roughness, AO, Metallic, etc.) from a single image. Seamless and tiling-friendly.
Instant WebGL viewer: inspect materials on a sphere, plane, and cube. Check tiling and lighting in real time.
Re-packages maps per engine: Unreal (BaseColor + ORM), Unity (Mask/MetallicSmoothness), Blender (separate channels).
PNG ↔ JPG ↔ SVG: fast convert, SVG rasterize, embed/trace options, quality & background controls.