
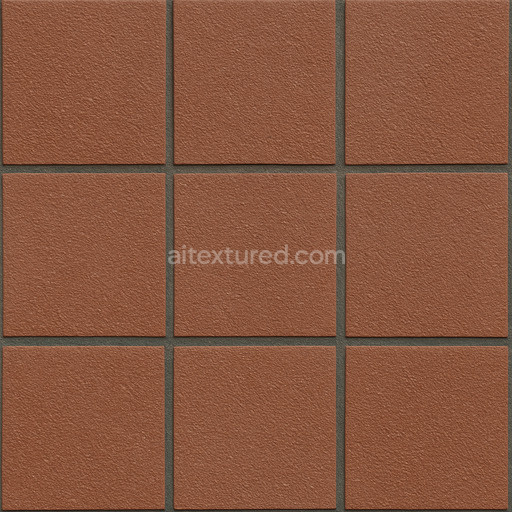
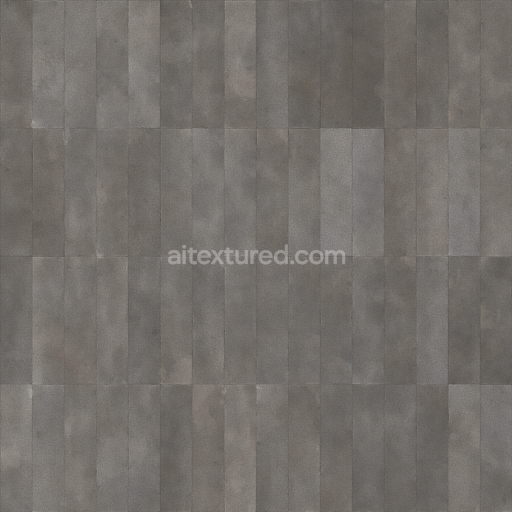
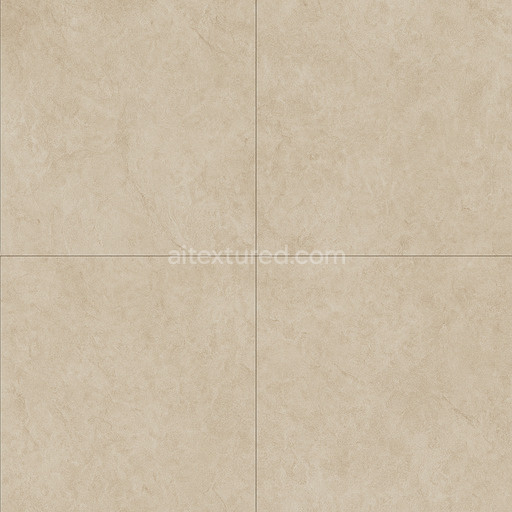
Seamless Ceramic Tile Texture
Seamless texture (tileable) · PNG, WEBP, PBR ZIP. License: AITextured Free Commercial License (FCL) v1.1. Free personal and commercial use. Raw resale, standalone redistribution, mirroring/scraping, competing asset packs, and AI/ML training are not allowed without written permission. Attribution is not required, but appreciated..

| ID | seamless-terracotta-tile-texture |
|---|---|
| Category | Ceramic-tile |
| Formats | PNG, WEBP, PBR ZIP |
| Size | 1k (1024x1024px), 2k (2048x2048px), 4k (4096x4096px), 8k (8192x8192px) |
| Color | sRGB |
| Tileable | Yes |
This seamless terracotta tile texture authentically replicates the traditional composition and materiality of classic terracotta flooring. The tiles are crafted from a porous ceramic base substrate formed primarily of natural clay minerals enriched with iron oxide pigments that produce the signature warm earthy red-orange hues. The ceramic body is fired to enhance durability and strength while maintaining a subtly rough surface that reflects the rustic handcrafted nature of terracotta. Fine mineral aggregates and oriented grain structures within the clay contribute to the tile’s distinct micro-roughness and natural color variations. Binders embedded in the terracotta matrix ensure cohesion and stability while weathering effects such as gentle surface wear minor chips and subtle imperfections are captured through the texture’s ambient occlusion and height channels adding realistic depth and tactile quality.
Rendered at an impressive 8K resolution this high-definition texture preserves intricate details—from the fine surface pores to nuanced color gradations—ensuring clarity and realism in close-up architectural visualizations game environments and digital art projects. The BaseColor (Albedo) map faithfully reproduces the rich terracotta tones while the Normal and Height maps emphasize the subtle undulations and edges of individual tiles enhancing the perception of surface relief and tile separations without introducing metallic reflections supported by a near-zero metallic value in the PBR setup. The Roughness channel provides a matte finish with a low sheen accurately simulating the natural unpolished surface of terracotta while Ambient Occlusion adds soft shadows around grout lines and tile intersections grounding the texture in a realistic spatial context.
Optimized for seamless integration into popular 3D software such as Blender Unreal Engine and Unity this texture is ideal for flooring and ground surfaces in both interior and exterior architectural visualization game design and digital art. For best results adjusting the UV scale to match the architectural context ensures a natural spatial relationship between tiles and surrounding elements. Additionally fine-tuning the roughness parameter allows customization of the surface finish—lower roughness values create a subtly polished contemporary look whereas higher values emphasize a more weathered rustic appearance. This versatile terracotta tile texture serves as a reliable default flooring material combining traditional warmth and authenticity with high-resolution professional-grade texturing suitable for a wide range of creative projects.
Import the texture maps into Blender with sRGB color space for albedo/base color and Non-Color for normal, roughness, metallic, AO, height, and ORM maps. Connect normal maps through a Normal Map node, then adjust UV scale with a Mapping node so the material repeats naturally on your model.
For the full step-by-step setup, see How to Use Seamless Textures in Blender. Browse related material examples in wood, concrete, and metal.
Yes. This texture is designed as a seamless tileable PBR material, so it can repeat across large surfaces without visible borders.
You can download PNG/WEBP versions and use 1K, 2K, 4K and 8K download options when available on the page.
Yes. The download options and engine-mapped ZIP workflow are designed for Blender, Unreal Engine, Unity Standard, URP and HDRP material pipelines.
Yes. The texture is available under the AITextured free commercial license. Review the license page for redistribution and AI-training restrictions.
Generate, preview, and export seamless PBR materials for Blender, Unity, and Unreal Engine—directly in your browser.
AI text-to-texture: type a prompt and get a seamless, tileable base image ready for PBR workflows (great starting point for materials).
Create a full PBR set (Normal, Roughness, AO, Metallic, etc.) from a single image. Seamless and tiling-friendly.
Instant WebGL viewer: inspect materials on a sphere, plane, and cube. Check tiling and lighting in real time.
Re-packages maps per engine: Unreal (BaseColor + ORM), Unity (Mask/MetallicSmoothness), Blender (separate channels).
PNG ↔ JPG ↔ SVG: fast convert, SVG rasterize, embed/trace options, quality & background controls.