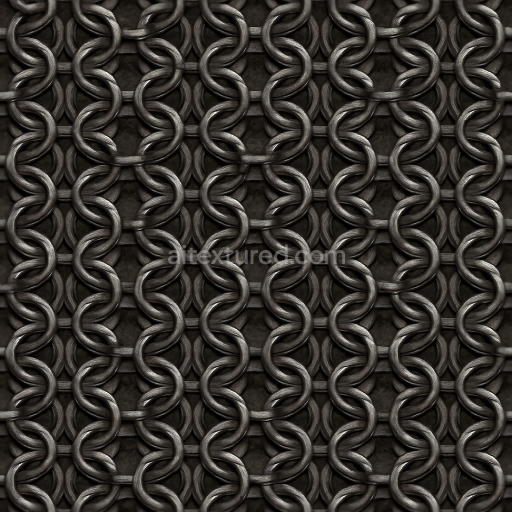
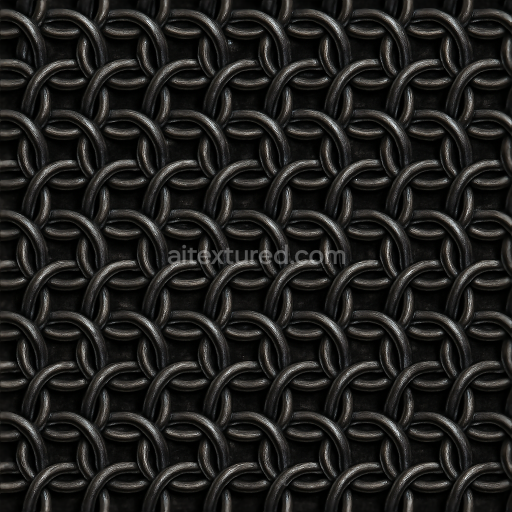
8K PBR Chainmail With Gunmetal Gray And Interwoven Rings Pattern
Seamless texture (tileable) · PNG, WEBP, PBR ZIP. License: AITextured Free Commercial License (FCL) v1.1. Free personal and commercial use. Raw resale, standalone redistribution, mirroring/scraping, competing asset packs, and AI/ML training are not allowed without written permission. Attribution is not required, but appreciated..

| ID | seamless-3d-texture-pbr-8k-of-riveted-links-chainmail-armor-fabric |
|---|---|
| Category | Chainmail |
| Formats | PNG, WEBP, PBR ZIP |
| Size | 1k (1024x1024px), 2k (2048x2048px), 4k (4096x4096px), 8k (8192x8192px) |
| Color | sRGB |
| Tileable | Yes |
This seamless 8K resolution PBR texture showcases a highly detailed closeup of riveted links forming a robust chainmail armor fabric crafted from interlocking metal rings. The base material consists of weathered steel enhanced by rivets that bind the links together ensuring enhanced durability and structural integrity. The metal surface displays a naturally brushed finish with subtle oxidation and abrasion marks reflecting an authentic medieval mail pattern. Fine scratches slight dents and natural imperfections are visible adding depth and realism to the armor’s rugged battle-worn appearance. The fabric’s weave pattern is tightly organized with minimal porosity emphasizing the dense protective mesh typical of historic chainmail armor.
In the PBR workflow the BaseColor/Albedo channel captures the dark steel-gray tones with hints of rust and patina while the Normal map richly defines the raised rivets metal rings and surface scratches enhancing the three-dimensional feel. The Roughness map presents a balanced variation between polished highlights and worn matte areas simulating subtle differences in surface wear. The Metallic channel is predominantly high reflecting the inherent metal composition of the chainmail while the Ambient Occlusion map adds realistic shadowing within the crevices between links. Height or Displacement data further amplify the tactile depth of the riveted pattern making the texture suitable for close-range rendering. This texture is fully optimized and ready for use in Blender Unreal Engine and Unity projects delivering photo-realistic results in 3D scenes that require a seamless durable armor fabric look.
When applying this texture consider adjusting the UV scale to maintain the integrity of the riveted links’ size relative to your 3D model ensuring the pattern does not appear stretched or repetitive. Fine-tuning the roughness map can also help customize the metallic sheen to fit various lighting conditions from matte medieval armor to slightly polished battle gear. This versatile seamless PBR texture is ideal for artists and designers aiming to replicate authentic protective chainmail armor with a finely detailed rugged metallic fabric that stands up to close inspection in high-resolution renders.
Import the texture maps into Blender with sRGB color space for albedo/base color and Non-Color for normal, roughness, metallic, AO, height, and ORM maps. Connect normal maps through a Normal Map node, then adjust UV scale with a Mapping node so the material repeats naturally on your model.
For the full step-by-step setup, see How to Use Seamless Textures in Blender. Browse related material examples in wood, concrete, and metal.
Yes. This texture is designed as a seamless tileable PBR material, so it can repeat across large surfaces without visible borders.
You can download PNG/WEBP versions and use 1K, 2K, 4K and 8K download options when available on the page.
Yes. The download options and engine-mapped ZIP workflow are designed for Blender, Unreal Engine, Unity Standard, URP and HDRP material pipelines.
Yes. The texture is available under the AITextured free commercial license. Review the license page for redistribution and AI-training restrictions.
Build, preview, and export seamless PBR materials. Generate full map sets from a single image, inspect them in a real-time WebGL viewer, and re-package maps for Unreal, Unity, and Blender—directly in your browser.
AI text-to-texture: type a prompt and get a seamless, tileable base image ready for PBR workflows (great starting point for materials).
Create a full PBR set (Normal, Roughness, AO, Metallic, etc.) from a single image. Seamless and tiling-friendly.
Instant WebGL viewer: inspect materials on a sphere, plane, and cube. Check tiling and lighting in real time.
Re-packages maps per engine: Unreal (BaseColor + ORM), Unity (Mask/MetallicSmoothness), Blender (separate channels).
PNG ↔ JPG ↔ SVG: fast convert, SVG rasterize, embed/trace options, quality & background controls.