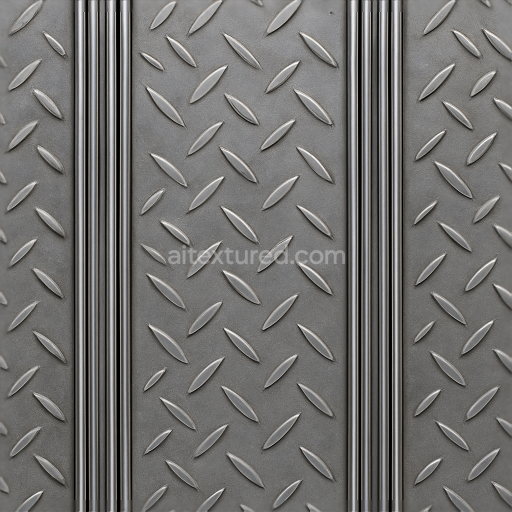
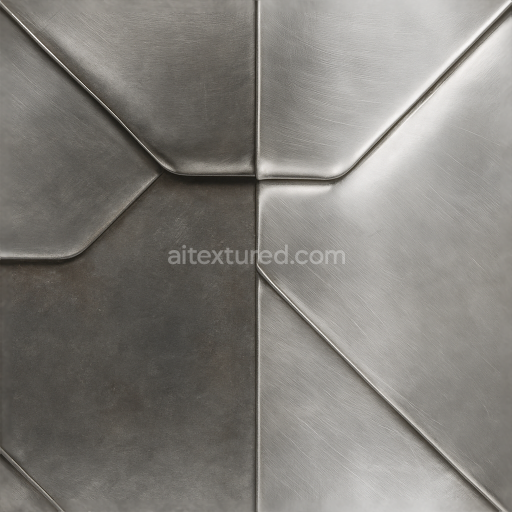
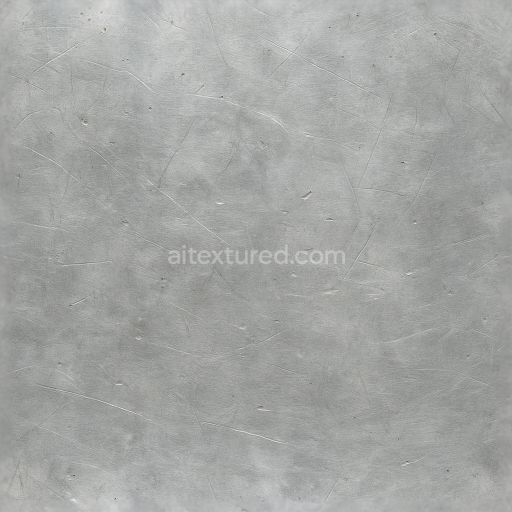
Diamond Plate Furniture Metal Surface Finish
Seamless texture (tileable) · PNG, WEBP, PBR ZIP. License: AITextured Free Commercial License (FCL) v1.1. Free personal and commercial use. Raw resale, standalone redistribution, mirroring/scraping, competing asset packs, and AI/ML training are not allowed without written permission. Attribution is not required, but appreciated..

| ID | seamless-3d-texture-pbr-8k-burnished-bronze-furniture-metal-finish |
|---|---|
| Category | Furniture metal |
| Formats | PNG, WEBP, PBR ZIP |
| Size | 1k (1024x1024px), 2k (2048x2048px), 4k (4096x4096px), 8k (8192x8192px) |
| Color | sRGB |
| Tileable | Yes |
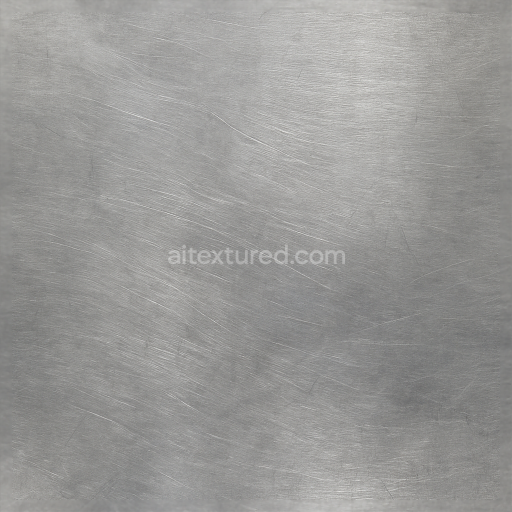
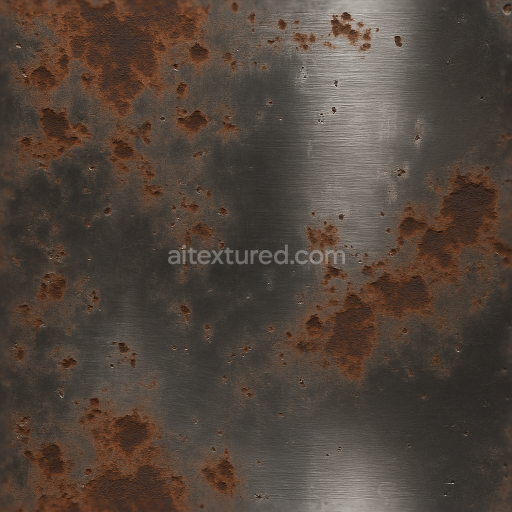
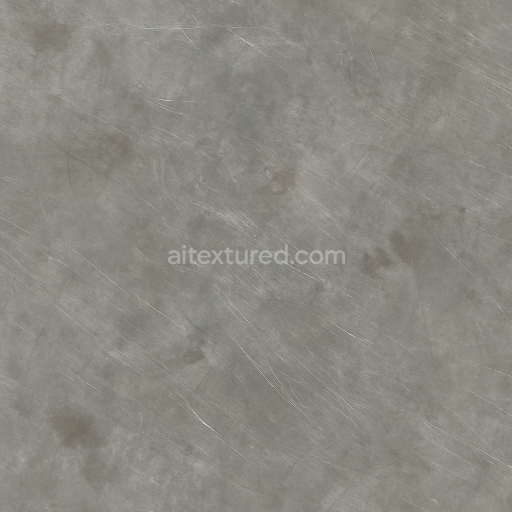
This seamless burnished bronze 3D texture showcases a meticulously crafted metal surface designed for high-fidelity rendering in 8K resolution. The material composition reflects an authentic metal substrate with a warm bronze base featuring a finely burnished finish achieved through controlled abrasion and polishing techniques. The surface exhibits natural patina and oxidation effects where subtle oxide layers and mineral deposits create a nuanced interplay of golden and darker brown hues. These color variations are the result of complex surface chemistry and weathering processes typical of aged bronze furniture metal parts lending the texture a lifelike visual depth and tactile richness. The metal’s microstructure characterized by low porosity and gently worn grain orientation is captured with precision to imitate classical or vintage furniture metalwork with a convincing aged finish.
In terms of PBR channels the base color (albedo) highlights the warm bronze tones with realistic gradients of oxidation and wear. The normal map intricately reproduces fine surface abrasions and subtle bumps enhancing the tactile detail and metal grain orientation. Roughness values vary to simulate the burnished finish’s polish with smoother areas reflecting more light and rougher patches indicating wear and oxidation. The metallic channel remains high emphasizing the metal substrate’s reflective qualities while ambient occlusion adds soft shadows in crevices for depth. Height and displacement maps contribute to the perception of surface irregularities such as patina buildup and minor dents enabling realistic parallax effects when applied in rendering engines.
Rendered and optimized for seamless tiling this burnished bronze PBR texture is fully compatible with Blender Unreal Engine and Unity workflows supporting high-end visualization and game asset creation. Its 8K resolution ensures exceptional detail even at close inspection making it ideal for luxury furniture metal surfaces classical hardware or vintage decor elements. For best results during implementation consider adjusting the UV scale to maintain a natural grain size relative to the model and fine-tune the roughness map to balance glossiness and surface wear according to lighting conditions. This approach maximizes realism ensuring the metal finish appears convincingly aged yet elegant across various digital environments.
Import the texture maps into Blender with sRGB color space for albedo/base color and Non-Color for normal, roughness, metallic, AO, height, and ORM maps. Connect normal maps through a Normal Map node, then adjust UV scale with a Mapping node so the material repeats naturally on your model.
For the full step-by-step setup, see How to Use Seamless Textures in Blender. Browse related material examples in wood, concrete, and metal.
Yes. This texture is designed as a seamless tileable PBR material, so it can repeat across large surfaces without visible borders.
You can download PNG/WEBP versions and use 1K, 2K, 4K and 8K download options when available on the page.
Yes. The download options and engine-mapped ZIP workflow are designed for Blender, Unreal Engine, Unity Standard, URP and HDRP material pipelines.
Yes. The texture is available under the AITextured free commercial license. Review the license page for redistribution and AI-training restrictions.


Generate, preview, and export seamless PBR materials for Blender, Unity, and Unreal Engine—directly in your browser.
AI text-to-texture: type a prompt and get a seamless, tileable base image ready for PBR workflows (great starting point for materials).
Create a full PBR set (Normal, Roughness, AO, Metallic, etc.) from a single image. Seamless and tiling-friendly.
Instant WebGL viewer: inspect materials on a sphere, plane, and cube. Check tiling and lighting in real time.
Re-packages maps per engine: Unreal (BaseColor + ORM), Unity (Mask/MetallicSmoothness), Blender (separate channels).
PNG ↔ JPG ↔ SVG: fast convert, SVG rasterize, embed/trace options, quality & background controls.