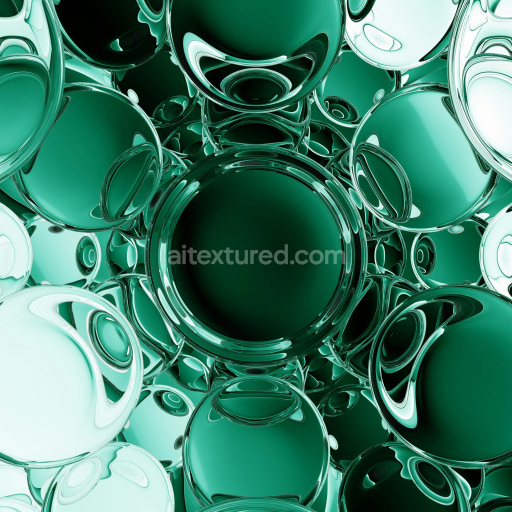
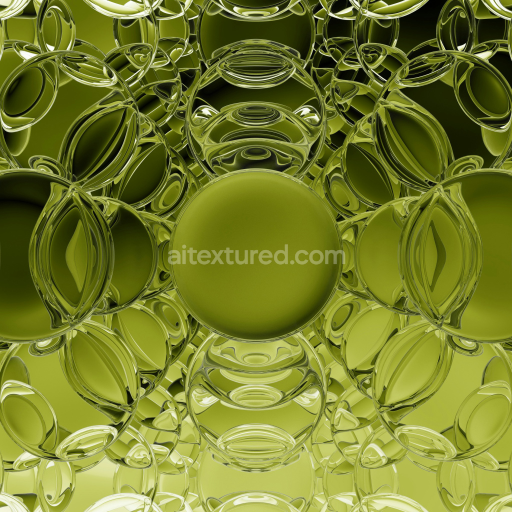
Fine Stained Glass Seamless Texture
Seamless texture (tileable) · PNG, WEBP, PBR ZIP. License: AITextured Free Commercial License (FCL) v1.1. Free personal and commercial use. Raw resale, standalone redistribution, mirroring/scraping, competing asset packs, and AI/ML training are not allowed without written permission. Attribution is not required, but appreciated..

| ID | patterned-stained-glass-texture-seamless |
|---|---|
| Category | Glass |
| Formats | PNG, WEBP, PBR ZIP |
| Size | 1k (1024x1024px), 2k (2048x2048px), 4k (4096x4096px), 8k (8192x8192px) |
| Color | sRGB |
| Tileable | Yes |
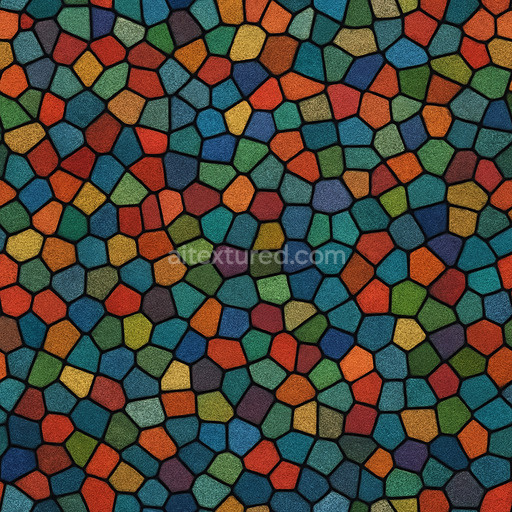
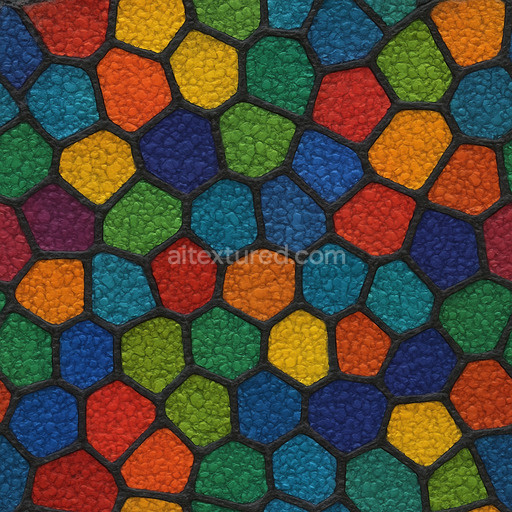
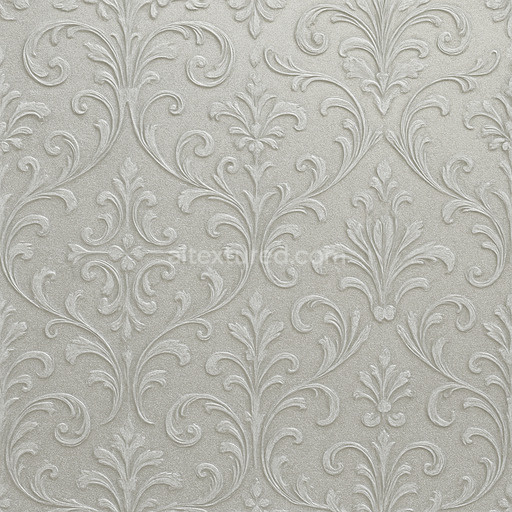
The Patterned Stained Glass Texture Seamless high resolution up to 8K is a meticulously designed digital material that evokes the intricate beauty of traditional stained glass crafted from mineral-based glass substrates. This texture features richly colored pigments embedded within the glass matrix simulating the vibrant oxide layers and metallic inclusions typically used to achieve the distinctive hues and opacity variations in stained glass art. The composition suggests a carefully balanced binder system that mimics the smooth fusion of glass segments held together by slender lead cames or organic binding agents providing a natural grain orientation and subtle surface imperfections. Its surface finish is polished yet exhibits a faintly uneven texture characteristic of hand-formed glass enhancing realism. This complexity is faithfully represented across PBR channels: the BaseColor/Albedo captures vivid translucent colors with nuanced gradients; the Normal map reveals delicate embossing and subtle bevels along the patterned edges; Roughness balances smooth glass reflections with areas of controlled micro-roughness to simulate light diffusion; Metallic is minimal but hints at the lead framing; Ambient Occlusion deepens shadowed crevices; and Height/Displacement adds slight relief to emphasize the textured surface and panel separations.
Rendered at an exceptional resolution of up to 8k this tileable patterned stained glass texture seamless high resolution up to 8K offers unparalleled detail and clarity ideal for covering large surfaces without losing sharpness or introducing repetitive artifacts. Its seamless tiling capability ensures flawless pattern continuity making it especially suitable for architectural visualization immersive game environments product mockups and interior staging projects that demand authenticity and visual richness. Fully compatible with industry-standard platforms like Blender Unreal Engine and Unity this texture patterned stained glass texture seamless high resolution up to 8K integrates smoothly into your creative workflow providing predictable and repeatable results. The included 3D preview aids in assessing how light interacts with the material’s complex optical properties enabling precise adjustments before deployment.
For optimal application it is recommended to fine-tune the roughness and normal map intensities to harmonize with your scene’s lighting rig thereby maintaining a grounded believable glass appearance. Adjusting the UV scale can also help manage the tile size to fit specific architectural elements or props ensuring the pattern remains proportionate and visually appealing. Utilizing this seamless patterned stained glass texture seamless high resolution up to 8K elevates your projects by combining high-fidelity material representation with versatile adaptability across digital design environments enhancing both realism and creative expression.
Import the texture maps into Blender with sRGB color space for albedo/base color and Non-Color for normal, roughness, metallic, AO, height, and ORM maps. Connect normal maps through a Normal Map node, then adjust UV scale with a Mapping node so the material repeats naturally on your model.
For the full step-by-step setup, see How to Use Seamless Textures in Blender. Browse related material examples in wood, concrete, and metal.
Yes. This texture is designed as a seamless tileable PBR material, so it can repeat across large surfaces without visible borders.
You can download PNG/WEBP versions and use 1K, 2K, 4K and 8K download options when available on the page.
Yes. The download options and engine-mapped ZIP workflow are designed for Blender, Unreal Engine, Unity Standard, URP and HDRP material pipelines.
Yes. The texture is available under the AITextured free commercial license. Review the license page for redistribution and AI-training restrictions.


Build, preview, and export seamless PBR materials. Generate full map sets from a single image, inspect them in a real-time WebGL viewer, and re-package maps for Unreal, Unity, and Blender—directly in your browser.
AI text-to-texture: type a prompt and get a seamless, tileable base image ready for PBR workflows (great starting point for materials).
Create a full PBR set (Normal, Roughness, AO, Metallic, etc.) from a single image. Seamless and tiling-friendly.
Instant WebGL viewer: inspect materials on a sphere, plane, and cube. Check tiling and lighting in real time.
Re-packages maps per engine: Unreal (BaseColor + ORM), Unity (Mask/MetallicSmoothness), Blender (separate channels).
PNG ↔ JPG ↔ SVG: fast convert, SVG rasterize, embed/trace options, quality & background controls.