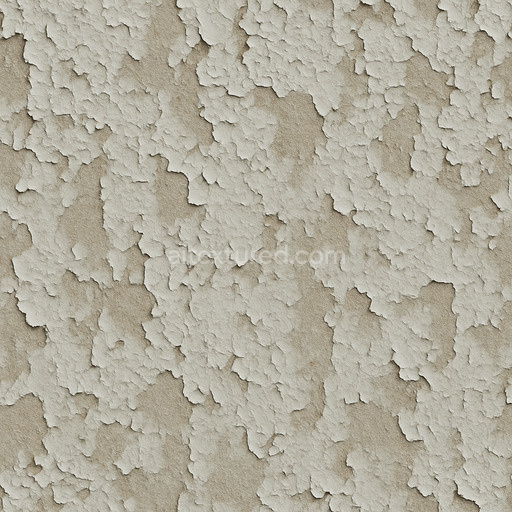
Detailed Matte Paint Seamless Texture
Seamless texture (tileable) · PNG, WEBP, PBR ZIP. License: AITextured Free Commercial License (FCL) v1.1. Free personal and commercial use. Raw resale, standalone redistribution, mirroring/scraping, competing asset packs, and AI/ML training are not allowed without written permission. Attribution is not required, but appreciated..

| ID | fine-peeling-paint-texture-seamless |
|---|---|
| Category | Paint-coating |
| Formats | PNG, WEBP, PBR ZIP |
| Size | 1k (1024x1024px), 2k (2048x2048px), 4k (4096x4096px), 8k (8192x8192px) |
| Color | sRGB |
| Tileable | Yes |
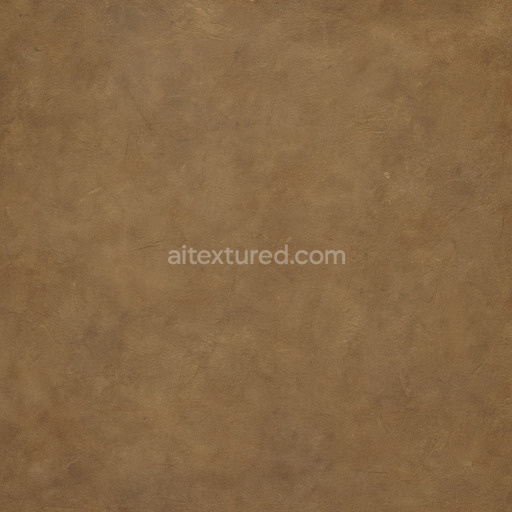
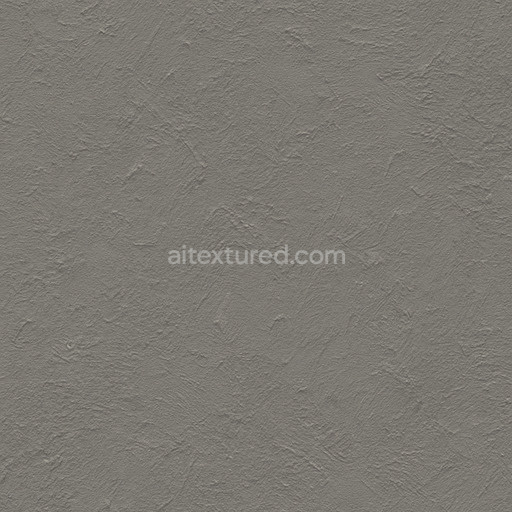
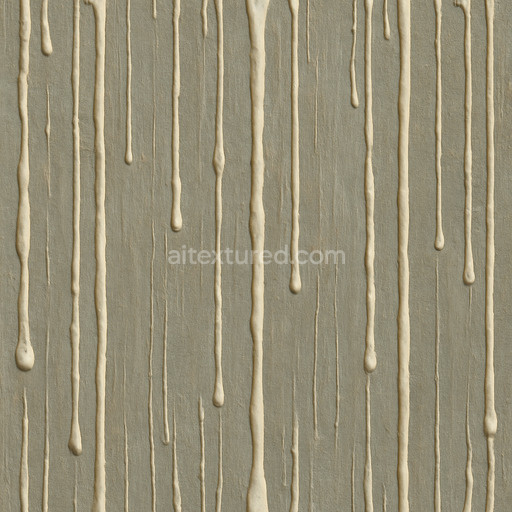
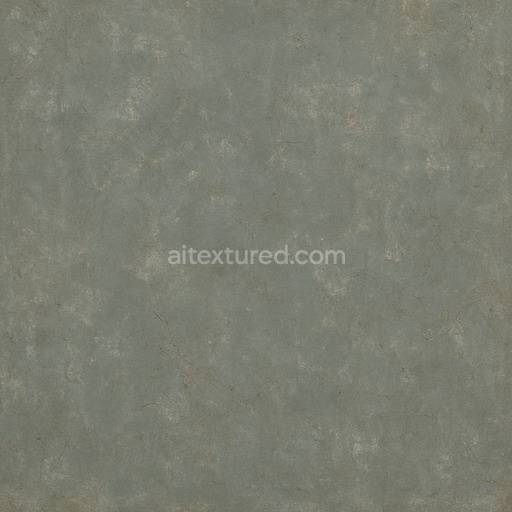
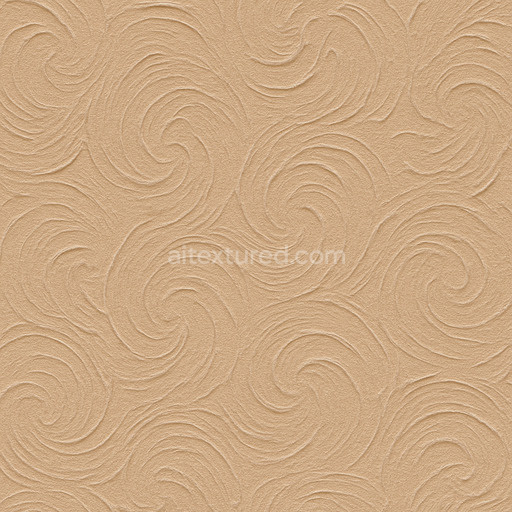
The Fine Peeling Paint Texture Seamless high resolution up to 8K expertly captures the complex materiality of aged paint layers adhered to a robust mineral-based substrate commonly resembling weathered concrete or plaster surfaces. This paint-coating texture reveals the natural degradation process where fine flakes and delicate cracks expose subtle aggregates and fibrous inclusions embedded within the paint film. The layered binders and pigments break down over time creating a surface finish marked by uneven peeling slight oxidation and varied tonal shifts derived from oxide stains and layered colorants. The texture's porosity and micro-cracks contribute to an authentic weathered appearance showcasing the intricate interplay of surface roughness and fine-scale material disruption typical of long-exposed paint layers on architectural finishes.
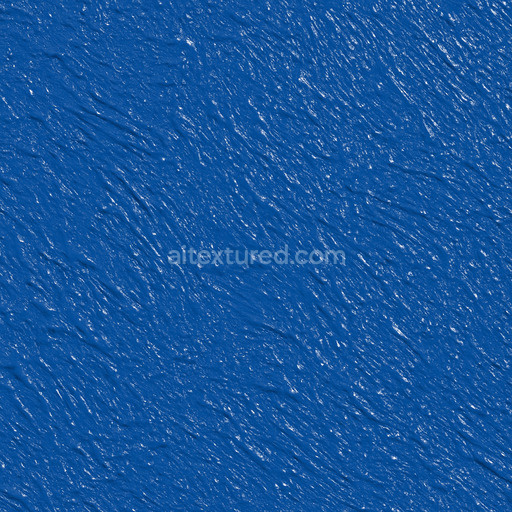
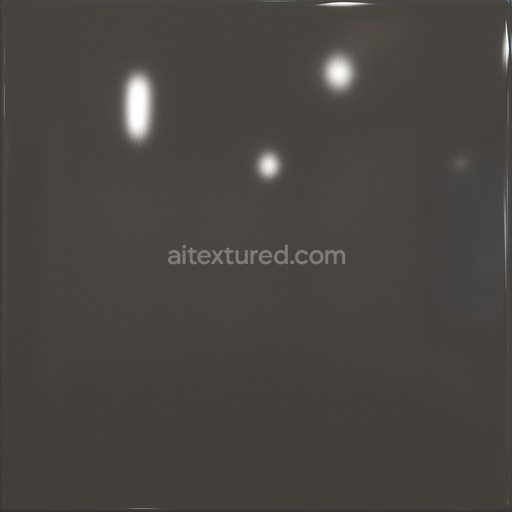
From a technical perspective this seamless fine peeling paint texture seamless high resolution up to 8K is crafted to deliver exceptional fidelity across multiple PBR channels. The BaseColor/Albedo channel captures nuanced color variation from layered pigments and oxide deposits while the Normal map emphasizes subtle surface relief including peeling edges and fine cracks enhancing the perception of depth. Roughness maps distinctly portray contrasts between matte eroded paint patches and smoother less weathered painted areas supporting realistic light scattering. The Metallic channel remains minimal accurately reflecting the non-metallic nature of aged paint. Additionally the Ambient Occlusion and Height/Displacement maps enhance shadowing and parallax effects reinforcing the texture’s three-dimensional quality and immersive 3D preview results in popular engines like Blender Unreal Engine and Unity.
Designed for seamless tiling at an ultra-high resolution of up to 8192 by 8192 pixels this tileable fine peeling paint texture seamless high resolution up to 8K ensures crisp detail retention even in close-up renders without pixelation or artifacts. This makes it an ideal choice for architectural visualization environment art and concept prototyping where authentic surface complexity is essential. When incorporating this texture fine peeling paint texture seamless high resolution up to 8K into projects adjusting the UV scale to the architectural context is recommended—larger scales suit expansive exterior walls while smaller scales work better for detailed props. Additionally fine-tuning the roughness channel can simulate varying degrees of surface wear or fresh paint remnants allowing greater control over the material’s visual storytelling and enhancing photorealistic 3D preview fidelity across diverse rendering workflows.
Import the texture maps into Blender with sRGB color space for albedo/base color and Non-Color for normal, roughness, metallic, AO, height, and ORM maps. Connect normal maps through a Normal Map node, then adjust UV scale with a Mapping node so the material repeats naturally on your model.
For the full step-by-step setup, see How to Use Seamless Textures in Blender. Browse related material examples in wood, concrete, and metal.
Yes. This texture is designed as a seamless tileable PBR material, so it can repeat across large surfaces without visible borders.
You can download PNG/WEBP versions and use 1K, 2K, 4K and 8K download options when available on the page.
Yes. The download options and engine-mapped ZIP workflow are designed for Blender, Unreal Engine, Unity Standard, URP and HDRP material pipelines.
Yes. The texture is available under the AITextured free commercial license. Review the license page for redistribution and AI-training restrictions.
Generate, preview, and export seamless PBR materials for Blender, Unity, and Unreal Engine—directly in your browser.
AI text-to-texture: type a prompt and get a seamless, tileable base image ready for PBR workflows (great starting point for materials).
Create a full PBR set (Normal, Roughness, AO, Metallic, etc.) from a single image. Seamless and tiling-friendly.
Instant WebGL viewer: inspect materials on a sphere, plane, and cube. Check tiling and lighting in real time.
Re-packages maps per engine: Unreal (BaseColor + ORM), Unity (Mask/MetallicSmoothness), Blender (separate channels).
PNG ↔ JPG ↔ SVG: fast convert, SVG rasterize, embed/trace options, quality & background controls.