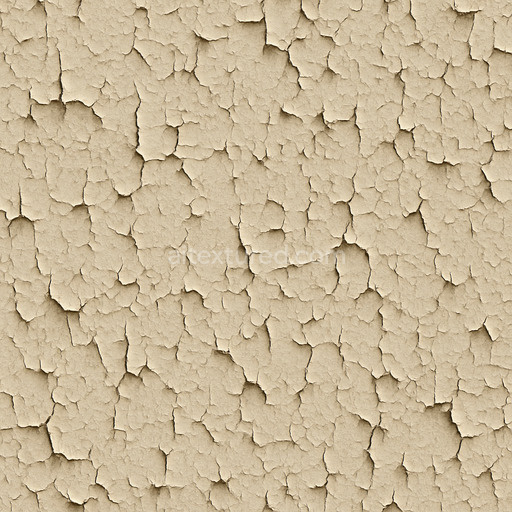
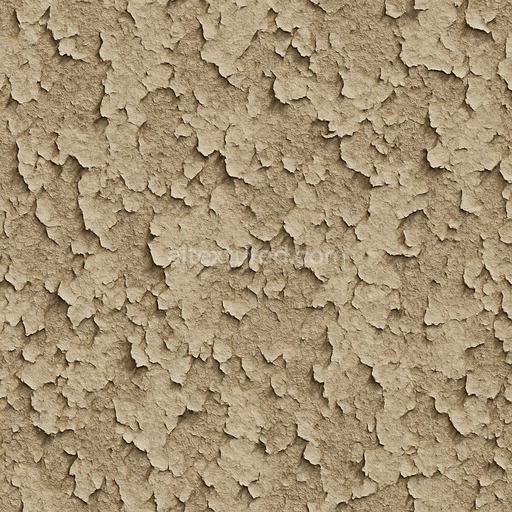
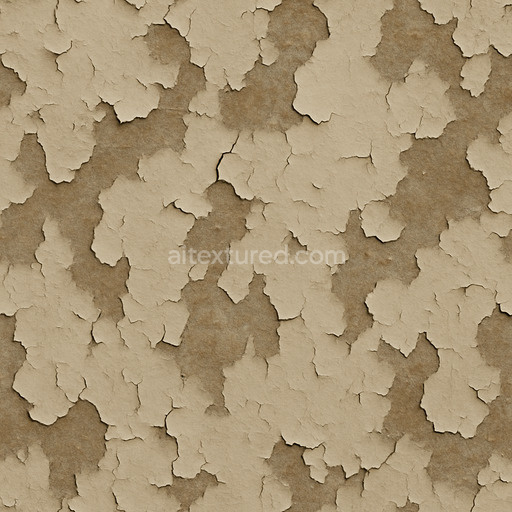
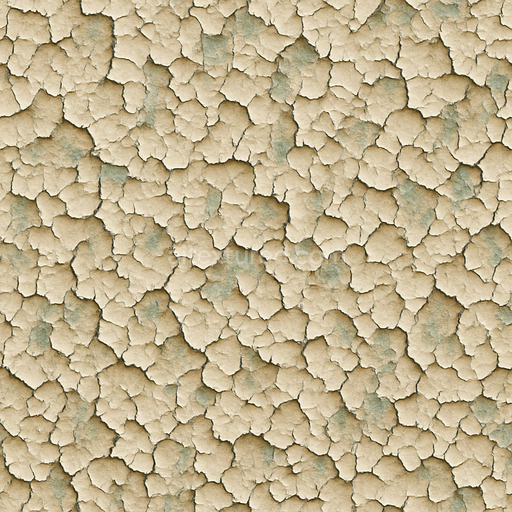
Patterned Peeling Paint Seamless Texture
Seamless texture (tileable) · PNG, WEBP, PBR ZIP. License: AITextured Free Commercial License (FCL) v1.1. Free personal and commercial use. Raw resale, standalone redistribution, mirroring/scraping, competing asset packs, and AI/ML training are not allowed without written permission. Attribution is not required, but appreciated..

| ID | peeling-paint-curling-flakes |
|---|---|
| Category | Paint-coating |
| Formats | PNG, WEBP, PBR ZIP |
| Size | 1k (1024x1024px), 2k (2048x2048px), 4k (4096x4096px), 8k (8192x8192px) |
| Color | sRGB |
| Tileable | Yes |
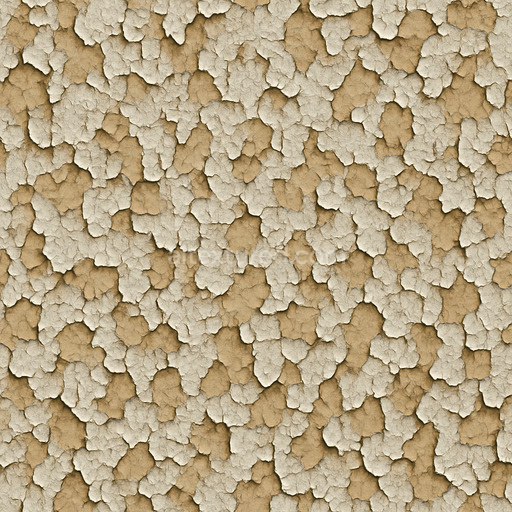
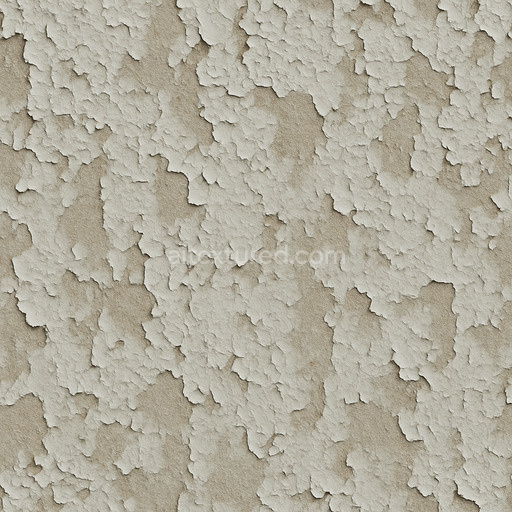
The peeling paint curling flakes texture expertly captures the intricate surface characteristics of aged paint layers that gradually detach from rigid substrates typically metal or wood bases. This high-quality seamless peeling paint curling flakes texture reveals the natural weathering process where paint binders weaken over time due to moisture and temperature fluctuations. The composition includes mineral and polymeric pigments embedded within the paint matrix combined with organic and inorganic fillers that contribute to subtle surface roughness and varying porosity. These materials interact to produce a cracked uneven finish with flakes curling at the edges occasionally exposing oxidized metal or weathered wood grain beneath thereby enhancing the tactile realism of paint-coating surfaces subjected to prolonged environmental exposure.
Within this tileable peeling paint curling flakes texture each PBR channel plays a crucial role in faithfully representing the material’s complex structure and weathered condition. The BaseColor/Albedo map captures authentic tonal variations reflecting faded dyes oxide layers and peeling paint hues alongside exposed substrate colors. The Normal map highlights curled edges and surface irregularities adding convincing depth and relief to the flakes. Roughness differentiates the smooth still-adhering paint areas from the rough cracked and weathered patches controlling light reflectivity and enhancing realism. The Metallic channel accounts for subtle metallic substrates or oxide residues that become visible beneath peeling layers while Ambient Occlusion intensifies shadows within crevices and gaps between flakes amplifying perceived depth. Height and Displacement maps offer additional dimensionality enabling realistic 3D surface modeling and parallax effects that enrich both real-time and offline renderings.
Rendered at resolutions up to 8K this seamless peeling paint curling flakes texture provides exceptional detail and clarity suitable for large-scale applications without visible seams or quality loss. It is optimized for PBR workflows and fully compatible with popular rendering engines such as Blender Unreal Engine and Unity ensuring smooth integration into diverse 3D projects. For optimal results it is recommended to maintain consistent UV scaling to avoid distortion of the peeling paint pattern and to fine-tune the Roughness map in accordance with your scene’s lighting conditions. Leveraging the Height/Displacement map can further enhance the three-dimensional feel by simulating the physical depth of curled paint layers making it especially effective for architectural visualizations game environments and immersive 3D previews where authentic paint-coating textures are essential.
Import the texture maps into Blender with sRGB color space for albedo/base color and Non-Color for normal, roughness, metallic, AO, height, and ORM maps. Connect normal maps through a Normal Map node, then adjust UV scale with a Mapping node so the material repeats naturally on your model.
For the full step-by-step setup, see How to Use Seamless Textures in Blender. Browse related material examples in wood, concrete, and metal.
Yes. This texture is designed as a seamless tileable PBR material, so it can repeat across large surfaces without visible borders.
You can download PNG/WEBP versions and use 1K, 2K, 4K and 8K download options when available on the page.
Yes. The download options and engine-mapped ZIP workflow are designed for Blender, Unreal Engine, Unity Standard, URP and HDRP material pipelines.
Yes. The texture is available under the AITextured free commercial license. Review the license page for redistribution and AI-training restrictions.

Generate, preview, and export seamless PBR materials for Blender, Unity, and Unreal Engine—directly in your browser.
AI text-to-texture: type a prompt and get a seamless, tileable base image ready for PBR workflows (great starting point for materials).
Create a full PBR set (Normal, Roughness, AO, Metallic, etc.) from a single image. Seamless and tiling-friendly.
Instant WebGL viewer: inspect materials on a sphere, plane, and cube. Check tiling and lighting in real time.
Re-packages maps per engine: Unreal (BaseColor + ORM), Unity (Mask/MetallicSmoothness), Blender (separate channels).
PNG ↔ JPG ↔ SVG: fast convert, SVG rasterize, embed/trace options, quality & background controls.