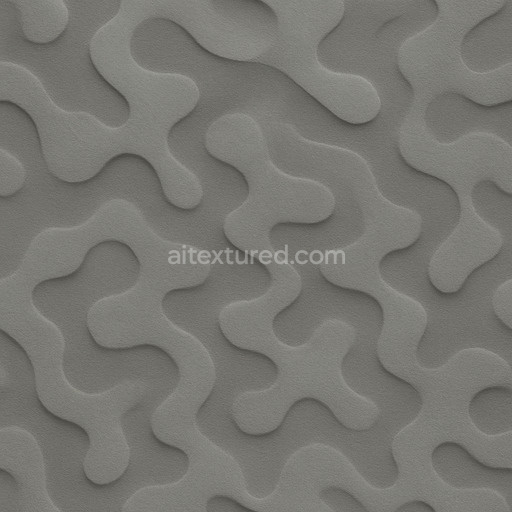
Matte Abstract Pattern Seamless Texture
Seamless texture (tileable) · PNG, WEBP, PBR ZIP. License: AITextured Free Commercial License (FCL) v1.1. Free personal and commercial use. Raw resale, standalone redistribution, mirroring/scraping, competing asset packs, and AI/ML training are not allowed without written permission. Attribution is not required, but appreciated..

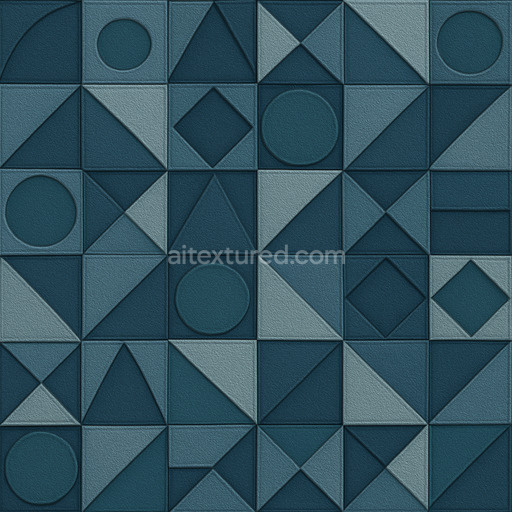
| ID | isometric-cubes-optical-illusion |
|---|---|
| Category | Patterns |
| Formats | PNG, WEBP, PBR ZIP |
| Size | 1k (1024x1024px), 2k (2048x2048px), 4k (4096x4096px), 8k (8192x8192px) |
| Color | sRGB |
| Tileable | Yes |
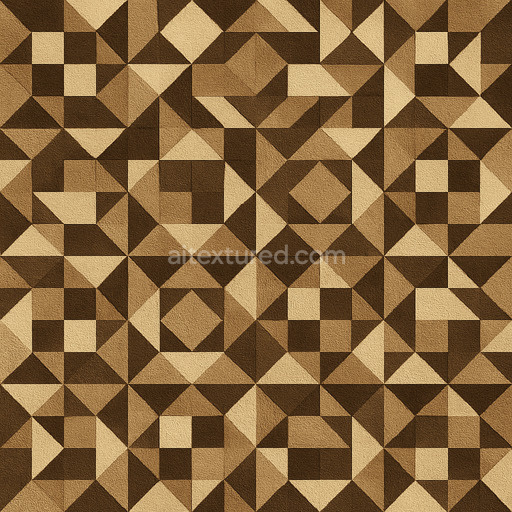
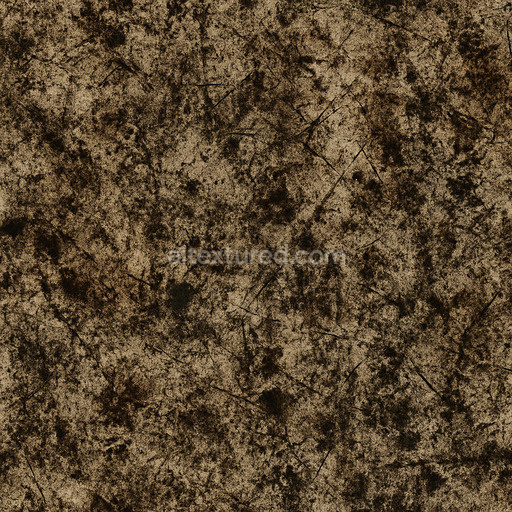
The Isometric Cubes Optical Illusion texture is a seamlessly tileable meticulously crafted PBR texture designed to simulate a sophisticated geometric pattern with a convincing optical effect. Its base substrate is envisioned as a finely polished mineral composite or ceramic surface combining smooth glazed areas with subtle micro-variations in porosity and texture to evoke a natural tactile quality. This carefully balanced composition includes synthetic binders and fine aggregates that ensure structural consistency and durability while the subtle interplay of pigments and oxide layers produces crisp neutral tones in the BaseColor/Albedo channel. These color variations reinforce the illusion of depth and dimensionality without overpowering the clean modern aesthetic making it highly versatile for architectural visualization product mockups and game environments.
Structurally the texture’s seamless isometric cubes optical illusion pattern is enhanced by a comprehensive PBR workflow that accurately translates its material properties across all channels. The Normal map highlights delicate elevations and recesses of the cube faces amplifying the perceived three-dimensional effect and optical complexity. Roughness and Metallic maps are finely tuned to create a semi-matte finish with low metallic reflectivity allowing realistic light interaction that preserves the clarity of the pattern under diverse lighting setups. Ambient Occlusion and Height/Displacement maps contribute additional depth by simulating natural shadowing and subtle surface relief which intensifies the visual sophistication of the illusion while maintaining geometric coherence. This combination ensures optimal performance for real-time 3D preview and high-end rendering engines alike.
Offered in ultra-high resolution up to 8K this seamless isometric cubes optical illusion texture delivers outstanding detail and scalability for large surfaces without visible seams or pattern fatigue. It integrates seamlessly with popular platforms such as Blender Unreal Engine and Unity providing artists and designers with a reliable production-ready material for elevating the visual interest of their 3D projects. For best results adjusting the UV scale is recommended to maintain the optical illusion’s balance across expansive surfaces preventing distortion and preserving the pattern’s dynamic depth. Additionally subtle fine-tuning of the roughness channel can enhance surface reflectivity to emphasize depth variations while retaining the texture’s clean geometric style helping to preserve the delicate contrast of light and shadow that defines this compelling patterns texture.
Overall the tileable isometric cubes optical illusion texture combines a harmonious balance of materials and composition with a sophisticated visually engaging effect. Its foundation of mineral-like substrates carefully selected binders and fine aggregates together with a comprehensive PBR channel set offers a highly realistic and versatile surface suitable for diverse applications. Whether incorporated into architectural visualizations immersive game environments or detailed product mockups this texture provides a refined polished finish that enhances any 3D scene with both aesthetic elegance and technical reliability.
Import the texture maps into Blender with sRGB color space for albedo/base color and Non-Color for normal, roughness, metallic, AO, height, and ORM maps. Connect normal maps through a Normal Map node, then adjust UV scale with a Mapping node so the material repeats naturally on your model.
For the full step-by-step setup, see How to Use Seamless Textures in Blender. Browse related material examples in wood, concrete, and metal.
Yes. This texture is designed as a seamless tileable PBR material, so it can repeat across large surfaces without visible borders.
You can download PNG/WEBP versions and use 1K, 2K, 4K and 8K download options when available on the page.
Yes. The download options and engine-mapped ZIP workflow are designed for Blender, Unreal Engine, Unity Standard, URP and HDRP material pipelines.
Yes. The texture is available under the AITextured free commercial license. Review the license page for redistribution and AI-training restrictions.


Generate, preview, and export seamless PBR materials for Blender, Unity, and Unreal Engine—directly in your browser.
AI text-to-texture: type a prompt and get a seamless, tileable base image ready for PBR workflows (great starting point for materials).
Create a full PBR set (Normal, Roughness, AO, Metallic, etc.) from a single image. Seamless and tiling-friendly.
Instant WebGL viewer: inspect materials on a sphere, plane, and cube. Check tiling and lighting in real time.
Re-packages maps per engine: Unreal (BaseColor + ORM), Unity (Mask/MetallicSmoothness), Blender (separate channels).
PNG ↔ JPG ↔ SVG: fast convert, SVG rasterize, embed/trace options, quality & background controls.