Coarse Plastic Seamless Texture
Seamless texture (tileable) · PNG, WEBP, PBR ZIP. License: AITextured Free Commercial License (FCL) v1.1. Free personal and commercial use. Raw resale, standalone redistribution, mirroring/scraping, competing asset packs, and AI/ML training are not allowed without written permission. Attribution is not required, but appreciated..

| ID | rough-plastic-seamless-texture |
|---|---|
| Category | Plastic |
| Formats | PNG, WEBP, PBR ZIP |
| Size | 1k (1024x1024px), 2k (2048x2048px), 4k (4096x4096px), 8k (8192x8192px) |
| Color | sRGB |
| Tileable | Yes |
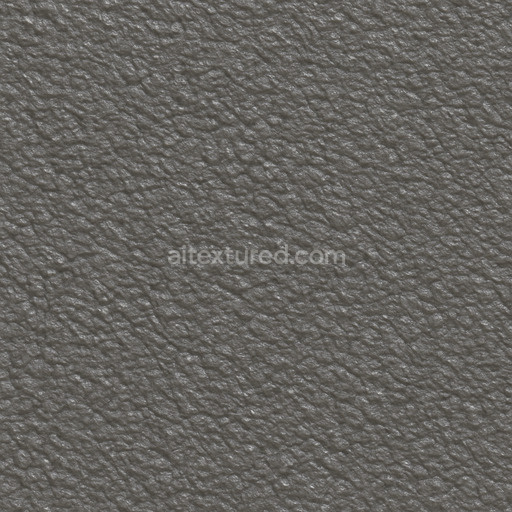
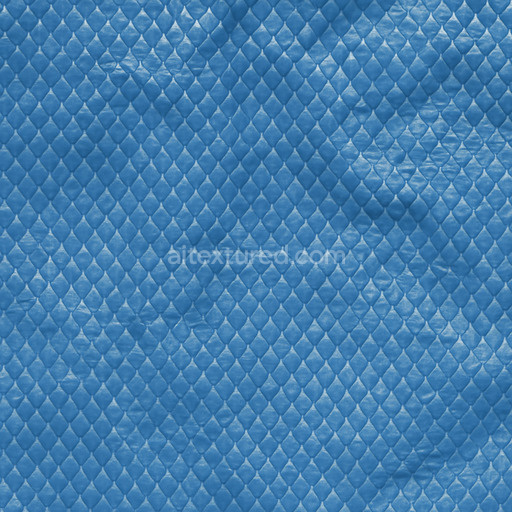
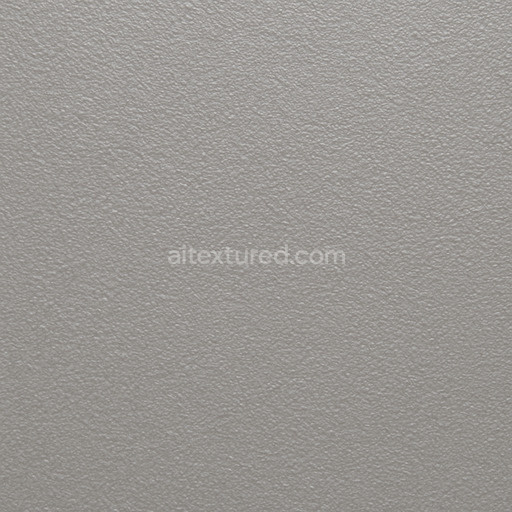
The Rough Plastic Seamless Texture is an AI-generated material designed to replicate the complex surface characteristics of polymer-based plastic with a naturally rough finish. Its composition mimics a synthetic substrate where microscopic aggregates and fine grain orientation create subtle surface irregularities and textural depth. The roughness arises from uneven binder distribution and embedded pigment particles while the surface finish retains a matte slightly tactile feel that avoids glossiness. This combination suggests a weather-resistant durable plastic often used in industrial or consumer products. The texture’s colorants simulate layered oxide films and pigment dispersion contributing to realistic shading and tonality across the BaseColor/Albedo channel. The Normal map captures micro-detail and grain directionality enhancing light interaction and emphasizing surface roughness while the Roughness map controls the diffuse reflection to maintain a non-reflective rugged appearance. Minimal metallic influence is present consistent with plastic’s non-metallic nature and Ambient Occlusion and Height/Displacement channels add subtle depth and shadowing to emphasize surface topology without exaggeration.
Rendered at an ultra-high resolution of up to 8K this tileable rough plastic seamless texture ensures exceptional detail retention even on large-scale surfaces making it ideal for realistic archviz game environments product mockups and interior staging projects. It integrates effortlessly with major 3D engines such as Blender Unity and Unreal Engine with minimal configuration allowing artists and developers to accelerate their workflows while maintaining consistent detail across vast areas. The seamless tiling property guarantees flawless pattern repetition without visible borders preserving the integrity of the material under various UV layouts. This AI pipeline prioritizes both micro-detail fidelity and structural consistency delivering a convincing production-ready result suitable for physically based rendering (PBR) workflows.
For optimal results it is recommended to carefully match texel density across all assets using this rough plastic seamless texture and to maintain uniform UV scaling to prevent distortion or stretching of the pattern. Adjusting the roughness parameter within your shader can further refine the tactile feel balancing between a subtle sheen and a fully matte surface depending on your lighting environment. The Height or Parallax maps can be utilized to add additional depth cues enhancing realism without compromising performance. Overall this texture offers a powerful versatile foundation for simulating rugged plastic materials with exceptional clarity and photorealistic detail in any digital project requiring high-quality plastic textures.
The PBR texture rough plastic seamless texture offers a highly detailed 3D preview that highlights the durable and consistent quality of the rough plastic seamless texture for advanced material design applications.
Import the texture maps into Blender with sRGB color space for albedo/base color and Non-Color for normal, roughness, metallic, AO, height, and ORM maps. Connect normal maps through a Normal Map node, then adjust UV scale with a Mapping node so the material repeats naturally on your model.
For the full step-by-step setup, see How to Use Seamless Textures in Blender. Browse related material examples in wood, concrete, and metal.
Yes. This texture is designed as a seamless tileable PBR material, so it can repeat across large surfaces without visible borders.
You can download PNG/WEBP versions and use 1K, 2K, 4K and 8K download options when available on the page.
Yes. The download options and engine-mapped ZIP workflow are designed for Blender, Unreal Engine, Unity Standard, URP and HDRP material pipelines.
Yes. The texture is available under the AITextured free commercial license. Review the license page for redistribution and AI-training restrictions.


Build, preview, and export seamless PBR materials. Generate full map sets from a single image, inspect them in a real-time WebGL viewer, and re-package maps for Unreal, Unity, and Blender—directly in your browser.
AI text-to-texture: type a prompt and get a seamless, tileable base image ready for PBR workflows (great starting point for materials).
Create a full PBR set (Normal, Roughness, AO, Metallic, etc.) from a single image. Seamless and tiling-friendly.
Instant WebGL viewer: inspect materials on a sphere, plane, and cube. Check tiling and lighting in real time.
Re-packages maps per engine: Unreal (BaseColor + ORM), Unity (Mask/MetallicSmoothness), Blender (separate channels).
PNG ↔ JPG ↔ SVG: fast convert, SVG rasterize, embed/trace options, quality & background controls.