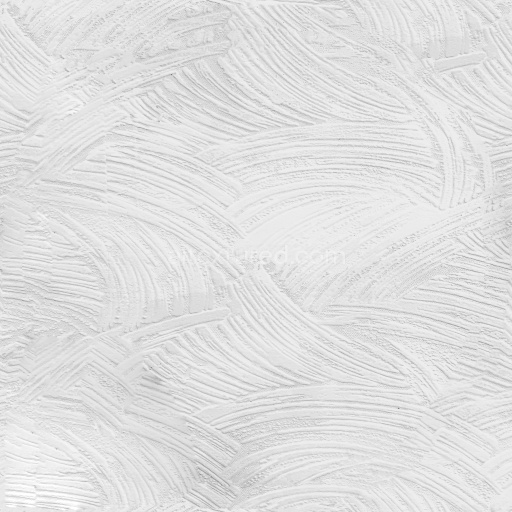
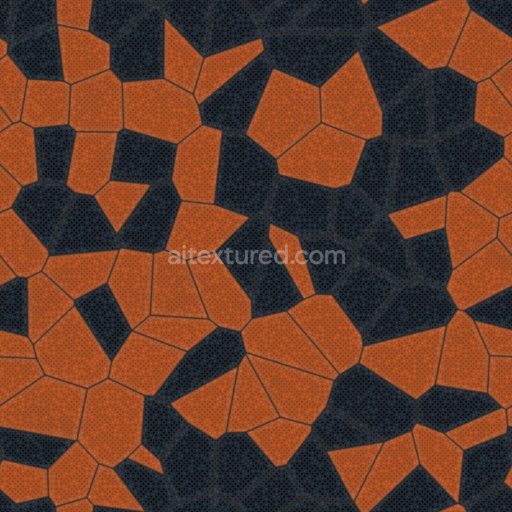
Patterned Acrylic Seamless Texture
Seamless texture (tileable) · PNG, WEBP, PBR ZIP. License: AITextured Free Commercial License (FCL) v1.1. Free personal and commercial use. Raw resale, standalone redistribution, mirroring/scraping, competing asset packs, and AI/ML training are not allowed without written permission. Attribution is not required, but appreciated..

| ID | stylized-plastic-seamless-texture |
|---|---|
| Category | Plastic |
| Formats | PNG, WEBP, PBR ZIP |
| Size | 1k (1024x1024px), 2k (2048x2048px), 4k (4096x4096px), 8k (8192x8192px) |
| Color | sRGB |
| Tileable | Yes |
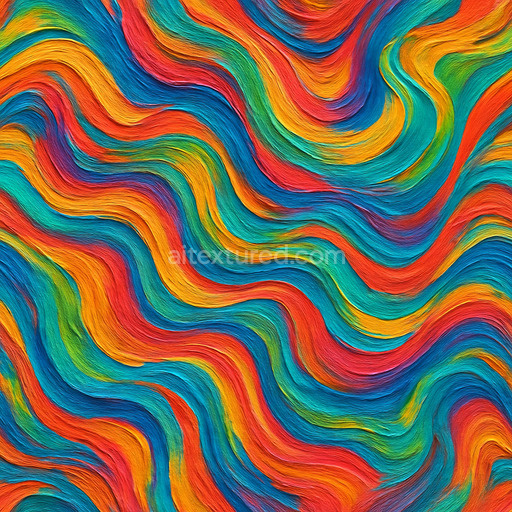
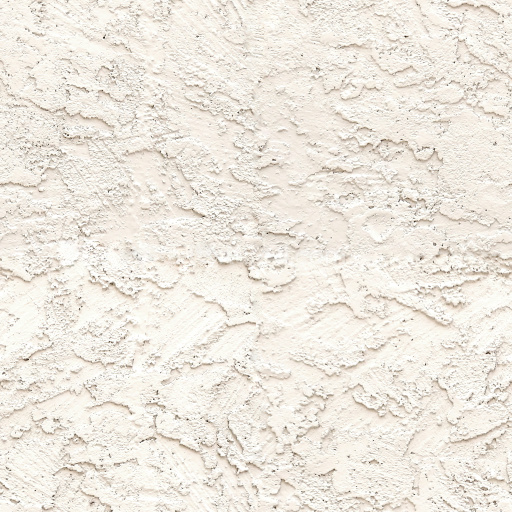
The Stylized Plastic Seamless Texture is a meticulously crafted AI-generated tileable stylized plastic seamless texture designed to enhance and accelerate your plastic material workflows. This high-resolution texture available up to 8K features a clean repeatable pattern that scales elegantly across large surfaces without visible seams making it ideal for real-time scenes cinematic renders level dressing and detailed material studies. The texture’s base substrate simulates a polymer plastic with a smooth yet subtly varied surface finish incorporating finely controlled noise that mimics natural imperfections and wear. Colorants are represented through soft uniform pigments that provide a consistent and believable hue without overpowering the material’s stylized appearance. The texture’s internal composition suggests a low-porosity homogenous plastic matrix with minimal grain orientation creating a visually appealing polished surface that reacts realistically under varied lighting conditions.
In PBR workflows the stylized plastic seamless texture excels by providing detailed BaseColor/Albedo channels that capture the subtle dye distribution and soft tonal shifts typical of colored plastics. The Normal map introduces delicate surface undulations and fine grain details enhancing light interaction and adding depth to the otherwise smooth polymer base. Roughness maps are carefully balanced to represent a semi-gloss finish—neither too matte nor overly shiny—allowing for flexible adaptation to different lighting rigs and scene requirements. Metallic channels remain neutral given the non-metallic nature of plastic while Ambient Occlusion and Height maps contribute to realistic shadowing and slight surface displacement supporting nuanced parallax effects without harsh transitions. This combination ensures that the texture remains natural and believable while maintaining a stylized aesthetic suitable for diverse digital environments.
Designed for seamless integration this tileable stylized plastic seamless texture works effortlessly within popular 3D engines such as Blender Unreal Engine and Unity requiring minimal setup to achieve professional results. Its robust AI generation process guarantees crisp details and controlled noise which preserve visual fidelity even at extreme close-ups or when applied over expansive geometry. For optimal results it is recommended to adjust the roughness intensity to closely match your scene’s lighting rig enhancing material realism. Additionally careful UV scaling can help maintain pattern consistency without stretching while subtle height or parallax adjustments can add an extra layer of depth and immersion to your plastic surfaces.
The PBR texture stylized plastic seamless texture offers a highly detailed 3D preview that highlights the material's uniform plastic textures and stylized plastic seamless texture properties for realistic PBR rendering.
Import the texture maps into Blender with sRGB color space for albedo/base color and Non-Color for normal, roughness, metallic, AO, height, and ORM maps. Connect normal maps through a Normal Map node, then adjust UV scale with a Mapping node so the material repeats naturally on your model.
For the full step-by-step setup, see How to Use Seamless Textures in Blender. Browse related material examples in wood, concrete, and metal.
Yes. This texture is designed as a seamless tileable PBR material, so it can repeat across large surfaces without visible borders.
You can download PNG/WEBP versions and use 1K, 2K, 4K and 8K download options when available on the page.
Yes. The download options and engine-mapped ZIP workflow are designed for Blender, Unreal Engine, Unity Standard, URP and HDRP material pipelines.
Yes. The texture is available under the AITextured free commercial license. Review the license page for redistribution and AI-training restrictions.


Build, preview, and export seamless PBR materials. Generate full map sets from a single image, inspect them in a real-time WebGL viewer, and re-package maps for Unreal, Unity, and Blender—directly in your browser.
AI text-to-texture: type a prompt and get a seamless, tileable base image ready for PBR workflows (great starting point for materials).
Create a full PBR set (Normal, Roughness, AO, Metallic, etc.) from a single image. Seamless and tiling-friendly.
Instant WebGL viewer: inspect materials on a sphere, plane, and cube. Check tiling and lighting in real time.
Re-packages maps per engine: Unreal (BaseColor + ORM), Unity (Mask/MetallicSmoothness), Blender (separate channels).
PNG ↔ JPG ↔ SVG: fast convert, SVG rasterize, embed/trace options, quality & background controls.