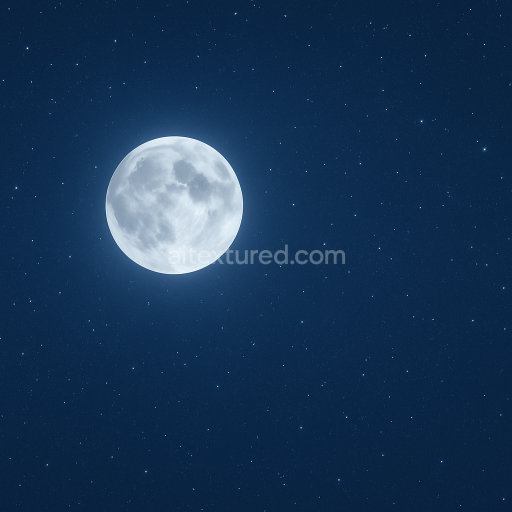
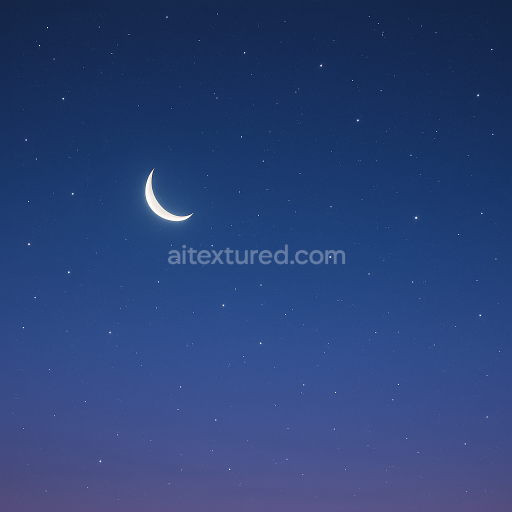
Seamless 8K PBR 3D texture of full moon night sky with clear starry background and subtle…
Seamless texture (tileable) · PNG, WEBP, PBR ZIP. License: AITextured Free Commercial License (FCL) v1.1. Free personal and commercial use. Raw resale, standalone redistribution, mirroring/scraping, competing asset packs, and AI/ML training are not allowed without written permission. Attribution is not required, but appreciated..

| ID | seamless-8k-pbr-3d-texture-of-night-starry-sky-with-milky-way-for-realistic-space-scenes |
|---|---|
| Category | Sky |
| Formats | PNG, WEBP, PBR ZIP |
| Size | 1k (1024x1024px), 2k (2048x2048px), 4k (4096x4096px), 8k (8192x8192px) |
| Color | sRGB |
| Tileable | Yes |
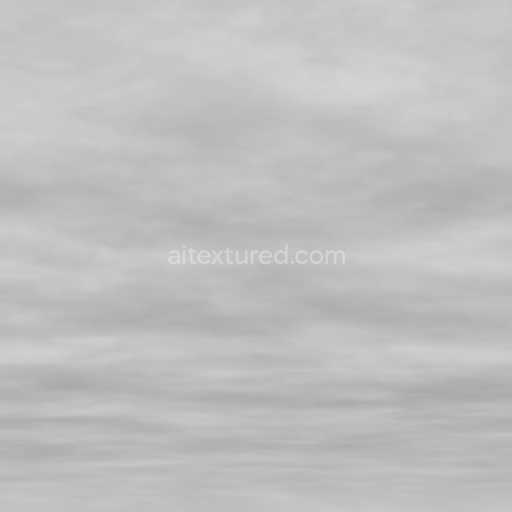
This seamless 8k PBR 3D texture presents a meticulously crafted depiction of a night sky characterized by a richly detailed starry expanse and the luminous band of the Milky Way galaxy. The material simulates the atmospheric substrate of clear nocturnal air which can be conceptually understood as a diffuse ethereal medium with minimal particulate matter allowing for high visibility of celestial elements. The texture's base layer or substrate is effectively a smooth matte surface that mimics the vast openness of space rendered through finely tuned BaseColor (Albedo) channels showcasing deep blues and subtle gradients of black and indigo. The star points and Milky Way glow are embedded as fine grain aggregates creating a natural scattering effect without sharp edges lending a soft yet crisp visual fidelity.
From a physical material perspective this sky texture can be analogized to a lightly diffused non-metallic surface with near-zero reflectivity confirming a very low Metallic value across the map. The Roughness channel is calibrated to high values to replicate the soft scattering of starlight through the Earth's atmosphere avoiding any polished or glossy reflections. The Normal map contributes subtle undulations and noise simulating atmospheric turbulence and slight variations in star brightness enhancing the three-dimensional illusion of depth without creating harsh geometric distortions. Ambient Occlusion is delicately applied to reinforce the contrast around denser star clusters and the Milky Way’s galactic core subtly enhancing perceived depth and volume in the sky dome geometry.
The Height or Displacement channel is utilized sparingly to suggest minimal depth variations in the Milky Way’s structure providing slight parallax shifts when viewed from different angles in real-time engines. This subtle relief effect adds realism without introducing excessive geometric complexity preserving performance in platforms such as Blender Unreal Engine and Unity. The texture’s surface finish is inherently matte and non-reflective matching the natural matte appearance of the night sky and ensuring compatibility with physically based rendering workflows. Colorants are digitally encoded to replicate true astronomical colors—cool whites faint yellows and soft blues—accurately reproducing the visual spectrum of stars and galactic dust clouds.
Designed at an exceptionally high resolution of 8k this texture ensures detailed clarity when applied to large sky dome geometries or panoramic backgrounds maintaining crispness even in close-up views or ultra-wide camera angles. For practical usage it is recommended to carefully adjust UV scaling to prevent pixelation and maintain star sharpness especially in immersive VR or first-person space simulation environments. Additionally fine-tuning the Roughness parameter can help balance the scattering effect providing either a softer haze or a clearer starry appearance depending on scene lighting conditions. Blending slight normal and height variations can further enhance the texture’s depth perception contributing to a more immersive and photorealistic night sky experience across all major 3D platforms.
Import the texture maps into Blender with sRGB color space for albedo/base color and Non-Color for normal, roughness, metallic, AO, height, and ORM maps. Connect normal maps through a Normal Map node, then adjust UV scale with a Mapping node so the material repeats naturally on your model.
For the full step-by-step setup, see How to Use Seamless Textures in Blender. Browse related material examples in wood, concrete, and metal.
Yes. This texture is designed as a seamless tileable PBR material, so it can repeat across large surfaces without visible borders.
You can download PNG/WEBP versions and use 1K, 2K, 4K and 8K download options when available on the page.
Yes. The download options and engine-mapped ZIP workflow are designed for Blender, Unreal Engine, Unity Standard, URP and HDRP material pipelines.
Yes. The texture is available under the AITextured free commercial license. Review the license page for redistribution and AI-training restrictions.

Build, preview, and export seamless PBR materials. Generate full map sets from a single image, inspect them in a real-time WebGL viewer, and re-package maps for Unreal, Unity, and Blender—directly in your browser.
AI text-to-texture: type a prompt and get a seamless, tileable base image ready for PBR workflows (great starting point for materials).
Create a full PBR set (Normal, Roughness, AO, Metallic, etc.) from a single image. Seamless and tiling-friendly.
Instant WebGL viewer: inspect materials on a sphere, plane, and cube. Check tiling and lighting in real time.
Re-packages maps per engine: Unreal (BaseColor + ORM), Unity (Mask/MetallicSmoothness), Blender (separate channels).
PNG ↔ JPG ↔ SVG: fast convert, SVG rasterize, embed/trace options, quality & background controls.