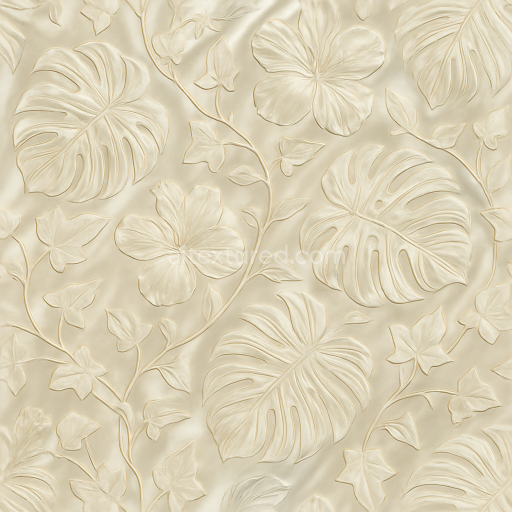
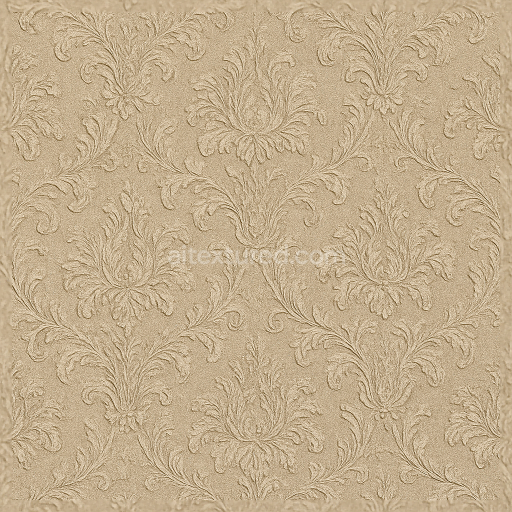
Tropical Ivy Leaves Wallpaper With Embossed Silk And Glossy Satin Finish
Seamless texture (tileable) · PNG, WEBP, PBR ZIP. License: AITextured Free Commercial License (FCL) v1.1. Free personal and commercial use. Raw resale, standalone redistribution, mirroring/scraping, competing asset packs, and AI/ML training are not allowed without written permission. Attribution is not required, but appreciated..

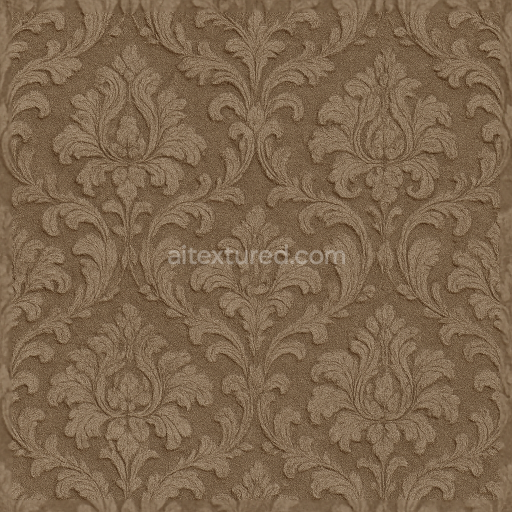
| ID | seamless-3d-texture-pbr-8k-wallpaper-with-vintage-floral-damask-embossed-design |
|---|---|
| Category | Wallpaper |
| Formats | PNG, WEBP, PBR ZIP |
| Size | 1k (1024x1024px), 2k (2048x2048px), 4k (4096x4096px), 8k (8192x8192px) |
| Color | sRGB |
| Tileable | Yes |
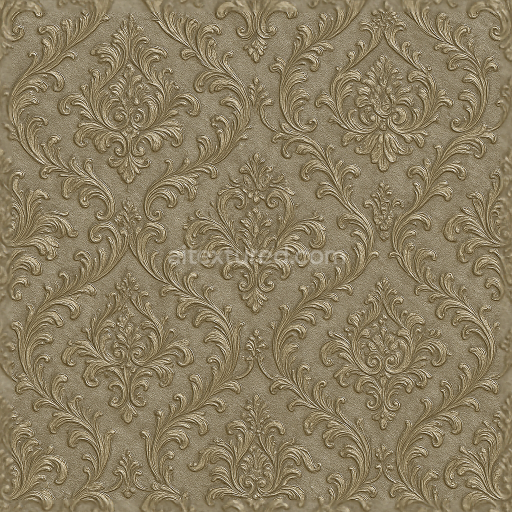
This seamless 3D texture presents a vintage floral damask wallpaper rendered in pristine 8K resolution offering exceptional detail and fidelity for professional use in Blender Unreal Engine and Unity. The base material emulates a woven textile substrate combining natural fibers like cotton or linen with traditional paper backing to replicate the authentic feel of classic wallpaper. The embossed damask pattern is formed through a raised geometric relief creating a tactile surface that enhances depth and shadowing. This raised design is carefully mapped in the Height and Normal channels to simulate the intricate contours and curvature of the floral motifs without additional geometry preserving performance while maximizing visual realism.
The wallpaper’s structural composition consists of a fibrous weave substrate bonded with a matte non-reflective finish that minimizes glare and emphasizes surface texture. Pigments used in the BaseColor channel maintain a tone-on-tone palette contributing to a subtle elegant contrast that reinforces the vintage appeal without overwhelming the design. The Roughness map reflects the matte finish by maintaining a relatively high roughness value ensuring soft light diffusion and reducing specular highlights. The Metallic channel is kept near zero accurately representing the non-metallic nature of wallpaper materials. Ambient Occlusion enhances the perception of depth within the embossed areas adding natural shadowing that grounds the pattern visually.
The texture’s porosity and surface detail mimic the softness of woven fibers combined with the slight irregularities of aged paper which subtly absorb and scatter light. This effect is critical for realistic renderings in architectural visualization and interior design applications. The embossed damask pattern follows a repetitive geometric form with elegant curves and symmetrical floral elements seamlessly tiled to allow for licensed UV scaling. This ensures flexibility in application whether covering expansive walls or smaller accent panels. The Normal and Height maps are calibrated to work harmoniously enabling artists to fine-tune the parallax effect or blend normals for enhanced surface complexity based on project needs.
For practical use adjusting the roughness channel can help tailor the matte finish to different lighting environments from soft diffuse interiors to brighter spaces while maintaining the vintage textile feel. When scaling the UVs it is advisable to keep proportions consistent to preserve the integrity of the damask motifs and avoid distortion. The texture’s readiness for real-time engines and offline renderers makes it a versatile choice for detailed interior scenes requiring historically inspired wall coverings with high fidelity and realistic material responses.
Import the texture maps into Blender with sRGB color space for albedo/base color and Non-Color for normal, roughness, metallic, AO, height, and ORM maps. Connect normal maps through a Normal Map node, then adjust UV scale with a Mapping node so the material repeats naturally on your model.
For the full step-by-step setup, see How to Use Seamless Textures in Blender. Browse related material examples in wood, concrete, and metal.
Yes. This texture is designed as a seamless tileable PBR material, so it can repeat across large surfaces without visible borders.
You can download PNG/WEBP versions and use 1K, 2K, 4K and 8K download options when available on the page.
Yes. The download options and engine-mapped ZIP workflow are designed for Blender, Unreal Engine, Unity Standard, URP and HDRP material pipelines.
Yes. The texture is available under the AITextured free commercial license. Review the license page for redistribution and AI-training restrictions.


Generate, preview, and export seamless PBR materials for Blender, Unity, and Unreal Engine—directly in your browser.
AI text-to-texture: type a prompt and get a seamless, tileable base image ready for PBR workflows (great starting point for materials).
Create a full PBR set (Normal, Roughness, AO, Metallic, etc.) from a single image. Seamless and tiling-friendly.
Instant WebGL viewer: inspect materials on a sphere, plane, and cube. Check tiling and lighting in real time.
Re-packages maps per engine: Unreal (BaseColor + ORM), Unity (Mask/MetallicSmoothness), Blender (separate channels).
PNG ↔ JPG ↔ SVG: fast convert, SVG rasterize, embed/trace options, quality & background controls.