
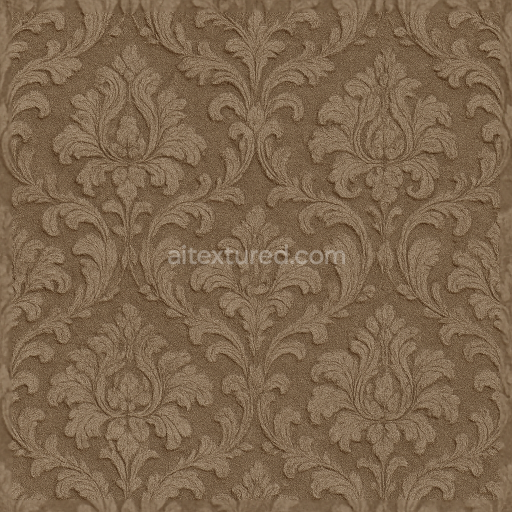
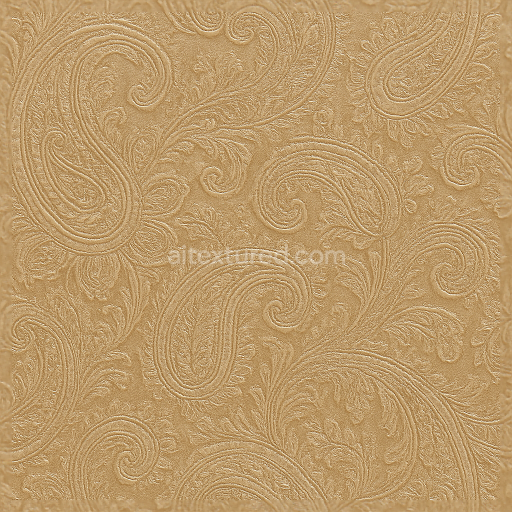
Wallpaper With Paisley Brocade Metallic Sheen Finish
Seamless texture (tileable) · PNG, WEBP, PBR ZIP. License: AITextured Free Commercial License (FCL) v1.1. Free personal and commercial use. Raw resale, standalone redistribution, mirroring/scraping, competing asset packs, and AI/ML training are not allowed without written permission. Attribution is not required, but appreciated..

| ID | seamless-3d-texture-pbr-8k-wallpaper-with-tribal-ikat-woven-fibers-and-cotton-weave |
|---|---|
| Category | Wallpaper |
| Formats | PNG, WEBP, PBR ZIP |
| Size | 1k (1024x1024px), 2k (2048x2048px), 4k (4096x4096px), 8k (8192x8192px) |
| Color | sRGB |
| Tileable | Yes |
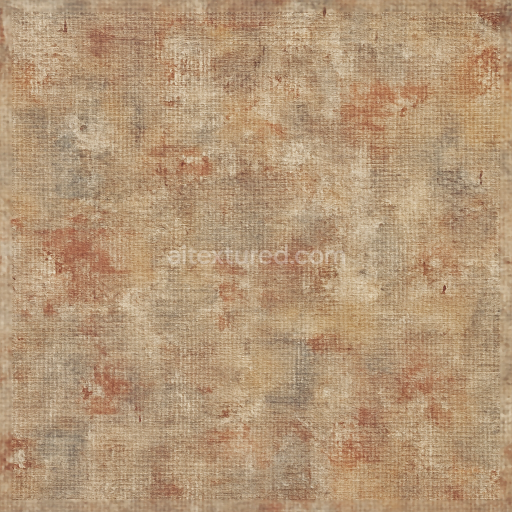
This seamless 3D texture features a detailed tribal ikat pattern rendered through an intricate arrangement of woven fibers and cotton weave perfectly emulating the tactile qualities of natural textiles. The base material is a finely woven cotton substrate characterized by a tight interlaced fiber structure that forms the foundation of the ikat design. The fibers exhibit subtle variations in thickness and twist creating authentic surface irregularities that contribute to the overall realism. These organic cotton fibers are bound together with a minimal natural adhesive simulating traditional weaving techniques without compromising the textile’s soft yet durable texture. The surface finish maintains a matte slightly brushed appearance highlighting the fibrous texture without introducing unwanted gloss which supports a rustic handcrafted aesthetic.
The geometric form of this texture is defined by the repetitive yet complex ikat pattern which integrates angular and flowing motifs characteristic of tribal design. The weave structure is visually reinforced by the interplay of warp and weft threads enhancing the depth and dimensionality of the surface. This composition is precisely captured through physically based rendering (PBR) channels: the BaseColor (Albedo) channel maps the natural cotton hues and dyed ikat color variations while the Normal map emphasizes the raised fibers and subtle thread contours. The Roughness map controls the matte fibrous surface feel avoiding any metallic reflections which are absent in this organic material. Ambient Occlusion enriches shadow details within the weave intersections and Height/Displacement maps provide realistic depth to the fabric’s raised patterns and thread overlaps essential for close-up renders and parallax effects.
Rendered at 8K resolution this texture ensures exceptional clarity and detail making it suitable for high-end visualizations in Blender Unreal Engine and Unity. The high resolution preserves fine fiber details and subtle color transitions allowing for immersive close-up views without pixelation. Its seamless repeat design enables flawless tiling across large surfaces such as accent walls or fabric simulations in interior scenes. The texture’s porosity and slight surface roughness are ideal for environments requiring natural light diffusion and soft shadows enhancing realism in virtual spaces.
For practical application when integrating this texture into 3D projects it is advisable to carefully adjust the UV scale to maintain the authentic size and spacing of the woven fibers and ikat motifs preventing unnatural stretching. Additionally fine-tuning the roughness map can help balance the matte appearance with slight specular highlights typical of cotton fibers under different lighting conditions. Combining the Height map subtly with the Normal map can improve the perception of depth without causing geometry artifacts especially when used with parallax or displacement techniques in real-time engines.
Import the texture maps into Blender with sRGB color space for albedo/base color and Non-Color for normal, roughness, metallic, AO, height, and ORM maps. Connect normal maps through a Normal Map node, then adjust UV scale with a Mapping node so the material repeats naturally on your model.
For the full step-by-step setup, see How to Use Seamless Textures in Blender. Browse related material examples in wood, concrete, and metal.
Yes. This texture is designed as a seamless tileable PBR material, so it can repeat across large surfaces without visible borders.
You can download PNG/WEBP versions and use 1K, 2K, 4K and 8K download options when available on the page.
Yes. The download options and engine-mapped ZIP workflow are designed for Blender, Unreal Engine, Unity Standard, URP and HDRP material pipelines.
Yes. The texture is available under the AITextured free commercial license. Review the license page for redistribution and AI-training restrictions.


Generate, preview, and export seamless PBR materials for Blender, Unity, and Unreal Engine—directly in your browser.
AI text-to-texture: type a prompt and get a seamless, tileable base image ready for PBR workflows (great starting point for materials).
Create a full PBR set (Normal, Roughness, AO, Metallic, etc.) from a single image. Seamless and tiling-friendly.
Instant WebGL viewer: inspect materials on a sphere, plane, and cube. Check tiling and lighting in real time.
Re-packages maps per engine: Unreal (BaseColor + ORM), Unity (Mask/MetallicSmoothness), Blender (separate channels).
PNG ↔ JPG ↔ SVG: fast convert, SVG rasterize, embed/trace options, quality & background controls.