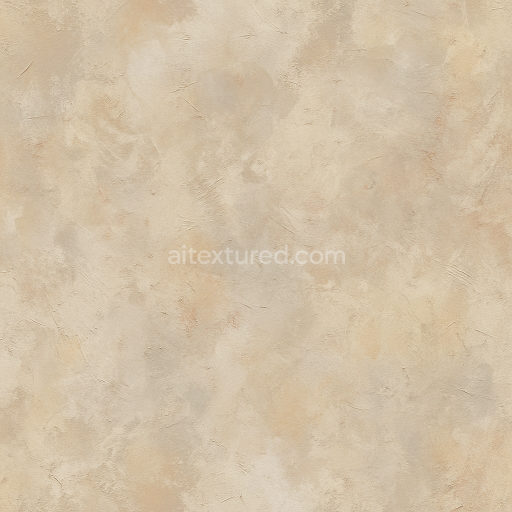
Abstract Fresco Wallpaper With Textured Plaster Finish
Seamless texture (tileable) · PNG, WEBP, PBR ZIP. License: AITextured Free Commercial License (FCL) v1.1. Free personal and commercial use. Raw resale, standalone redistribution, mirroring/scraping, competing asset packs, and AI/ML training are not allowed without written permission. Attribution is not required, but appreciated..

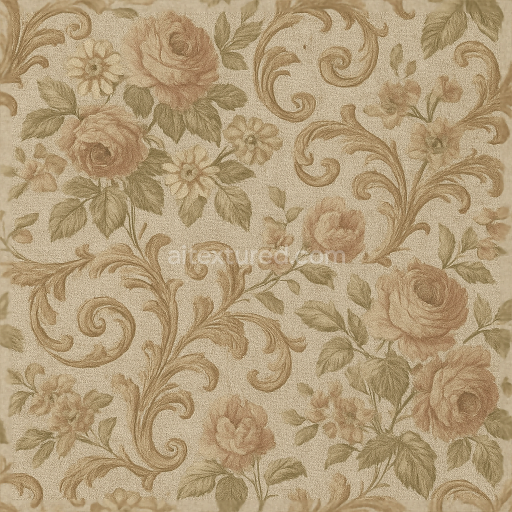
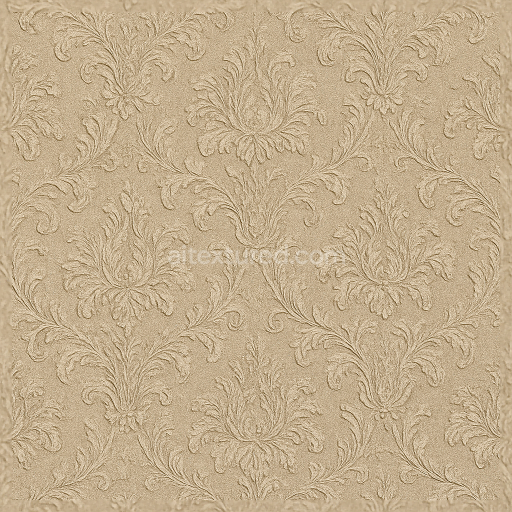
| ID | seamless-3d-texture-pbr-8k-classic-floral-damask-wallpaper-with-embossed-raised-velvet-weave-and-muted-pastel-tones |
|---|---|
| Category | Wallpaper |
| Formats | PNG, WEBP, PBR ZIP |
| Size | 1k (1024x1024px), 2k (2048x2048px), 4k (4096x4096px), 8k (8192x8192px) |
| Color | sRGB |
| Tileable | Yes |
This seamless 3D texture represents a classic floral damask wallpaper rendered at an impressive 8K resolution optimized for physically based rendering (PBR) workflows. The base material simulates a high-quality textile substrate specifically a woven velvet fabric which is characterized by its dense fiber composition and slightly raised pile. The textile weave is tightly constructed with the embossed floral damask pattern formed through a combination of raised velvet threads and recessed background areas giving the surface a pronounced tactile relief. This interplay between elevated and indented sections creates a subtle depth that translates into the Height and Normal maps essential for realistic light interaction in engines such as Blender Unreal Engine and Unity.
The wallpaper’s composition suggests a fiber-rich base where cellulose or synthetic fibers serve as the primary aggregate bound by a natural or acrylic adhesive binder. The weave structure is intricate and layered allowing for a soft velvet texture that is both plush and durable. The surface finish mimics the gentle sheen typical of velvet exhibiting a low-metallicity value and moderate roughness to reflect the fabric’s matte yet slightly lustrous quality. The muted pastel tones are achieved through carefully calibrated pigments in the Base Color (Albedo) map which maintain subtle color gradations without saturation enhancing the wallpaper’s understated elegance. Ambient Occlusion contributes to emphasizing the folds and raised elements by simulating soft shadows within the embossed pattern.
From a technical perspective this texture integrates multiple PBR channels for realistic rendering: the BaseColor channel carries the soft pastel hues; the Normal map encodes the velvet weave’s embossed details; the Roughness map controls the surface’s semi-matte finish balancing light scattering and specular highlights; the Metallic map remains near zero due to the non-metallic fabric nature. The Height or Displacement map captures the raised damask pattern’s form allowing for parallax or tessellation effects that enhance realism especially in close-up views. Ambient Occlusion provides depth cues that anchor the pattern visually to the wall substrate making it suitable for sophisticated interior visualizations.
Designed for seamless tiling this wallpaper texture allows for flawless repetition across large surfaces without visible seams making it ideal for expansive wall treatments in virtual environments or architectural renders. When using this texture it is recommended to carefully adjust the UV scale to maintain the pattern’s classic proportions and avoid distortion. Additionally fine-tuning the Roughness map can help simulate varying velvet pile conditions from softer matte finishes to slightly polished looks. Blending the Height and Normal maps judiciously enhances the embossed effect without causing excessive geometric distortion providing a balanced and realistic representation of the ornate floral damask velvet weave.
Import the texture maps into Blender with sRGB color space for albedo/base color and Non-Color for normal, roughness, metallic, AO, height, and ORM maps. Connect normal maps through a Normal Map node, then adjust UV scale with a Mapping node so the material repeats naturally on your model.
For the full step-by-step setup, see How to Use Seamless Textures in Blender. Browse related material examples in wood, concrete, and metal.
Yes. This texture is designed as a seamless tileable PBR material, so it can repeat across large surfaces without visible borders.
You can download PNG/WEBP versions and use 1K, 2K, 4K and 8K download options when available on the page.
Yes. The download options and engine-mapped ZIP workflow are designed for Blender, Unreal Engine, Unity Standard, URP and HDRP material pipelines.
Yes. The texture is available under the AITextured free commercial license. Review the license page for redistribution and AI-training restrictions.


Generate, preview, and export seamless PBR materials for Blender, Unity, and Unreal Engine—directly in your browser.
AI text-to-texture: type a prompt and get a seamless, tileable base image ready for PBR workflows (great starting point for materials).
Create a full PBR set (Normal, Roughness, AO, Metallic, etc.) from a single image. Seamless and tiling-friendly.
Instant WebGL viewer: inspect materials on a sphere, plane, and cube. Check tiling and lighting in real time.
Re-packages maps per engine: Unreal (BaseColor + ORM), Unity (Mask/MetallicSmoothness), Blender (separate channels).
PNG ↔ JPG ↔ SVG: fast convert, SVG rasterize, embed/trace options, quality & background controls.