
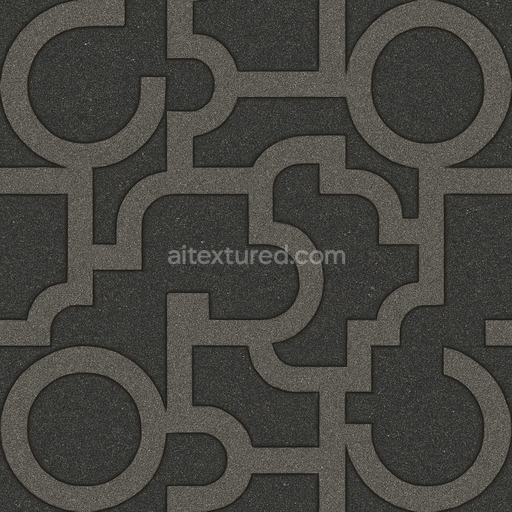
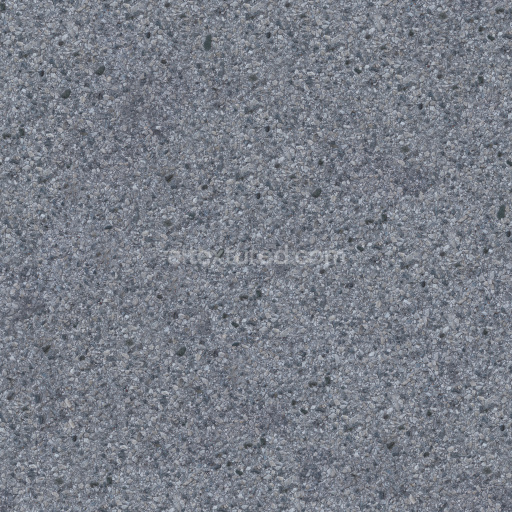
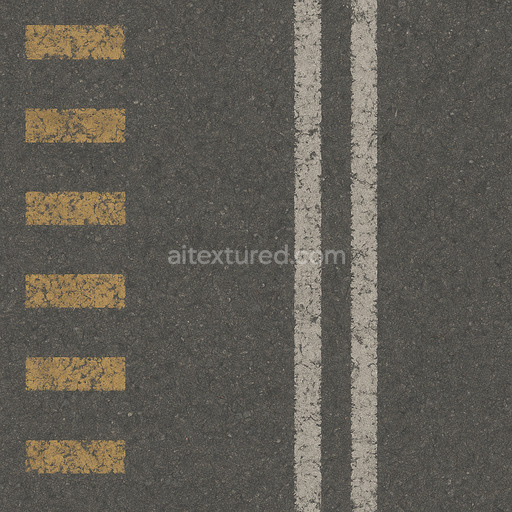
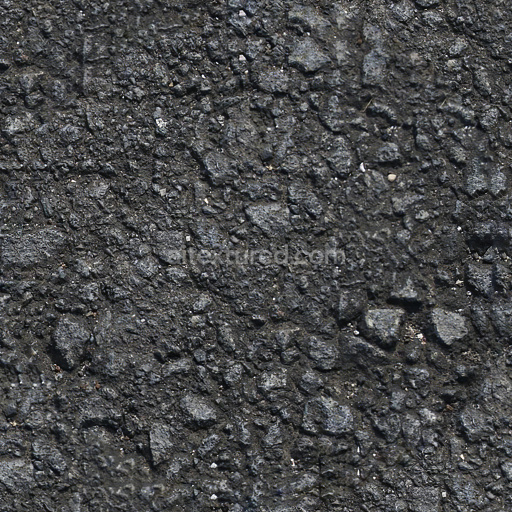
Decorative Asphalt Seamless Texture
Seamless texture (tileable) · PNG, WEBP, PBR ZIP. License: AITextured Free Commercial License (FCL) v1.1. Free personal and commercial use. Raw resale, standalone redistribution, mirroring/scraping, competing asset packs, and AI/ML training are not allowed without written permission. Attribution is not required, but appreciated..

| ID | shiny-weathered-asphalt-texture-seamless |
|---|---|
| Category | Asphalt |
| Formats | PNG, WEBP, PBR ZIP |
| Size | 1k (1024x1024px), 2k (2048x2048px), 4k (4096x4096px), 8k (8192x8192px) |
| Color | sRGB |
| Tileable | Yes |
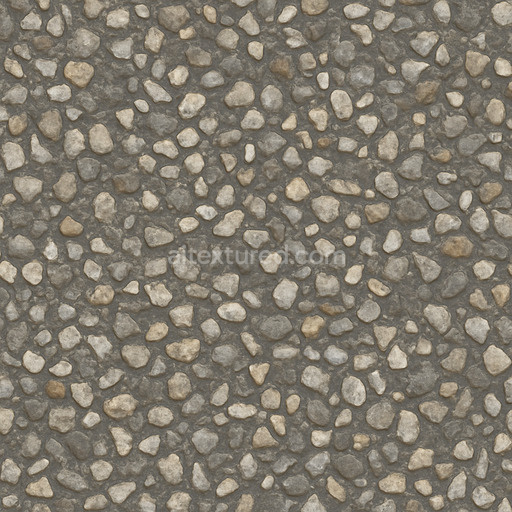
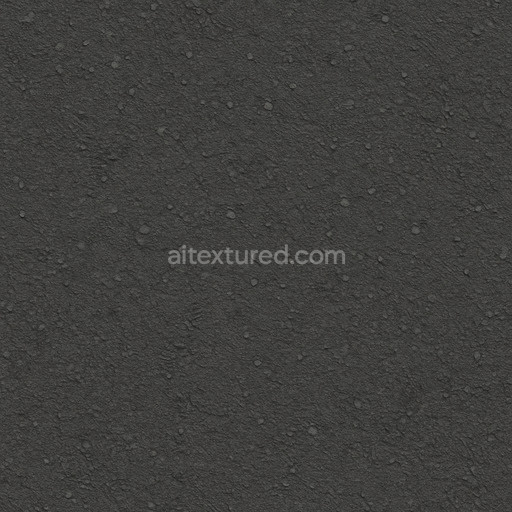
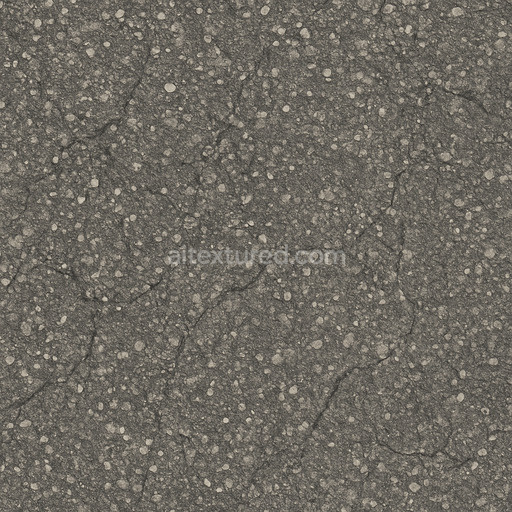
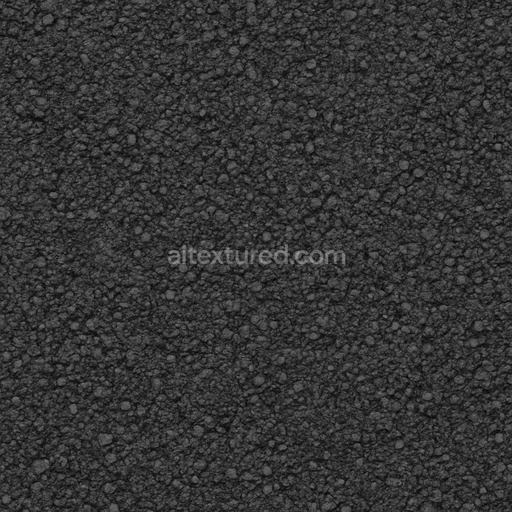
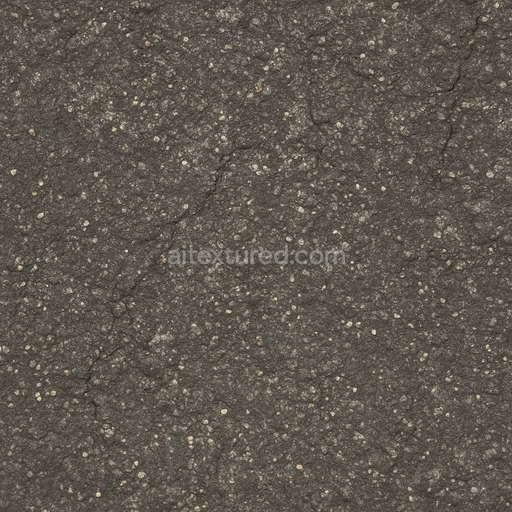
This shiny weathered asphalt texture seamless high resolution up to 8K expertly captures the intricate material composition and surface characteristics of aged asphalt with exceptional realism. The base substrate is primarily composed of mineral aggregates including crushed stone and gravel tightly bound by a polymeric bitumen binder that ensures structural durability and cohesion. Over time natural weathering processes introduce subtle porosity micro-cracks and fine fissures across the surface while the shiny finish reflects slight polishing effects caused by environmental abrasion and wear. The color palette showcases deep charcoal grays intermingled with muted browns and occasional faded oxide layers representing pigment alterations from oxidation and prolonged UV exposure. This complex interplay of mineral grains binder sheen and weathering nuances is meticulously rendered to deliver a seamless shiny weathered asphalt texture seamless high resolution up to 8K that is both visually compelling and physically plausible.
In terms of PBR texture mapping the BaseColor or Albedo map portrays the nuanced variations in color from dark mineral aggregates to lighter binder regions and weathered spots providing essential visual depth. The Normal map encodes fine surface details such as cracks aggregate edges and subtle undulations enhancing realism when illuminated dynamically. Roughness maps balance glossy polished areas with rough matte weathered zones allowing reflections and highlights to respond naturally to environmental lighting conditions. The Metallic channel remains minimal or nonexistent accurately reflecting asphalt’s non-metallic nature while Ambient Occlusion adds depth to crevices and cracks heightening the three-dimensional perception of the surface. Height or Displacement maps further define surface relief enabling enhanced parallax and realistic contouring in compatible 3D engines.
Optimized for demanding workflows in Blender Unreal Engine and Unity this tileable shiny weathered asphalt texture seamless high resolution up to 8K supports large-scale applications without visible seams or pixelation. Its ultra-high resolution guarantees crisp detail retention even during close-up views or detailed 3D previews making it ideal for architectural visualizations game environments product mockups and interior staging projects. For best results it is recommended to adjust the roughness intensity carefully to match your scene’s lighting setup and to fine-tune the UV scale to maintain realistic aggregate proportions. This ensures the material integrates naturally and convincingly within any rendered environment delivering a professional-grade asphalt texture experience.
Import the texture maps into Blender with sRGB color space for albedo/base color and Non-Color for normal, roughness, metallic, AO, height, and ORM maps. Connect normal maps through a Normal Map node, then adjust UV scale with a Mapping node so the material repeats naturally on your model.
For the full step-by-step setup, see How to Use Seamless Textures in Blender. Browse related material examples in wood, concrete, and metal.
Yes. This texture is designed as a seamless tileable PBR material, so it can repeat across large surfaces without visible borders.
You can download PNG/WEBP versions and use 1K, 2K, 4K and 8K download options when available on the page.
Yes. The download options and engine-mapped ZIP workflow are designed for Blender, Unreal Engine, Unity Standard, URP and HDRP material pipelines.
Yes. The texture is available under the AITextured free commercial license. Review the license page for redistribution and AI-training restrictions.
Generate, preview, and export seamless PBR materials for Blender, Unity, and Unreal Engine—directly in your browser.
AI text-to-texture: type a prompt and get a seamless, tileable base image ready for PBR workflows (great starting point for materials).
Create a full PBR set (Normal, Roughness, AO, Metallic, etc.) from a single image. Seamless and tiling-friendly.
Instant WebGL viewer: inspect materials on a sphere, plane, and cube. Check tiling and lighting in real time.
Re-packages maps per engine: Unreal (BaseColor + ORM), Unity (Mask/MetallicSmoothness), Blender (separate channels).
PNG ↔ JPG ↔ SVG: fast convert, SVG rasterize, embed/trace options, quality & background controls.