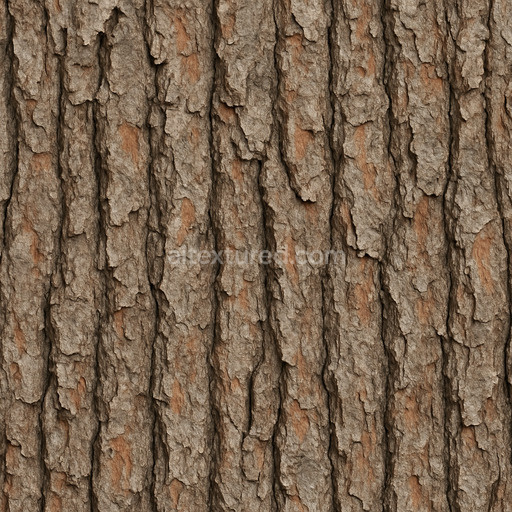
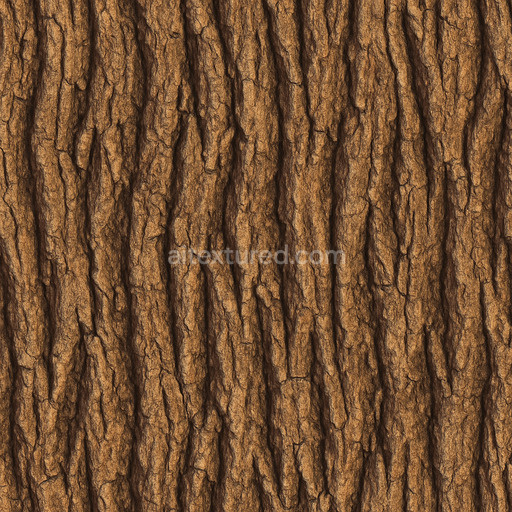
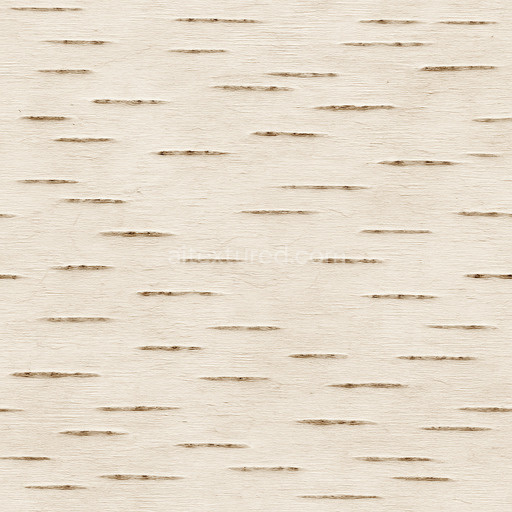
Tree Bark Wood - Bark Wood Forest Nature Tree Bark
Seamless texture (tileable) · PNG, WEBP, PBR ZIP. License: AITextured Free Commercial License (FCL) v1.1. Free personal and commercial use. Raw resale, standalone redistribution, mirroring/scraping, competing asset packs, and AI/ML training are not allowed without written permission. Attribution is not required, but appreciated..

| ID | aged-birch-bark-texture-seamless |
|---|---|
| Category | Bark |
| Formats | PNG, WEBP, PBR ZIP |
| Size | 1k (1024x1024px), 2k (2048x2048px), 4k (4096x4096px), 8k (8192x8192px) |
| Color | sRGB |
| Tileable | Yes |
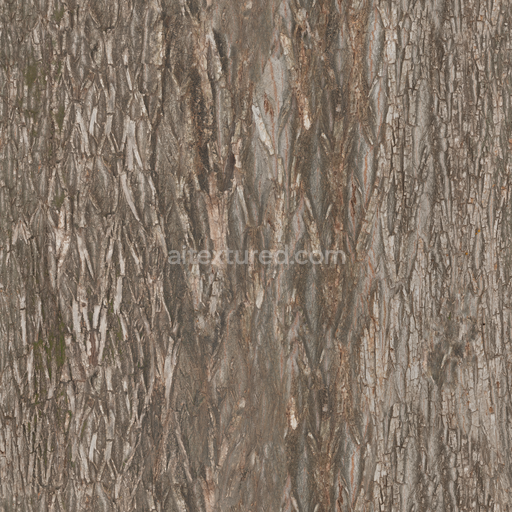
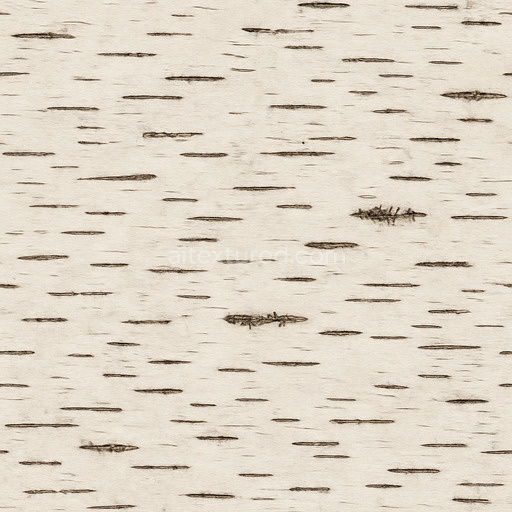
The aged birch bark texture seamless high resolution up to 8K is an intricately detailed AI-generated material that authentically captures the natural complexity and organic qualities of weathered birch bark. This texture reflects the unique composition of birch bark as an organic substrate composed of thin fibrous layers with distinct grain orientation that reveal the tree’s growth patterns and cellular structure. Over time environmental factors such as moisture sunlight and temperature fluctuations contribute to the bark’s porous weathered surface resulting in a rich interplay between roughened cracked areas and smoother worn patches. The color palette spans pale creams soft browns and muted grays simulating pigment variations caused by natural oxidation and subtle fungal growth. These attributes are directly represented across the PBR channels: the BaseColor/Albedo map conveys the subtle nuanced color shifts and layered pigments while the Normal map enhances the fine grain and micro-structural details of the fibrous bark surface. The Roughness channel highlights contrasts between polished and rough zones enabling realistic light scattering whereas the Metallic channel remains minimal reflecting the bark’s purely organic non-metallic nature. Ambient Occlusion deepens crevices and folds for enhanced texture depth and the Height/Displacement map adds convincing surface relief without artificial sharpness reinforcing the tactile feel of the bark.
Designed for seamless tileable application this seamless aged birch bark texture seamless high resolution up to 8K integrates effortlessly with industry-standard 3D software such as Blender Unreal Engine and Unity. Its ultra-high resolution of up to 8K ensures exceptional detail and visual fidelity across both small-scale assets and expansive environmental surfaces without visible seams or distortion. The AI-driven generation process preserves the bark’s natural irregularities and structural consistency capturing the authentic tactile sensation and visual richness of aged bark under diverse lighting conditions. This makes the tileable aged birch bark texture seamless high resolution up to 8K an ideal resource for game developers architectural visualization artists and concept designers seeking to enrich their projects with realistic bark textures that deliver depth and realism in any 3D scene or cinematic environment.
For optimal results when integrating this texture aged birch bark texture seamless high resolution up to 8K into your workflow it is recommended to carefully adjust the UV scale to maintain sharpness while minimizing repetitive patterns ensuring the natural grain remains crisp without appearing tiled. Fine-tuning the roughness map can further emphasize the weathered aged character of the bark allowing highlights and shadows to interact authentically with the surface micro-variations. Additionally subtle use of the height or parallax displacement map can enhance perceived surface depth and dimensionality providing convincing breakup and tactile realism without introducing excessive noise. This comprehensive texture set complete with BaseColor Normal Roughness Metallic Ambient Occlusion and Height/Displacement channels offers a versatile and reliable solution for achieving lifelike birch bark surfaces that perform consistently across a wide range of rendering engines and project requirements supporting high-detail visualization and realistic material representation.
Import the texture maps into Blender with sRGB color space for albedo/base color and Non-Color for normal, roughness, metallic, AO, height, and ORM maps. Connect normal maps through a Normal Map node, then adjust UV scale with a Mapping node so the material repeats naturally on your model.
For the full step-by-step setup, see How to Use Seamless Textures in Blender. Browse related material examples in wood, concrete, and metal.
Yes. This texture is designed as a seamless tileable PBR material, so it can repeat across large surfaces without visible borders.
You can download PNG/WEBP versions and use 1K, 2K, 4K and 8K download options when available on the page.
Yes. The download options and engine-mapped ZIP workflow are designed for Blender, Unreal Engine, Unity Standard, URP and HDRP material pipelines.
Yes. The texture is available under the AITextured free commercial license. Review the license page for redistribution and AI-training restrictions.


Build, preview, and export seamless PBR materials. Generate full map sets from a single image, inspect them in a real-time WebGL viewer, and re-package maps for Unreal, Unity, and Blender—directly in your browser.
AI text-to-texture: type a prompt and get a seamless, tileable base image ready for PBR workflows (great starting point for materials).
Create a full PBR set (Normal, Roughness, AO, Metallic, etc.) from a single image. Seamless and tiling-friendly.
Instant WebGL viewer: inspect materials on a sphere, plane, and cube. Check tiling and lighting in real time.
Re-packages maps per engine: Unreal (BaseColor + ORM), Unity (Mask/MetallicSmoothness), Blender (separate channels).
PNG ↔ JPG ↔ SVG: fast convert, SVG rasterize, embed/trace options, quality & background controls.