Versatile Seamless Fabric Textures Collection
Seamless texture (tileable) · PNG, WEBP, PBR ZIP. License: AITextured Free Commercial License (FCL) v1.1. Free personal and commercial use. Raw resale, standalone redistribution, mirroring/scraping, competing asset packs, and AI/ML training are not allowed without written permission. Attribution is not required, but appreciated..

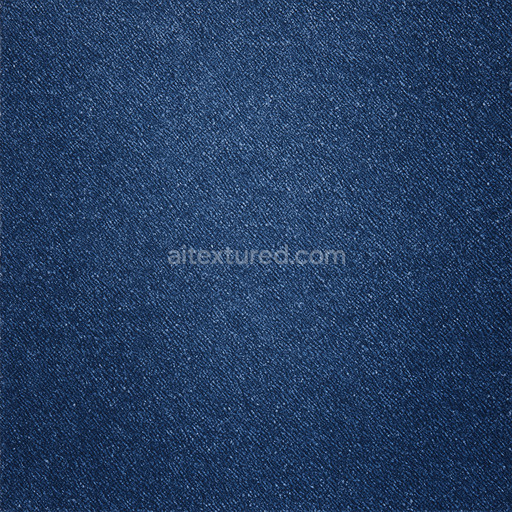
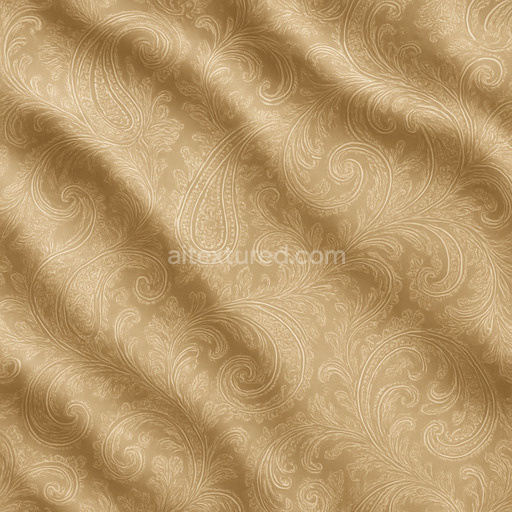
| ID | archviz-cloth-clothes-fabric-nylon-substance-designer-x2 |
|---|---|
| Category | Fabric |
| Formats | PNG, WEBP, PBR ZIP |
| Size | 1k (1024x1024px), 2k (2048x2048px), 4k (4096x4096px), 8k (8192x8192px) |
| Color | sRGB |
| Tileable | Yes |
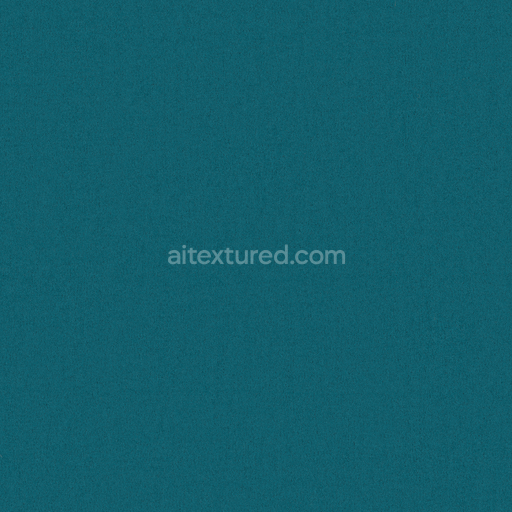
This Archviz Cloth Clothes Fabric Nylon Substance Designer texture is meticulously crafted to provide a high-quality seamless PBR material tailored for physically based rendering workflows in architectural visualization game engines and both real-time and offline renderers. The fabric’s base substrate consists predominantly of tightly woven nylon fibers—a synthetic polymer celebrated for its exceptional durability smooth finish and resilience against wear and environmental factors. These fine fibers are interlaced with a balanced grain orientation resulting in a subtle yet consistent weave pattern that creates natural surface porosity. This intricate fiber arrangement allows for realistic light interaction producing nuanced shadowing and depth that greatly enhance the visual fidelity of cloth and textile simulations in 3D environments. The fabric’s structural integrity is reinforced with carefully integrated binders and adhesives which maintain flexibility and softness while ensuring the nylon fibers remain securely bonded under various deformation and stress conditions typical in clothing and upholstery applications. The surface finish exhibits a gentle satin sheen that reflects the smooth modern aesthetic characteristic of premium synthetic fabrics with synthetic dyes applied uniformly to achieve stable true-to-life coloration represented accurately in the BaseColor/Albedo channel.*
Within the comprehensive PBR texture set all maps are provided at an impressive 8K resolution ensuring crisp detail even when rendered in large-scale architectural scenes or close-up fabric views. The Normal map expertly captures the fine weave and fiber relief adding tangible surface depth without increasing polygon complexity. Roughness values are precisely calibrated to reflect the semi-matte finish typical of nylon fabric balancing subtle light diffusion with delicate specular highlights that convey a tactile smooth surface. The Metallic map remains neutral consistent with the non-metallic nature of textile fibers while the Ambient Occlusion map emphasizes micro shadows within the weave’s interstices enhancing realism in fabric folds and creases. Height and Displacement maps accurately depict raised fiber patterns and gentle surface undulations making this texture ideal for advanced parallax and tessellation effects in popular engines such as Unreal and Unity. The entire set is optimized for seamless integration and color space accuracy in Blender and other PBR-compliant renderers ensuring consistent gamma response and lighting fidelity across platforms.*
For optimal results it is recommended to carefully adjust the UV scale to correspond with the garment or furniture model’s proportions as nylon’s detailed weave pattern becomes apparent when tiled too small or overstretched. Additionally fine-tuning the Roughness map allows for customization of fabric reflectivity whether aiming for a casual matte look or a more polished synthetic finish typical of technical clothing. This Archviz cloth fabric nylon texture expertly created using Substance Designer offers designers and artists a versatile reliable and physically accurate nylon textile material that excels in both architectural visualization and game development delivering outstanding realism and detail in every render.
Import the texture maps into Blender with sRGB color space for albedo/base color and Non-Color for normal, roughness, metallic, AO, height, and ORM maps. Connect normal maps through a Normal Map node, then adjust UV scale with a Mapping node so the material repeats naturally on your model.
For the full step-by-step setup, see How to Use Seamless Textures in Blender. Browse related material examples in wood, concrete, and metal.
Yes. This texture is designed as a seamless tileable PBR material, so it can repeat across large surfaces without visible borders.
You can download PNG/WEBP versions and use 1K, 2K, 4K and 8K download options when available on the page.
Yes. The download options and engine-mapped ZIP workflow are designed for Blender, Unreal Engine, Unity Standard, URP and HDRP material pipelines.
Yes. The texture is available under the AITextured free commercial license. Review the license page for redistribution and AI-training restrictions.


Build, preview, and export seamless PBR materials. Generate full map sets from a single image, inspect them in a real-time WebGL viewer, and re-package maps for Unreal, Unity, and Blender—directly in your browser.
AI text-to-texture: type a prompt and get a seamless, tileable base image ready for PBR workflows (great starting point for materials).
Create a full PBR set (Normal, Roughness, AO, Metallic, etc.) from a single image. Seamless and tiling-friendly.
Instant WebGL viewer: inspect materials on a sphere, plane, and cube. Check tiling and lighting in real time.
Re-packages maps per engine: Unreal (BaseColor + ORM), Unity (Mask/MetallicSmoothness), Blender (separate channels).
PNG ↔ JPG ↔ SVG: fast convert, SVG rasterize, embed/trace options, quality & background controls.