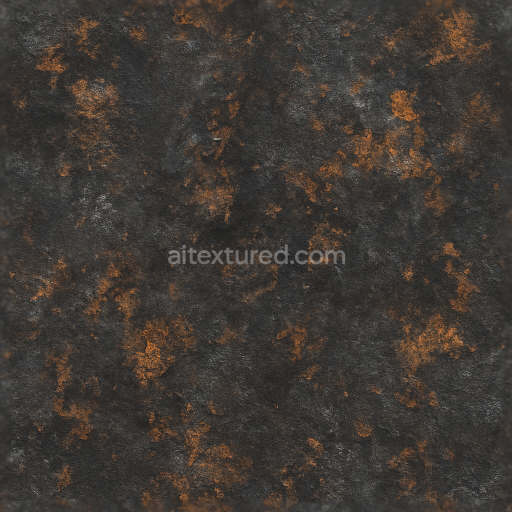
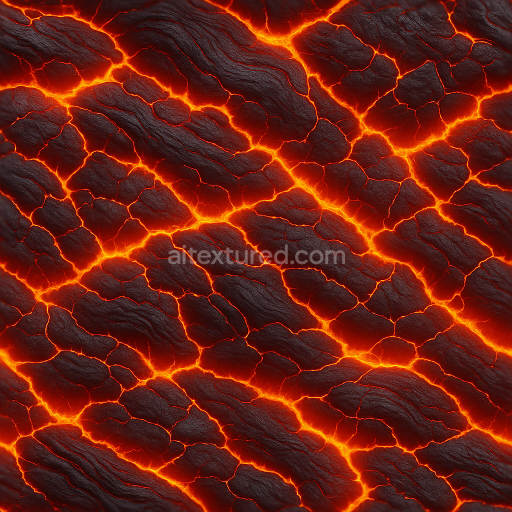
smoldering ash crust PBR 8K surface
Seamless texture (tileable) · PNG, WEBP, PBR ZIP. License: AITextured Free Commercial License (FCL) v1.1. Free personal and commercial use. Raw resale, standalone redistribution, mirroring/scraping, competing asset packs, and AI/ML training are not allowed without written permission. Attribution is not required, but appreciated..

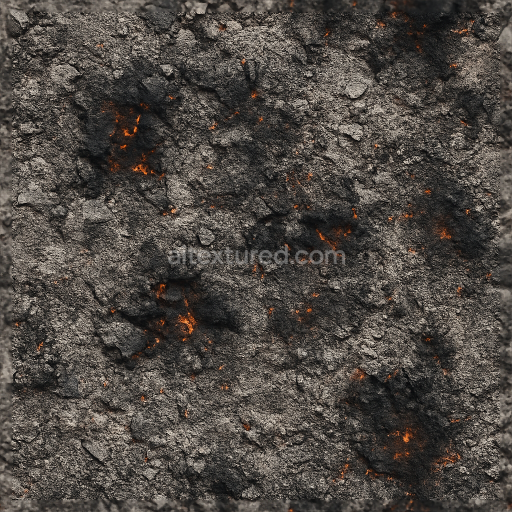
| ID | seamless-3d-texture-pbr-8k-molten-lava-crust-with-magma-flow-details |
|---|---|
| Category | Fire |
| Formats | PNG, WEBP, PBR ZIP |
| Size | 1k (1024x1024px), 2k (2048x2048px), 4k (4096x4096px), 8k (8192x8192px) |
| Color | sRGB |
| Tileable | Yes |
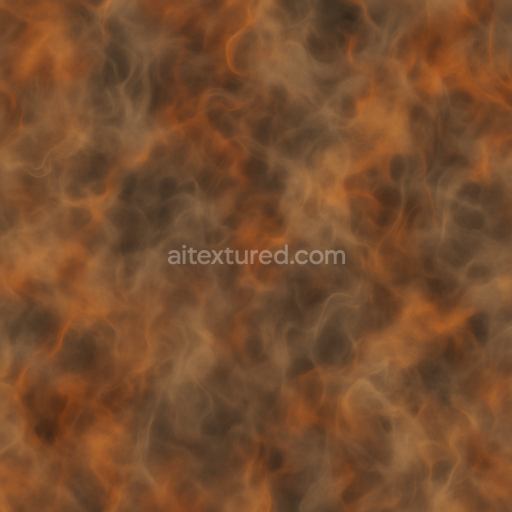
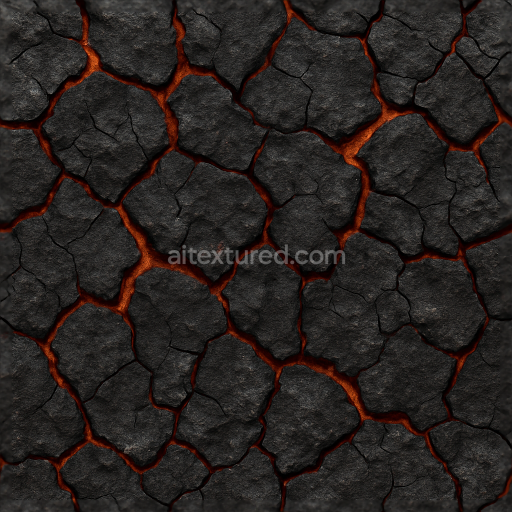
This seamless 3D texture in stunning 8K resolution showcases a highly detailed PBR surface of molten lava crust with vivid magma flow details perfectly suited for volcanic and fiery terrain models. The material composition simulates a complex volcanic substrate where a hardened mineral crust of oxidized basaltic rock overlays a dynamic semi-fluid magma core. The crust's rough blistered surface exhibits natural porosity and weathering effects with cracks and fissures glowing with intense thermal energy. Dark iron oxide pigments and mineral deposits color the crust in deep charcoals and burnt siennas contrasting sharply against the vibrant reds and oranges of flowing magma veins beneath. This interplay of mineral layers and molten pockets creates an organic textured finish that reflects the raw power and heat of volcanic activity. The texture’s photorealistic surface finish appears rough and fractured yet retains a subtle heat shimmer that enhances realism.
In PBR channels the BaseColor/Albedo captures the dark lava crust with mottled black and gray tones interspersed with bright magma reds and fiery oranges accurately representing mineral pigmentation and heat glow. The Normal map intricately defines the blistered crust fissures and flowing magma veins giving pronounced surface depth and tactile roughness. Roughness values vary naturally with the crust showing a matte weathered finish while the molten magma exhibits slightly lower roughness to simulate heat-induced glossiness. The Metallic channel remains near zero reflecting the non-metallic nature of volcanic rock while Ambient Occlusion enhances the deeper cracks and fissures for added depth. Height/Displacement maps enable realistic surface relief emphasizing the rugged uneven lava crust with raised ridges and sunken magma flows that respond dynamically to lighting.
Designed for seamless tiling this texture ensures natural micro-variations in the fire aura and heat-affected zones making it ideal for creating expansive volcanic landscapes in Blender Unreal Engine and Unity. Its high-resolution 8K quality offers exceptional detail even at close camera distances. For optimal results it is recommended to adjust the UV scale to maintain visible detail without repetition and to fine-tune roughness values to balance between matte crust and glowing magma effects. Additionally employing height or parallax mapping can greatly enhance the perceived depth of fissures and flowing magma veins enriching the immersive experience of fiery terrain models.
Import the texture maps into Blender with sRGB color space for albedo/base color and Non-Color for normal, roughness, metallic, AO, height, and ORM maps. Connect normal maps through a Normal Map node, then adjust UV scale with a Mapping node so the material repeats naturally on your model.
For the full step-by-step setup, see How to Use Seamless Textures in Blender. Browse related material examples in wood, concrete, and metal.
Yes. This texture is designed as a seamless tileable PBR material, so it can repeat across large surfaces without visible borders.
You can download PNG/WEBP versions and use 1K, 2K, 4K and 8K download options when available on the page.
Yes. The download options and engine-mapped ZIP workflow are designed for Blender, Unreal Engine, Unity Standard, URP and HDRP material pipelines.
Yes. The texture is available under the AITextured free commercial license. Review the license page for redistribution and AI-training restrictions.


Generate, preview, and export seamless PBR materials for Blender, Unity, and Unreal Engine—directly in your browser.
AI text-to-texture: type a prompt and get a seamless, tileable base image ready for PBR workflows (great starting point for materials).
Create a full PBR set (Normal, Roughness, AO, Metallic, etc.) from a single image. Seamless and tiling-friendly.
Instant WebGL viewer: inspect materials on a sphere, plane, and cube. Check tiling and lighting in real time.
Re-packages maps per engine: Unreal (BaseColor + ORM), Unity (Mask/MetallicSmoothness), Blender (separate channels).
PNG ↔ JPG ↔ SVG: fast convert, SVG rasterize, embed/trace options, quality & background controls.