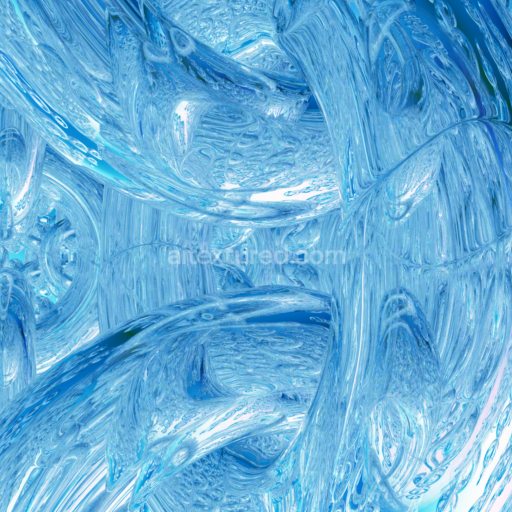
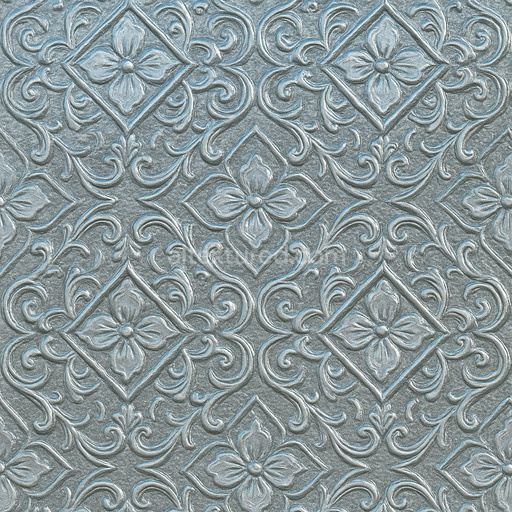
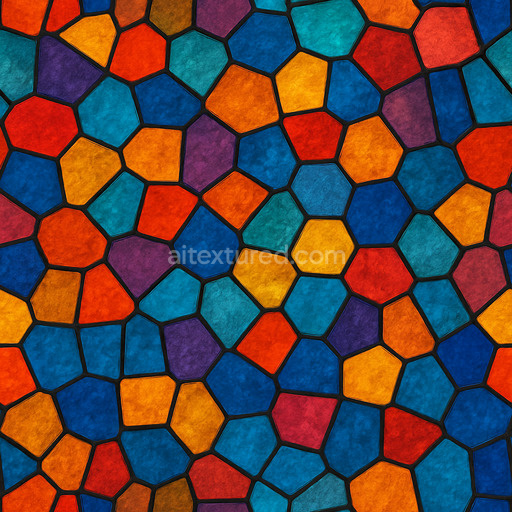
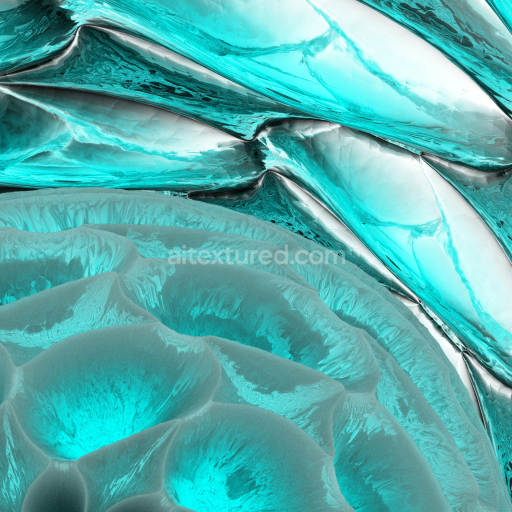
Blue Abstract Glass PBR Texture with Curved Swirling Patterns
Seamless texture (tileable) · PNG, WEBP, PBR ZIP. License: AITextured Free Commercial License (FCL) v1.1. Free personal and commercial use. Raw resale, standalone redistribution, mirroring/scraping, competing asset packs, and AI/ML training are not allowed without written permission. Attribution is not required, but appreciated..

| ID | prismatic-glass-triangular-facets |
|---|---|
| Category | Glass |
| Formats | PNG, WEBP, PBR ZIP |
| Size | 1k (1024x1024px), 2k (2048x2048px), 4k (4096x4096px), 8k (8192x8192px) |
| Color | sRGB |
| Tileable | Yes |
The prismatic glass triangular facets texture is a meticulously crafted high-quality seamless material designed to authentically replicate the intricate optical and structural features of prismatic glass surfaces embedded with sharp triangular facets. The base substrate mimics a clear polished glass matrix enhanced by subtle oxide layers that contribute to the natural reflections and refractions characteristic of prismatic glass. These oxide layers act as delicate colorants imparting faint prismatic distortions and subtle tint variations without overpowering the overall clarity. The triangular facets resemble finely defined geometric crystalline structures with precise grain orientation adding significant depth and dimension. The surface finish is impeccably smooth and glossy simulating the dense non-porous nature of premium glass. Minute micro-details including the beveled and raised edges of each facet are visible through the Normal and Height/Displacement maps enhancing the perception of structural complexity and realism.
This seamless prismatic glass triangular facets texture set is fully optimized for physically based rendering workflows featuring an extensive PBR channel collection: BaseColor/Albedo Normal Roughness Metallic Ambient Occlusion and Height/Displacement. The BaseColor map subtly captures translucency and slight prismatic color dispersion while the Normal and Height maps emphasize the three-dimensional geometry and spatial depth of the triangular facets. The Roughness channel expertly balances glossy and matte areas producing natural light scattering effects that maintain sharpness and clarity without introducing excessive surface imperfections. Metallic values remain minimal to reflect the dielectric properties of glass while Ambient Occlusion enhances the shading around facets boosting visual cohesion and depth perception in real-time 3D preview environments. Rendered seamlessly at up to 8K resolution this tileable prismatic glass triangular facets texture maintains crisp detail and consistent structure across large UV islands without distortion or visible seams.
Designed for integration into modern 3D pipelines this PBR material prismatic glass triangular facets material is fully compatible with Blender Unreal Engine and Unity supporting both real-time applications and high-end cinematic rendering projects. Its tileable nature ensures efficient iteration and reliable performance across diverse creative workflows from architectural visualization to game asset development. For optimal results maintaining consistent texel density across all glass assets is recommended along with careful tuning of the Roughness map to emphasize subtle prismatic reflections and refractions. Adjusting Height or parallax settings can further enhance the perceived geometric complexity of the triangular facets adding an extra layer of authenticity and visual depth to renders or interactive scenes.
Overall this seamless prismatic glass triangular facets texture elevates material libraries with its detailed composition and realistic portrayal of prismatic glass surfaces. Its precise structural design and natural interplay of light and color make it an indispensable resource for artists and developers seeking professional-grade glass textures with exceptional clarity sharpness and photorealistic fidelity. Whether for 3D preview real-time rendering or cinematic visualization this texture delivers unmatched visual precision and versatility across all projects requiring high-resolution glass materials.
Import the texture maps into Blender with sRGB color space for albedo/base color and Non-Color for normal, roughness, metallic, AO, height, and ORM maps. Connect normal maps through a Normal Map node, then adjust UV scale with a Mapping node so the material repeats naturally on your model.
For the full step-by-step setup, see How to Use Seamless Textures in Blender. Browse related material examples in wood, concrete, and metal.
Yes. This texture is designed as a seamless tileable PBR material, so it can repeat across large surfaces without visible borders.
You can download PNG/WEBP versions and use 1K, 2K, 4K and 8K download options when available on the page.
Yes. The download options and engine-mapped ZIP workflow are designed for Blender, Unreal Engine, Unity Standard, URP and HDRP material pipelines.
Yes. The texture is available under the AITextured free commercial license. Review the license page for redistribution and AI-training restrictions.

Build, preview, and export seamless PBR materials. Generate full map sets from a single image, inspect them in a real-time WebGL viewer, and re-package maps for Unreal, Unity, and Blender—directly in your browser.
AI text-to-texture: type a prompt and get a seamless, tileable base image ready for PBR workflows (great starting point for materials).
Create a full PBR set (Normal, Roughness, AO, Metallic, etc.) from a single image. Seamless and tiling-friendly.
Instant WebGL viewer: inspect materials on a sphere, plane, and cube. Check tiling and lighting in real time.
Re-packages maps per engine: Unreal (BaseColor + ORM), Unity (Mask/MetallicSmoothness), Blender (separate channels).
PNG ↔ JPG ↔ SVG: fast convert, SVG rasterize, embed/trace options, quality & background controls.