High-Quality Seamless Forest Ground Texture
Seamless texture (tileable) · PNG, WEBP, PBR ZIP. License: AITextured Free Commercial License (FCL) v1.1. Free personal and commercial use. Raw resale, standalone redistribution, mirroring/scraping, competing asset packs, and AI/ML training are not allowed without written permission. Attribution is not required, but appreciated..

| ID | hand-painted-stylized-dirt-floor-ground-grounding |
|---|---|
| Category | Ground surface |
| Formats | PNG, WEBP, PBR ZIP |
| Size | 1k (1024x1024px), 2k (2048x2048px), 4k (4096x4096px), 8k (8192x8192px) |
| Color | sRGB |
| Tileable | Yes |
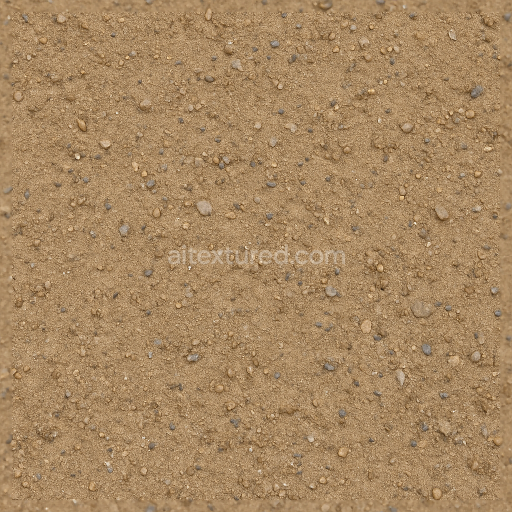
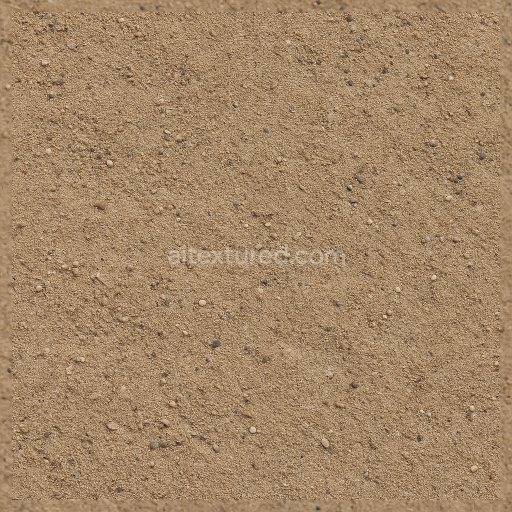
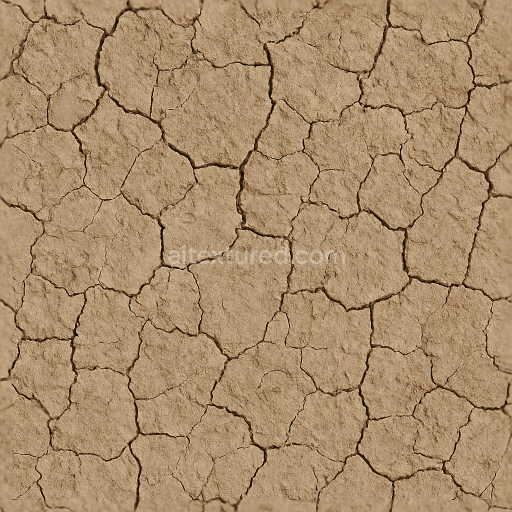
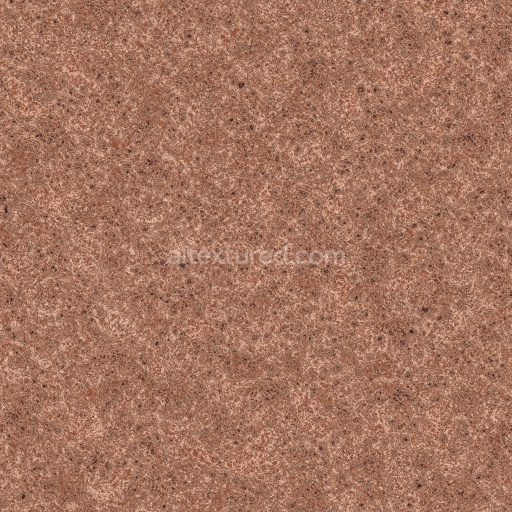
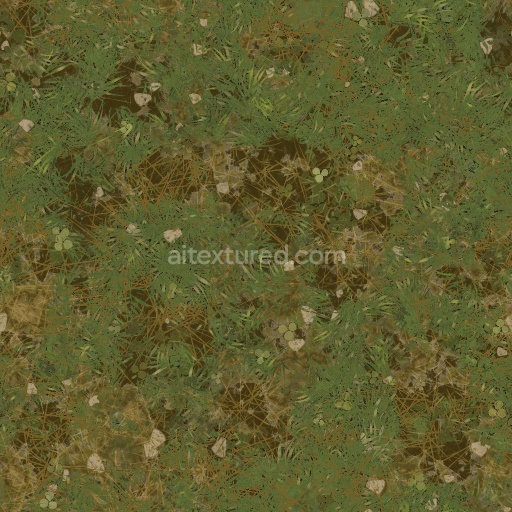
This hand painted stylized dirt floor ground grounding texture is meticulously crafted to represent the intricate complexity of natural soil surfaces with a distinct artistic interpretation. Its base substrate is composed of finely mimicked mineral granules seamlessly blended with subtle organic matter creating a porous and slightly weathered layer that evokes the authentic feel of earth. The texture integrates carefully chosen earth-tone pigments and natural colorants delivering warm consistent hues that enhance realism while maintaining a stylized visual appeal. Variations in surface roughness simulate natural irregularities and weathering resulting in a matte finish that avoids any gloss or metallic shine perfectly reflecting the non-reflective appearance typical of pure soil. This balanced composition of mineral and organic components produces a visually rich ground layer suitable for diverse environmental scenarios.
Designed specifically for physically based rendering (PBR) workflows this seamless texture includes an extensive set of maps that accurately convey the material’s properties across multiple channels. The BaseColor map features warm hand painted earth tones that highlight the texture’s artistic foundation while the Normal map captures subtle micro-details and grain orientation to emphasize the natural soil structure. Roughness maps define the diffuse and matte qualities by controlling light scattering ensuring a weathered realistic surface without gloss. The Metallic channel is intentionally flat reflecting the soil’s inherently non-metallic nature. Ambient Occlusion enhances depth by simulating shadowed crevices and subtle depressions in the dirt surface and the Height/Displacement map adds realistic ground undulations that emphasize porosity and weathering effects. Rendered at resolutions up to 8K this texture maintains exceptional detail and sharpness even when extensively tiled making it ideal for use in Blender Unreal Engine Unity and other real-time or offline rendering environments.
To optimize the visual outcome in your projects adjusting the UV scale is recommended to strike a balance between texture repetition and detail visibility especially on large ground surfaces. Additionally fine-tuning the roughness values can simulate different soil conditions such as moisture levels or compaction enhancing environmental realism. Proper configuration of your project’s color space and gamma settings will preserve the subtle hand painted color gradations and weathering effects ensuring the texture’s stylized yet natural appearance remains intact. This versatile ground texture offers a reliable and visually compelling foundation for artists and developers aiming to recreate authentic stylized dirt floors with technical accuracy and artistic flair across a variety of creative workflows.
Import the texture maps into Blender with sRGB color space for albedo/base color and Non-Color for normal, roughness, metallic, AO, height, and ORM maps. Connect normal maps through a Normal Map node, then adjust UV scale with a Mapping node so the material repeats naturally on your model.
For the full step-by-step setup, see How to Use Seamless Textures in Blender. Browse related material examples in wood, concrete, and metal.
Yes. This texture is designed as a seamless tileable PBR material, so it can repeat across large surfaces without visible borders.
You can download PNG/WEBP versions and use 1K, 2K, 4K and 8K download options when available on the page.
Yes. The download options and engine-mapped ZIP workflow are designed for Blender, Unreal Engine, Unity Standard, URP and HDRP material pipelines.
Yes. The texture is available under the AITextured free commercial license. Review the license page for redistribution and AI-training restrictions.
Generate, preview, and export seamless PBR materials for Blender, Unity, and Unreal Engine—directly in your browser.
AI text-to-texture: type a prompt and get a seamless, tileable base image ready for PBR workflows (great starting point for materials).
Create a full PBR set (Normal, Roughness, AO, Metallic, etc.) from a single image. Seamless and tiling-friendly.
Instant WebGL viewer: inspect materials on a sphere, plane, and cube. Check tiling and lighting in real time.
Re-packages maps per engine: Unreal (BaseColor + ORM), Unity (Mask/MetallicSmoothness), Blender (separate channels).
PNG ↔ JPG ↔ SVG: fast convert, SVG rasterize, embed/trace options, quality & background controls.