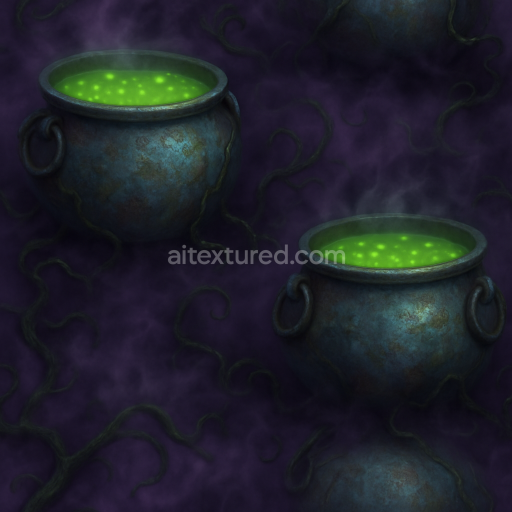
Witch Brew Liquid In Cauldron Metal With Eerie Reflections
Seamless texture (tileable) · PNG, WEBP, PBR ZIP. License: AITextured Free Commercial License (FCL) v1.1. Free personal and commercial use. Raw resale, standalone redistribution, mirroring/scraping, competing asset packs, and AI/ML training are not allowed without written permission. Attribution is not required, but appreciated..

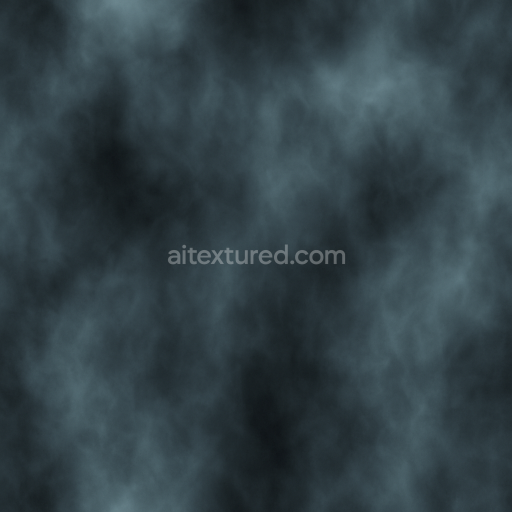
| ID | seamless-3d-texture-pbr-8k-witch-hat-fabric-with-spooky-purple-hues |
|---|---|
| Category | Halloween |
| Formats | PNG, WEBP, PBR ZIP |
| Size | 1k (1024x1024px), 2k (2048x2048px), 4k (4096x4096px), 8k (8192x8192px) |
| Color | sRGB |
| Tileable | Yes |
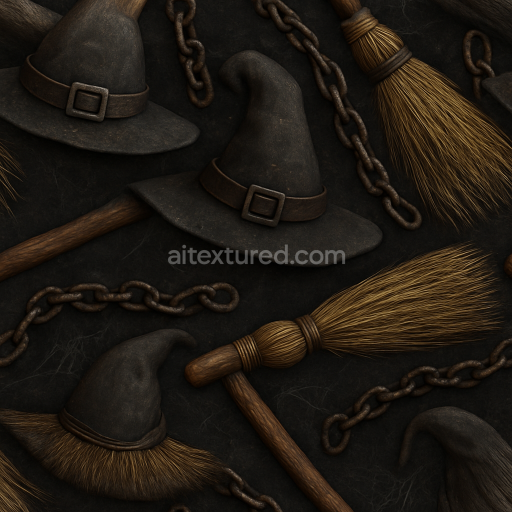
This seamless 3D texture presents a highly detailed witch hat fabric rendered in stunning 8K resolution with physically based rendering (PBR) precision. The material composition reflects an organic woven textile base likely a coarse natural fiber such as burlap or linen combined with subtle synthetic binders that provide structural integrity and slight flexibility. The fabric’s surface shows a meticulously captured weave pattern with fine grain orientation revealing the characteristic interlacing of threads that create a tactile rough texture. The edges appear worn and tattered indicating weathering and natural fiber degradation which is further enhanced by scattered porosity and frayed fibers. The colorants consist of layered violet and witch purple pigments producing rich spooky fabric hues complemented by dark shadow overlays that intensify the mysterious Halloween ambiance. These pigments are integrated within the fibers giving a deep non-reflective matte finish with occasional subtle sheen where threads catch light.*
In terms of PBR channel detail the BaseColor (Albedo) map showcases the fabric’s vivid purple tones with nuanced shading while the Normal map intricately conveys the fabric’s subtle weave and frayed edges adding realistic surface depth. The Roughness channel balances the matte and slightly reflective areas mimicking the natural variance in fiber sheen due to wear and aging. The Metallic map is nearly absent reflecting the organic non-metallic nature of the textile substrate. Ambient Occlusion enhances crevices between fibers and torn edges increasing visual depth and shadow realism. Height/Displacement maps emphasize the fabric’s raised weave and distressed patches allowing for convincing parallax effects in real-time engines.*
Designed for seamless tiling without visible repetition this texture is optimized for use in Blender Unreal Engine and Unity ensuring broad compatibility for game developers and 3D artists. The neutral lighting setup embedded in the texture supports versatile application across various digital scenes and lighting environments. For practical use adjusting the UV scale can maximize the detail fidelity on larger models while fine-tuning the Roughness parameter can help achieve the desired balance between matte fabric and subtle light reflection enhancing realism in close-up renders or interactive experiences.
Import the texture maps into Blender with sRGB color space for albedo/base color and Non-Color for normal, roughness, metallic, AO, height, and ORM maps. Connect normal maps through a Normal Map node, then adjust UV scale with a Mapping node so the material repeats naturally on your model.
For the full step-by-step setup, see How to Use Seamless Textures in Blender. Browse related material examples in wood, concrete, and metal.
Yes. This texture is designed as a seamless tileable PBR material, so it can repeat across large surfaces without visible borders.
You can download PNG/WEBP versions and use 1K, 2K, 4K and 8K download options when available on the page.
Yes. The download options and engine-mapped ZIP workflow are designed for Blender, Unreal Engine, Unity Standard, URP and HDRP material pipelines.
Yes. The texture is available under the AITextured free commercial license. Review the license page for redistribution and AI-training restrictions.


Build, preview, and export seamless PBR materials. Generate full map sets from a single image, inspect them in a real-time WebGL viewer, and re-package maps for Unreal, Unity, and Blender—directly in your browser.
AI text-to-texture: type a prompt and get a seamless, tileable base image ready for PBR workflows (great starting point for materials).
Create a full PBR set (Normal, Roughness, AO, Metallic, etc.) from a single image. Seamless and tiling-friendly.
Instant WebGL viewer: inspect materials on a sphere, plane, and cube. Check tiling and lighting in real time.
Re-packages maps per engine: Unreal (BaseColor + ORM), Unity (Mask/MetallicSmoothness), Blender (separate channels).
PNG ↔ JPG ↔ SVG: fast convert, SVG rasterize, embed/trace options, quality & background controls.