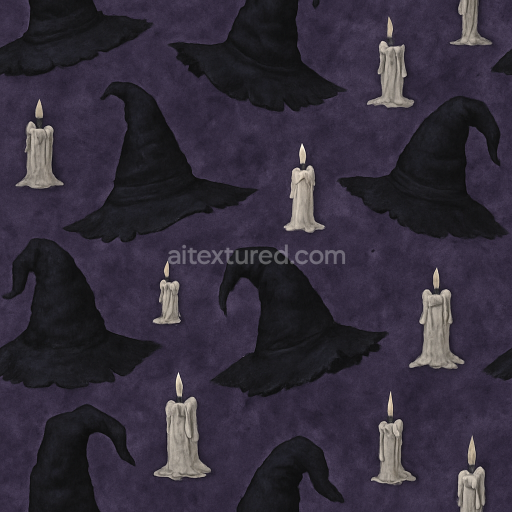
Black Cat Fur With Moonlight Silver Highlights
Seamless texture (tileable) · PNG, WEBP, PBR ZIP. License: AITextured Free Commercial License (FCL) v1.1. Free personal and commercial use. Raw resale, standalone redistribution, mirroring/scraping, competing asset packs, and AI/ML training are not allowed without written permission. Attribution is not required, but appreciated..

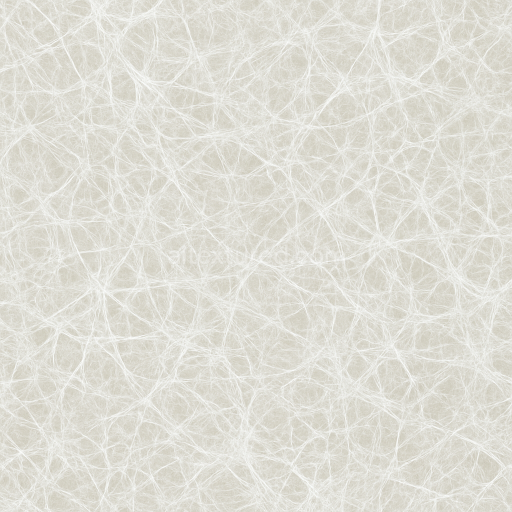
| ID | seamless-3d-texture-pbr-8k-haunted-forest-floor-with-fallen-leaves-and-grave-dirt |
|---|---|
| Category | Halloween |
| Formats | PNG, WEBP, PBR ZIP |
| Size | 1k (1024x1024px), 2k (2048x2048px), 4k (4096x4096px), 8k (8192x8192px) |
| Color | sRGB |
| Tileable | Yes |
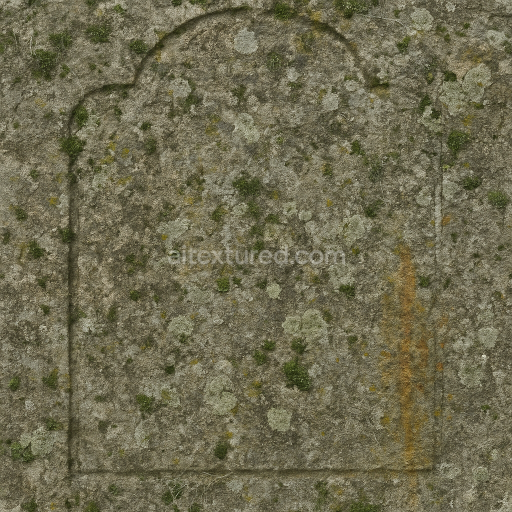
This seamless 3D texture showcases a haunted forest floor richly detailed with fallen leaves grave dirt and patches of dead grass rendered in photorealistic PBR quality at an impressive 8K resolution. The base substrate is primarily organic soil interspersed with decayed plant matter and mineral-rich grave dirt creating a natural weathered surface. The composition includes fine aggregates of decomposed leaves and twigs bound by moist earth lending a porous uneven texture that captures subtle variations in soil density and moisture. The surface finish is matte with a slight dampness reflecting the muddy wet ground conditions typical of a haunted woodland environment. Muted earth tones dominate the BaseColor/Albedo channel while the Normal map emphasizes detailed grain orientation and the intricate layering of organic debris. Roughness values vary across the texture to simulate the contrast between dry leaves and wet soil enhancing tactile realism. The Metallic channel is minimal as the natural forest floor contains little to no metal content while Ambient Occlusion deepens shadowed crevices beneath leaves and soil clumps adding depth and dimensionality. Height and Displacement maps accurately portray subtle terrain undulations including depressions and raised debris supporting realistic parallax effects in real-time engines.
Designed for versatility this haunted forest floor texture is optimized for use in Unreal Engine Blender and Unity making it ideal for immersive Halloween environments in games and films. Its seamless tiling capability allows it to cover vast terrains without visible repetition or artifacts preserving the eerie organic feel across large surfaces. Neutral balanced lighting in the texture ensures all intricate details remain visible under different environmental setups from moonlit nights to foggy diffuse daylight. Additional elements such as thorny branches and scattered muddy patches are integrated naturally within the texture enhancing the spooky atmosphere without overwhelming the base composition. The texture’s high resolution ensures that even close-up views reveal detailed vein patterns on leaves soil granularity and subtle fungal decay providing an unmatched level of realism for detailed scenes.
When applying this texture adjusting the UV scale can help balance detail density across varying terrain sizes while fine-tuning roughness parameters can simulate wetness levels from freshly damp earth to dried leaf litter. For enhanced depth perception enabling height or parallax mapping in your material setup will accentuate the forest floor’s uneven surface adding immersive realism in first-person or close-range shots. This texture’s high-precision PBR channels and naturalistic material composition make it a reliable choice for artists seeking to create authentic haunted forest floors with a compelling sense of decay moisture and organic complexity.
Import the texture maps into Blender with sRGB color space for albedo/base color and Non-Color for normal, roughness, metallic, AO, height, and ORM maps. Connect normal maps through a Normal Map node, then adjust UV scale with a Mapping node so the material repeats naturally on your model.
For the full step-by-step setup, see How to Use Seamless Textures in Blender. Browse related material examples in wood, concrete, and metal.
Yes. This texture is designed as a seamless tileable PBR material, so it can repeat across large surfaces without visible borders.
You can download PNG/WEBP versions and use 1K, 2K, 4K and 8K download options when available on the page.
Yes. The download options and engine-mapped ZIP workflow are designed for Blender, Unreal Engine, Unity Standard, URP and HDRP material pipelines.
Yes. The texture is available under the AITextured free commercial license. Review the license page for redistribution and AI-training restrictions.

Build, preview, and export seamless PBR materials. Generate full map sets from a single image, inspect them in a real-time WebGL viewer, and re-package maps for Unreal, Unity, and Blender—directly in your browser.
AI text-to-texture: type a prompt and get a seamless, tileable base image ready for PBR workflows (great starting point for materials).
Create a full PBR set (Normal, Roughness, AO, Metallic, etc.) from a single image. Seamless and tiling-friendly.
Instant WebGL viewer: inspect materials on a sphere, plane, and cube. Check tiling and lighting in real time.
Re-packages maps per engine: Unreal (BaseColor + ORM), Unity (Mask/MetallicSmoothness), Blender (separate channels).
PNG ↔ JPG ↔ SVG: fast convert, SVG rasterize, embed/trace options, quality & background controls.