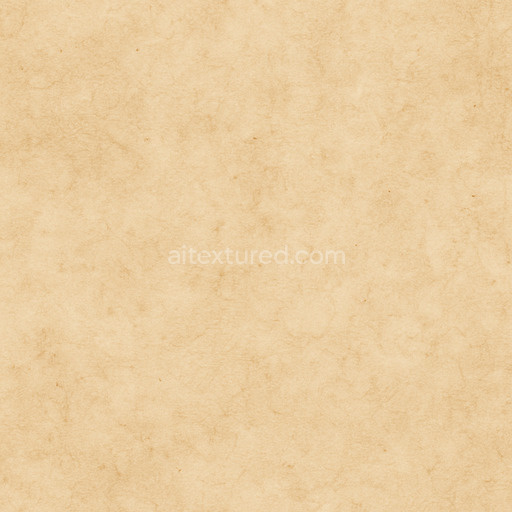
Natural Parchment Seamless Texture
Seamless texture (tileable) · PNG, WEBP, PBR ZIP. License: AITextured Free Commercial License (FCL) v1.1. Free personal and commercial use. Raw resale, standalone redistribution, mirroring/scraping, competing asset packs, and AI/ML training are not allowed without written permission. Attribution is not required, but appreciated..

| ID | geometric-cube-shape-wallpaper-pattern-free-pbr |
|---|---|
| Category | Paper |
| Formats | PNG, WEBP, PBR ZIP |
| Size | 1k (1024x1024px), 2k (2048x2048px), 4k (4096x4096px), 8k (8192x8192px) |
| Color | sRGB |
| Tileable | Yes |
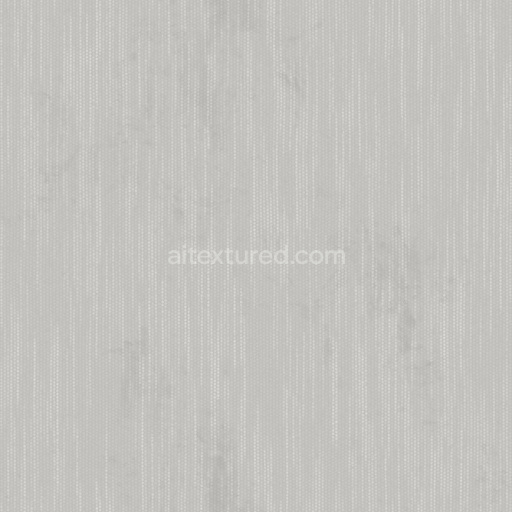
The Geometric Cube Shape Wallpaper Pattern (Paper 0030) presents a refined design composed of interlocking 3D cubes rendered in soothing blue hues. This texture is meticulously crafted on a polymer-based substrate, which offers a smooth yet resilient surface ideal for indoor wall coverings. The polymer foundation ensures both flexibility and durability, while the binder system utilizes advanced synthetic adhesives that preserve the pattern’s integrity and prevent color fading over extended periods. Incorporated within the composition are fine mineral aggregates that subtly enrich the texture’s depth and tactile quality, introducing natural variations that emulate the feel of real materials. The surface finish features a matte, softly brushed effect that minimizes glare and accentuates the geometric cube shapes through nuanced light diffusion and gentle shadow interplay along the edges.
From a physically based rendering (PBR) perspective, this wallpaper texture excels in realism and versatility across multiple channels. The BaseColor (Albedo) map showcases richly saturated blue pigments with gradient shading that highlights the facets and edges of each cube, creating a pronounced three-dimensional effect. The Normal map adds finely detailed surface variations that simulate subtle embossing and the sharpness of cube edges without increasing polygon count. Roughness is carefully calibrated to a moderate level, providing a balanced soft diffuse reflection that avoids unwanted glossiness, while the Metallic channel remains at zero to reflect the non-metallic, painted nature of the surface. Ambient Occlusion enhances depth perception by intensifying shadows within the crevices between cubes. Additionally, the Height or Displacement map enables realistic parallax effects, simulating slight elevation changes that add a tangible sense of texture, especially effective at close range.
Rendered in ultra-high-definition 8K resolution, this seamless PBR texture is optimized for use in Blender, Unreal Engine, and Unity, supporting detailed and lifelike visualizations. Its clean UV layout allows for easy scaling and tiling, ensuring that the geometric cube pattern adapts flawlessly to walls of various dimensions without visible repetition or distortion. For practical implementation, adjusting the roughness map slightly higher can soften light reflections, enhancing the cozy ambiance in residential interiors such as living rooms and bedrooms. Employing the height map with parallax occlusion mapping further amplifies the perception of depth, making digital spaces feel more tactile and immersive while maintaining a sophisticated, contemporary aesthetic.
Import the texture maps into Blender with sRGB color space for albedo/base color and Non-Color for normal, roughness, metallic, AO, height, and ORM maps. Connect normal maps through a Normal Map node, then adjust UV scale with a Mapping node so the material repeats naturally on your model.
For the full step-by-step setup, see How to Use Seamless Textures in Blender. Browse related material examples in wood, concrete, and metal.
Yes. This texture is designed as a seamless tileable PBR material, so it can repeat across large surfaces without visible borders.
You can download PNG/WEBP versions and use 1K, 2K, 4K and 8K download options when available on the page.
Yes. The download options and engine-mapped ZIP workflow are designed for Blender, Unreal Engine, Unity Standard, URP and HDRP material pipelines.
Yes. The texture is available under the AITextured free commercial license. Review the license page for redistribution and AI-training restrictions.


Build, preview, and export seamless PBR materials. Generate full map sets from a single image, inspect them in a real-time WebGL viewer, and re-package maps for Unreal, Unity, and Blender—directly in your browser.
AI text-to-texture: type a prompt and get a seamless, tileable base image ready for PBR workflows (great starting point for materials).
Create a full PBR set (Normal, Roughness, AO, Metallic, etc.) from a single image. Seamless and tiling-friendly.
Instant WebGL viewer: inspect materials on a sphere, plane, and cube. Check tiling and lighting in real time.
Re-packages maps per engine: Unreal (BaseColor + ORM), Unity (Mask/MetallicSmoothness), Blender (separate channels).
PNG ↔ JPG ↔ SVG: fast convert, SVG rasterize, embed/trace options, quality & background controls.