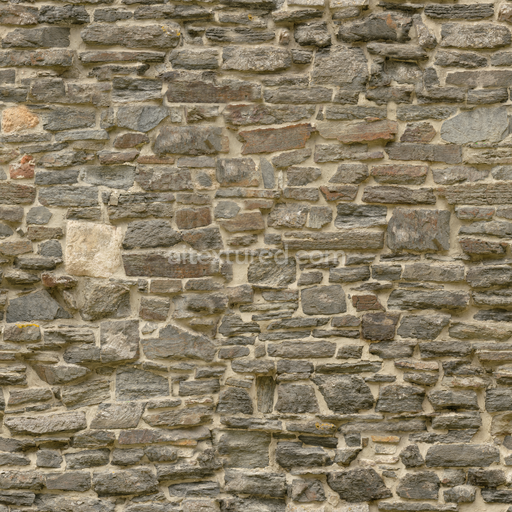
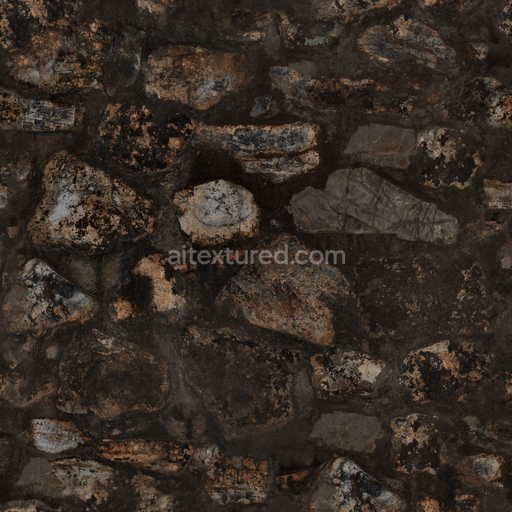
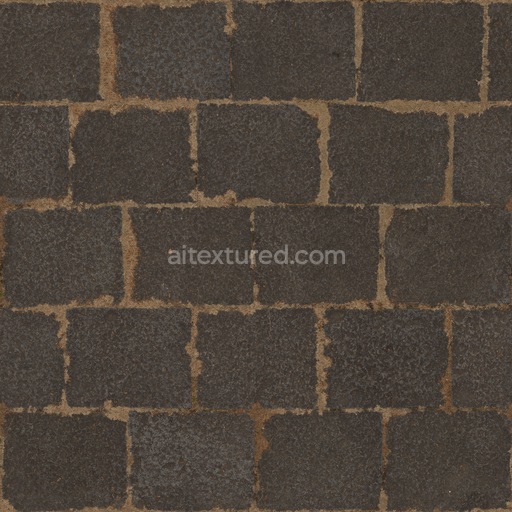
Castle Wall Slates - Wall Rough Blocks Stacked Old Castle
Seamless texture (tileable) · PNG, WEBP, PBR ZIP. License: AITextured Free Commercial License (FCL) v1.1. Free personal and commercial use. Raw resale, standalone redistribution, mirroring/scraping, competing asset packs, and AI/ML training are not allowed without written permission. Attribution is not required, but appreciated..

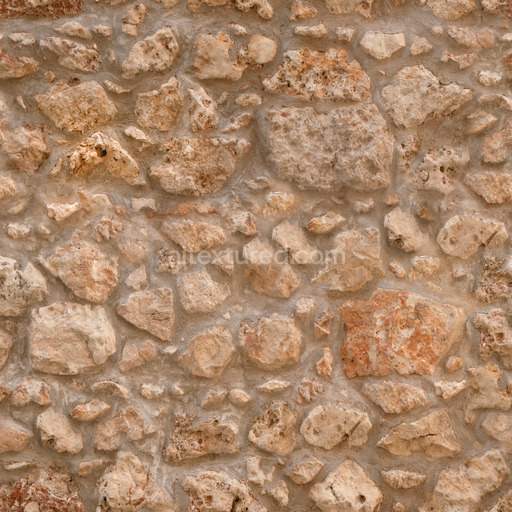
| ID | quarry-wall-02-rough-wall-rock-quarry-quarry-stone-rock-face |
|---|---|
| Category | Rock |
| Formats | PNG, WEBP, PBR ZIP |
| Size | 1k (1024x1024px), 2k (2048x2048px), 4k (4096x4096px), 8k (8192x8192px) |
| Color | sRGB |
| Tileable | Yes |
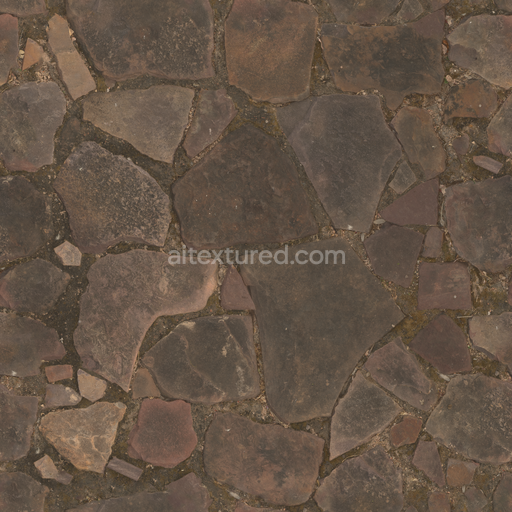
This Wall Rock Quarry 3D texture labeled quarry wall 02 authentically represents the roughhewn character of solid rock commonly found in outdoor stone quarries and mining sites. The material’s base substrate consists of tightly bonded mineral aggregates forming a dense quarry stone matrix naturally shaped through geological processes over time. This results in an irregular rock face marked by natural porosity fractures and weathering effects such as surface chipping and mineral oxide layers. The coarse surface finish captures the rugged essence of quarry walls with earth-toned pigments and subtle color variations derived from embedded mineral deposits and iron oxide staining producing a balanced and realistic albedo map true to natural stone quarry environments.
All physically based rendering (PBR) channels of this seamless 3D texture are expertly crafted to convey the physical and visual properties of a rough quarry wall. The Albedo (BaseColor) map provides natural stone hues without baked lighting maintaining authenticity for various lighting conditions in Blender Unreal Engine and Unity workflows. The Normal map encodes fine surface details such as fissures chips and grain orientation adding depth and realism without increasing polygon count. Roughness values are calibrated to replicate the matte uneven texture of quarry stone surfaces avoiding glossiness and emphasizing natural variation. Metallic is consistently minimal reflecting the non-metallic nature of rock. Ambient Occlusion enhances shading in crevices and recessed areas intensifying three-dimensional perception. The Height map supports displacement and parallax effects enabling realistic surface contouring and depth on stone walls and rock faces.
Available natively at 4K resolution with an optional upgrade to 8K this quarry wall texture ensures high-fidelity detail for demanding projects while remaining optimized for performance across digital content creation pipelines. Its tileable format guarantees seamless repetition over large surfaces such as mining sites quarry walls or stone quarries without visible seams or artifacts. For optimal results adjusting the UV scale to align with natural quarry block dimensions is recommended alongside fine-tuning roughness parameters to simulate varying degrees of moisture or weathering on the rock face. Utilizing the height map with parallax occlusion mapping further enhances realism in close-up renders or interactive environments making this texture ideal for both real-time and offline rendering applications.
Import the texture maps into Blender with sRGB color space for albedo/base color and Non-Color for normal, roughness, metallic, AO, height, and ORM maps. Connect normal maps through a Normal Map node, then adjust UV scale with a Mapping node so the material repeats naturally on your model.
For the full step-by-step setup, see How to Use Seamless Textures in Blender. Browse related material examples in wood, concrete, and metal.
Yes. This texture is designed as a seamless tileable PBR material, so it can repeat across large surfaces without visible borders.
You can download PNG/WEBP versions and use 1K, 2K, 4K and 8K download options when available on the page.
Yes. The download options and engine-mapped ZIP workflow are designed for Blender, Unreal Engine, Unity Standard, URP and HDRP material pipelines.
Yes. The texture is available under the AITextured free commercial license. Review the license page for redistribution and AI-training restrictions.


Generate, preview, and export seamless PBR materials for Blender, Unity, and Unreal Engine—directly in your browser.
AI text-to-texture: type a prompt and get a seamless, tileable base image ready for PBR workflows (great starting point for materials).
Create a full PBR set (Normal, Roughness, AO, Metallic, etc.) from a single image. Seamless and tiling-friendly.
Instant WebGL viewer: inspect materials on a sphere, plane, and cube. Check tiling and lighting in real time.
Re-packages maps per engine: Unreal (BaseColor + ORM), Unity (Mask/MetallicSmoothness), Blender (separate channels).
PNG ↔ JPG ↔ SVG: fast convert, SVG rasterize, embed/trace options, quality & background controls.