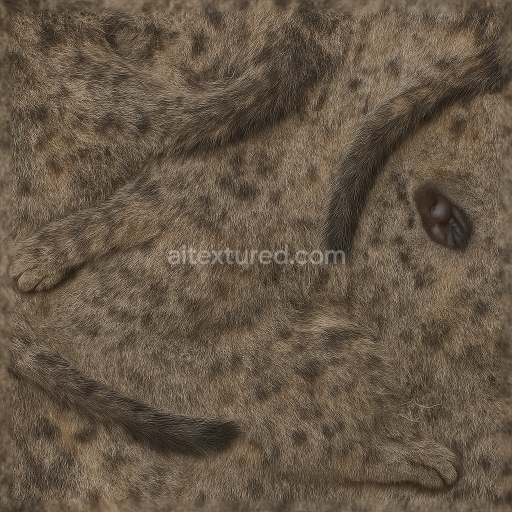
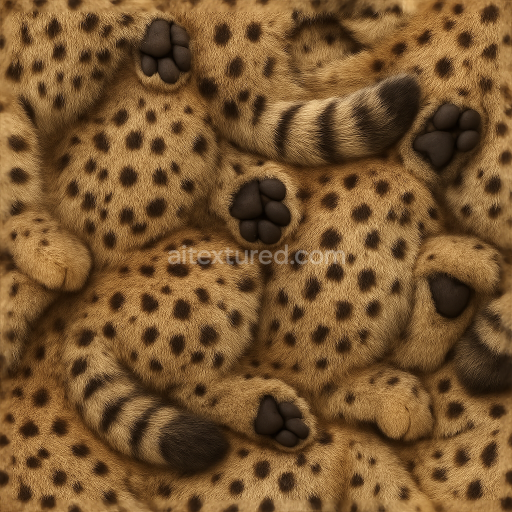
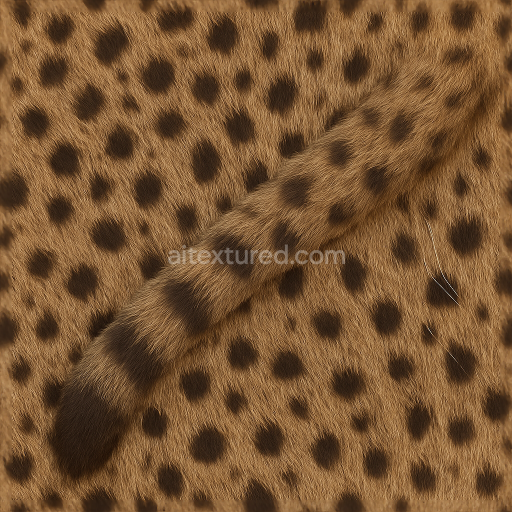
Mottled Fur Fuzzy Skin Mammal Skin Fur Undercoat Bristly Fur Tail Fur Paw Pads Whiskers
Seamless texture (tileable) · PNG, WEBP, PBR ZIP. License: AITextured Free Commercial License (FCL) v1.1. Free personal and commercial use. Raw resale, standalone redistribution, mirroring/scraping, competing asset packs, and AI/ML training are not allowed without written permission. Attribution is not required, but appreciated..

| ID | seamless-3d-texture-pbr-8k-dappled-fur-spotted-fur-fuzzy-skin-bristly-fur-mammal-skin-fur-undercoat-tail-fur-paw-pads-whiskers |
|---|---|
| Category | Animal skin |
| Formats | PNG, WEBP, PBR ZIP |
| Size | 1k (1024x1024px), 2k (2048x2048px), 4k (4096x4096px), 8k (8192x8192px) |
| Color | sRGB |
| Tileable | Yes |
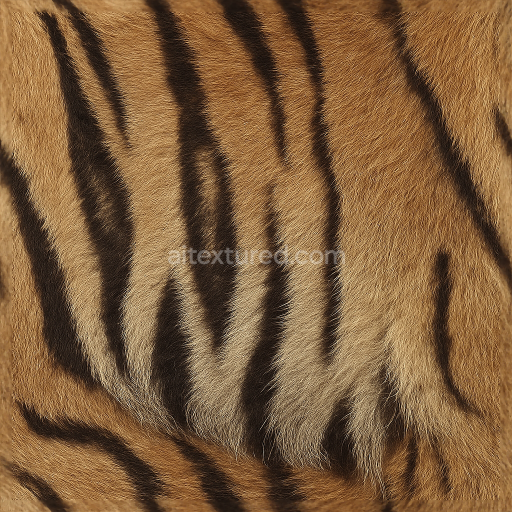
This seamless 8K PBR texture captures the intricate details of mammalian skin characterized by dappled and spotted fur patterns. The underlying substrate simulates a dense fibrous dermal layer, which provides the foundation for the layered fur structure. The fur itself consists of a combination of soft undercoat fibers and coarser, bristly guard hairs arranged in natural flowing patterns, including tail fur and whiskers that extend outward to add dimensionality. Paw pads are represented with a slightly roughened yet supple epidermal surface, contrasting the surrounding fur with a matte, nearly non-reflective finish. The geometry mimics a fine, irregular grain formed by the overlapping hairs and skin creases, creating a tactile, organic form rather than a repetitive or geometric tile.
From a material composition perspective, the texture emulates a composite of keratinous fibers embedded within a semi-porous dermal matrix. The base color channel (Albedo) features subtle variations of earthy browns, muted tans, and soft grays that replicate natural pigmentation and dappled spotting. The Normal map encodes the fine hair shafts, skin folds, and bristle orientation to enhance light interaction and surface relief. Roughness is carefully balanced to represent the contrast between the slightly oily, fuzzy undercoat and the drier, more reflective bristly hairs, while the paw pads exhibit higher roughness values to simulate their tactile grip. Metallic values remain minimal, reflecting the non-metallic nature of biological materials. Ambient Occlusion adds depth to crevices between fur clusters and skin wrinkles, enhancing realism. Height and Displacement maps provide subtle micro-relief for fur layering and skin surface undulations, supporting parallax effects in real-time engines.
This texture is optimized for use in Blender, Unreal Engine, and Unity, supporting physically based rendering workflows with seamless tiling that enables large surface coverage without visible repetition. The high resolution ensures that close-up renders retain fine fur details and skin textures, essential for photorealistic animal models. For practical implementation, it is recommended to adjust the UV scale carefully to maintain natural fur density and avoid stretching. Additionally, fine-tuning the roughness channel can help simulate variations from wet to dry fur conditions, while blending height and normal maps can enhance depth perception without introducing artifacts during parallax occlusion mapping.
Import the texture maps into Blender with sRGB color space for albedo/base color and Non-Color for normal, roughness, metallic, AO, height, and ORM maps. Connect normal maps through a Normal Map node, then adjust UV scale with a Mapping node so the material repeats naturally on your model.
For the full step-by-step setup, see How to Use Seamless Textures in Blender. Browse related material examples in wood, concrete, and metal.
Yes. This texture is designed as a seamless tileable PBR material, so it can repeat across large surfaces without visible borders.
You can download PNG/WEBP versions and use 1K, 2K, 4K and 8K download options when available on the page.
Yes. The download options and engine-mapped ZIP workflow are designed for Blender, Unreal Engine, Unity Standard, URP and HDRP material pipelines.
Yes. The texture is available under the AITextured free commercial license. Review the license page for redistribution and AI-training restrictions.


Build, preview, and export seamless PBR materials. Generate full map sets from a single image, inspect them in a real-time WebGL viewer, and re-package maps for Unreal, Unity, and Blender—directly in your browser.
AI text-to-texture: type a prompt and get a seamless, tileable base image ready for PBR workflows (great starting point for materials).
Create a full PBR set (Normal, Roughness, AO, Metallic, etc.) from a single image. Seamless and tiling-friendly.
Instant WebGL viewer: inspect materials on a sphere, plane, and cube. Check tiling and lighting in real time.
Re-packages maps per engine: Unreal (BaseColor + ORM), Unity (Mask/MetallicSmoothness), Blender (separate channels).
PNG ↔ JPG ↔ SVG: fast convert, SVG rasterize, embed/trace options, quality & background controls.