
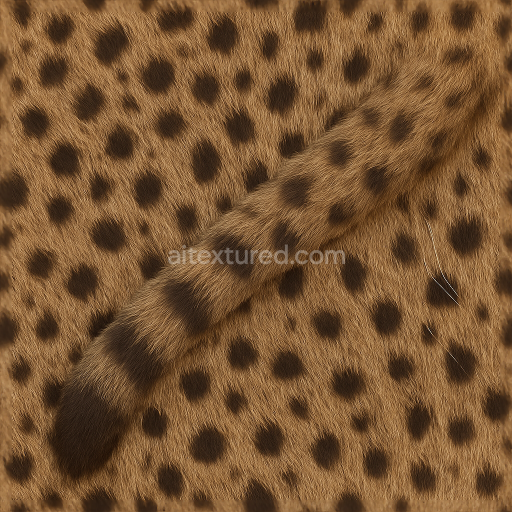
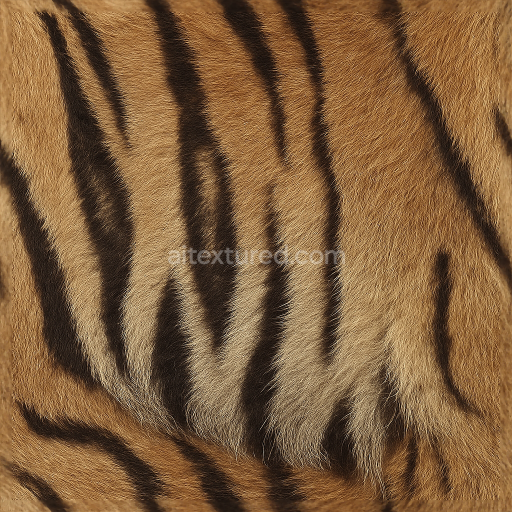
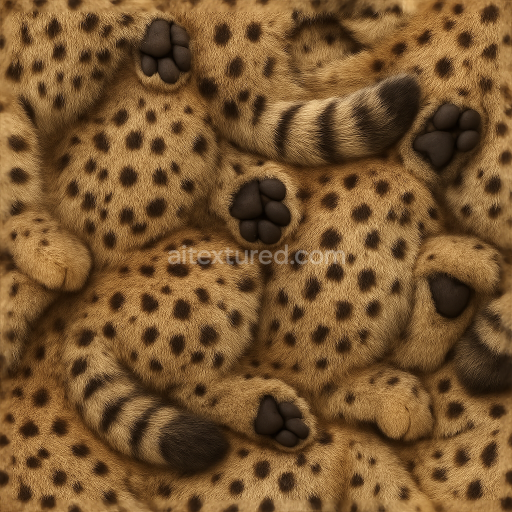
Coarse Fur Mammal Skin Fur Guard Hairs Tail Fur Whiskers Mane Fur Spotted Fur Dense Fur
Seamless texture (tileable) · PNG, WEBP, PBR ZIP. License: AITextured Free Commercial License (FCL) v1.1. Free personal and commercial use. Raw resale, standalone redistribution, mirroring/scraping, competing asset packs, and AI/ML training are not allowed without written permission. Attribution is not required, but appreciated..

| ID | seamless-3d-texture-pbr-8k-flaky-skin-cracked-skin-wrinkled-skin-rough-hide-pitted-skin-leathery-skin-thick-skin-rugged-skin |
|---|---|
| Category | Animal skin |
| Formats | PNG, WEBP, PBR ZIP |
| Size | 1k (1024x1024px), 2k (2048x2048px), 4k (4096x4096px), 8k (8192x8192px) |
| Color | sRGB |
| Tileable | Yes |
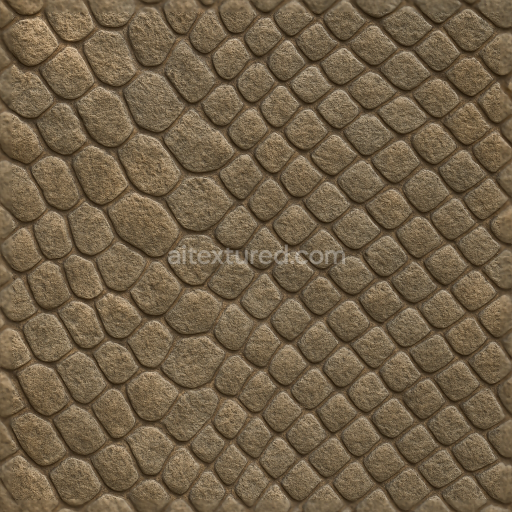
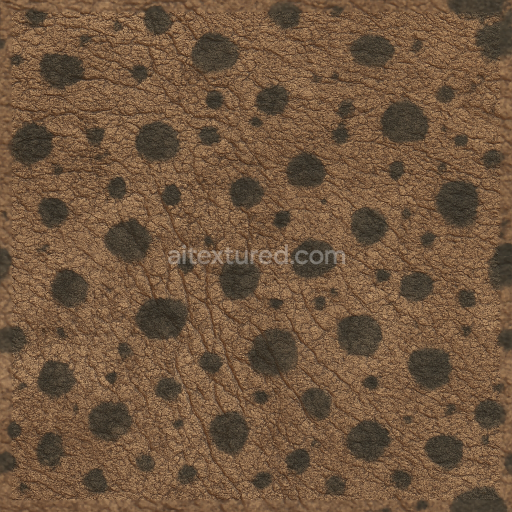
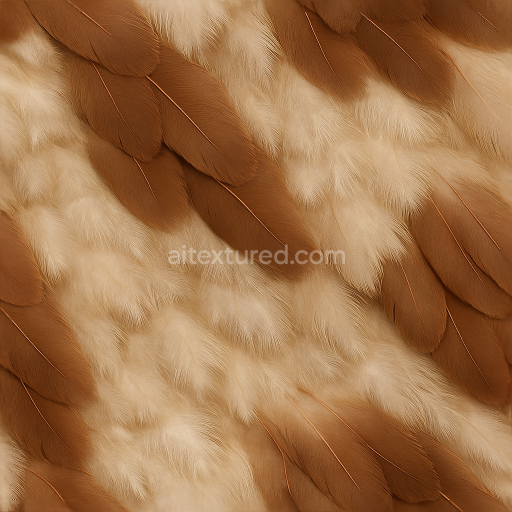
This seamless 8K PBR texture represents a complex animal skin surface characterized by flaky, cracked, and heavily wrinkled patterns. The underlying material suggests a thick, leathery hide typically found on aged or weathered creatures, where natural collagen fibers have become exposed and rugged due to prolonged environmental stress. The geometric form is irregular yet consistent, featuring an organic network of deep crevices, raised flaky patches, and pitted indentations that combine to form a highly detailed and realistic skin topology. The surface’s rough, porous nature implies a substrate rich in fibrous connective tissue, interspersed with granular aggregates that contribute to the uneven texture and robust tactile feel.
From a compositional standpoint, the base material resembles dense dermal layers, where a resilient matrix of collagen and elastin fibers provides structural integrity. This matrix is interwoven with microscopic grains and coarse aggregates that have weathered and cracked, resulting in surface fissures and flaky segments. The binders within this complex form act as natural adhesives, binding fibers and particles to maintain cohesion despite the evident wear and tear. The surface finish is matte and rugged, lacking any polished or reflective qualities, which reinforces the leathery, aged appearance. Pigmentation is subtle and varies across the texture, featuring muted earth tones—grays, browns, and desaturated tans—emphasizing natural skin coloration affected by environmental exposure and pigmentation loss.
In terms of PBR channel mapping, the BaseColor (Albedo) captures the subtle tonal variations and natural discolorations of the leathery skin. The Normal map intricately encodes the complex wrinkles, flaky elevations, and pitted recesses, enhancing depth perception under dynamic lighting. Roughness values are high and varied, reflecting the uneven surface finish—some areas appear more cracked and dry with higher roughness, while minimally worn patches exhibit slightly smoother characteristics. The Metallic channel remains negligible since the material is organic and non-metallic. Ambient Occlusion adds depth to crevices and fine details, reinforcing realism by simulating occluded light in the micro-geometry. Finally, Height/Displacement maps provide precise volumetric detail for effective parallax and tessellation, crucial for close-up renders where the rugged skin’s 3D form is emphasized.
Designed for seamless tiling, this texture is optimized for use in Blender, Unreal Engine, and Unity, making it highly versatile for 3D artists working across game development, film production, or digital visualization. The 8K resolution ensures exceptional detail retention even on large surfaces or close camera angles. When integrating this texture, it is advisable to carefully adjust UV scale to prevent pattern repetition from becoming noticeable, and fine-tune roughness maps to match specific lighting conditions. For enhanced realism, blending Height and Normal maps can produce more nuanced surface depth, particularly when simulating subsurface scattering effects on thick, leathery skin.
Import the texture maps into Blender with sRGB color space for albedo/base color and Non-Color for normal, roughness, metallic, AO, height, and ORM maps. Connect normal maps through a Normal Map node, then adjust UV scale with a Mapping node so the material repeats naturally on your model.
For the full step-by-step setup, see How to Use Seamless Textures in Blender. Browse related material examples in wood, concrete, and metal.
Yes. This texture is designed as a seamless tileable PBR material, so it can repeat across large surfaces without visible borders.
You can download PNG/WEBP versions and use 1K, 2K, 4K and 8K download options when available on the page.
Yes. The download options and engine-mapped ZIP workflow are designed for Blender, Unreal Engine, Unity Standard, URP and HDRP material pipelines.
Yes. The texture is available under the AITextured free commercial license. Review the license page for redistribution and AI-training restrictions.


Build, preview, and export seamless PBR materials. Generate full map sets from a single image, inspect them in a real-time WebGL viewer, and re-package maps for Unreal, Unity, and Blender—directly in your browser.
AI text-to-texture: type a prompt and get a seamless, tileable base image ready for PBR workflows (great starting point for materials).
Create a full PBR set (Normal, Roughness, AO, Metallic, etc.) from a single image. Seamless and tiling-friendly.
Instant WebGL viewer: inspect materials on a sphere, plane, and cube. Check tiling and lighting in real time.
Re-packages maps per engine: Unreal (BaseColor + ORM), Unity (Mask/MetallicSmoothness), Blender (separate channels).
PNG ↔ JPG ↔ SVG: fast convert, SVG rasterize, embed/trace options, quality & background controls.