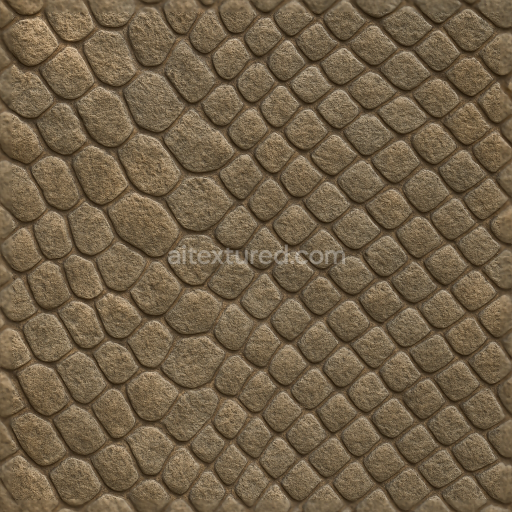
Scaly Skin Rough Hide Reptile Skin Scaled Reptile Snake Scales
Seamless texture (tileable) · PNG, WEBP, PBR ZIP. License: AITextured Free Commercial License (FCL) v1.1. Free personal and commercial use. Raw resale, standalone redistribution, mirroring/scraping, competing asset packs, and AI/ML training are not allowed without written permission. Attribution is not required, but appreciated..

| ID | seamless-3d-texture-pbr-8k-fuzzy-skin-bristly-fur-mammal-skin-fur-undercoat-tail-fur-paw-pads-whiskers-spotted-fur |
|---|---|
| Category | Animal skin |
| Formats | PNG, WEBP, PBR ZIP |
| Size | 1k (1024x1024px), 2k (2048x2048px), 4k (4096x4096px), 8k (8192x8192px) |
| Color | sRGB |
| Tileable | Yes |
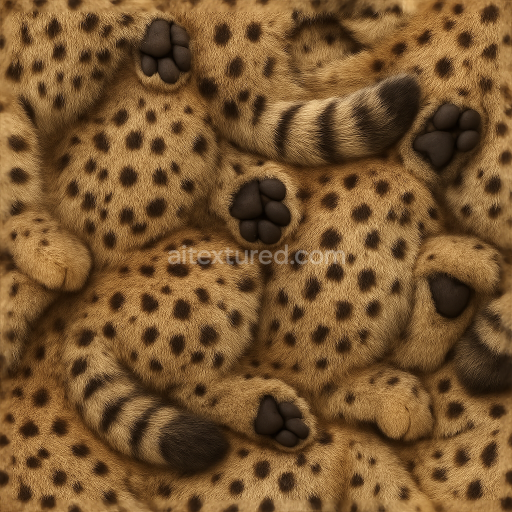
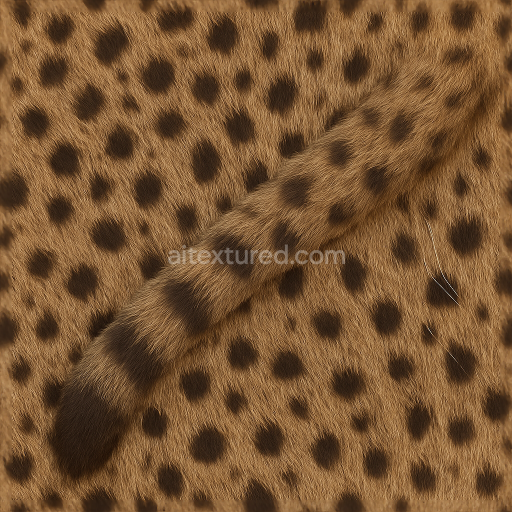
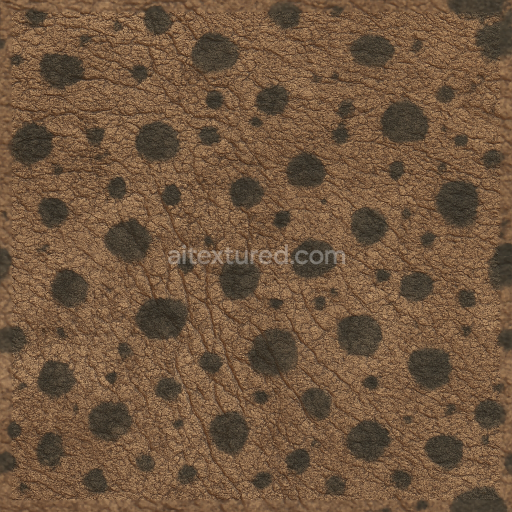
This seamless 8K PBR texture captures the intricate details of mammal skin characterized by fuzzy, bristly fur with a complex spotted pattern. The base material consists primarily of dense, layered keratin fibers forming the fur undercoat and tail fur, overlying a flexible, slightly textured epidermal substrate. The skin’s surface features subtle variations in porosity and microrelief, reflecting natural wear and environmental exposure, while the paw pads exhibit a tougher, leathery structure with fine creases and ridges. Whiskers emerge as stiff, cylindrical filaments, providing distinct geometric contrast against the soft fur masses. The overall form is organic and irregular, with natural clustering of spots and directional fur growth patterns that create a dynamic, lifelike surface topology.*
From a materials science perspective, the fur fibers serve as the primary aggregate, densely packed and oriented to simulate natural bristliness and fuzziness. The underlying skin acts as a compliant substrate bonded to the fur through microscopic interlocking structures, mimicking natural adhesion. Coloration arises from layered pigments within the keratin fibers and skin cells, producing the spotted motifs and subtle tonal shifts across the fur and paw pads. The surface finish varies across regions; the fur appears matte with diffuse reflection due to its fibrous nature, while the paw pads show a slightly roughened, semi-gloss texture. Whiskers are modeled with higher specular response and lower roughness, enhancing their tactile realism.*
In terms of PBR channel mapping, the BaseColor (Albedo) channel encodes the nuanced spotted fur patterns and natural skin tones, carefully calibrated to preserve subtle pigment variations. The Normal map captures the fur’s directional fiber geometry, skin microfolds, and the raised whisker bases, lending convincing depth and relief. Roughness values vary spatially: low roughness on the smooth, stiff whiskers and mid to high roughness across the fuzzy fur and textured paw pads, simulating realistic light scattering. The Metallic channel remains near zero, consistent with organic animal tissue, while Ambient Occlusion accentuates shadowing within fur clusters and skin creases. Height or Displacement maps add fine surface undulations and subtle volumetric depth, enhancing microgeometry for close-up renders.*
Rendered under neutral lighting conditions, this texture maintains fidelity in color and shading, ensuring compatibility with Blender, Unreal Engine, and Unity workflows. Its seamless tiling nature allows for scalable application across large mesh surfaces without visible repetition or seams, crucial for detailed 3D animal models. For optimal use, it is recommended to carefully adjust the UV scale to preserve natural fur density and spot size, and to fine-tune roughness values within your shader to balance softness and subtle specular highlights. Additionally, blending height and normal maps can enhance the perception of fur volume and skin relief, especially when combined with parallax occlusion techniques.*
Import the texture maps into Blender with sRGB color space for albedo/base color and Non-Color for normal, roughness, metallic, AO, height, and ORM maps. Connect normal maps through a Normal Map node, then adjust UV scale with a Mapping node so the material repeats naturally on your model.
For the full step-by-step setup, see How to Use Seamless Textures in Blender. Browse related material examples in wood, concrete, and metal.
Yes. This texture is designed as a seamless tileable PBR material, so it can repeat across large surfaces without visible borders.
You can download PNG/WEBP versions and use 1K, 2K, 4K and 8K download options when available on the page.
Yes. The download options and engine-mapped ZIP workflow are designed for Blender, Unreal Engine, Unity Standard, URP and HDRP material pipelines.
Yes. The texture is available under the AITextured free commercial license. Review the license page for redistribution and AI-training restrictions.


Build, preview, and export seamless PBR materials. Generate full map sets from a single image, inspect them in a real-time WebGL viewer, and re-package maps for Unreal, Unity, and Blender—directly in your browser.
AI text-to-texture: type a prompt and get a seamless, tileable base image ready for PBR workflows (great starting point for materials).
Create a full PBR set (Normal, Roughness, AO, Metallic, etc.) from a single image. Seamless and tiling-friendly.
Instant WebGL viewer: inspect materials on a sphere, plane, and cube. Check tiling and lighting in real time.
Re-packages maps per engine: Unreal (BaseColor + ORM), Unity (Mask/MetallicSmoothness), Blender (separate channels).
PNG ↔ JPG ↔ SVG: fast convert, SVG rasterize, embed/trace options, quality & background controls.