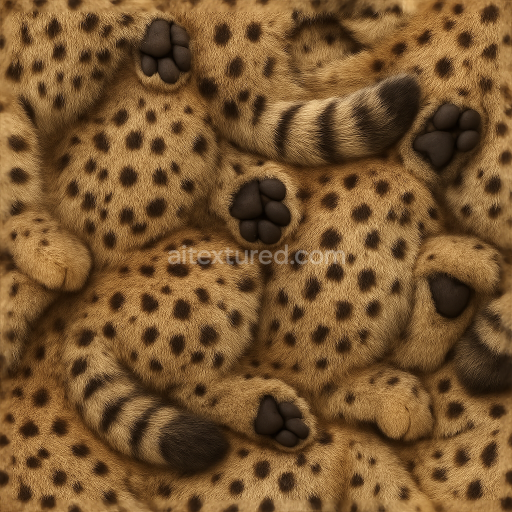
Spotted Hide Thick Skin Leathery Skin Rough Hide Cracked Skin Wrinkled Skin Pitted Skin
Seamless texture (tileable) · PNG, WEBP, PBR ZIP. License: AITextured Free Commercial License (FCL) v1.1. Free personal and commercial use. Raw resale, standalone redistribution, mirroring/scraping, competing asset packs, and AI/ML training are not allowed without written permission. Attribution is not required, but appreciated..

| ID | seamless-3d-texture-pbr-8k-shell-surface-turtle-shell-armored-hide-scaly-skin-rough-scales-pitted-skin-reptile-skin-horny-plates |
|---|---|
| Category | Animal skin |
| Formats | PNG, WEBP, PBR ZIP |
| Size | 1k (1024x1024px), 2k (2048x2048px), 4k (4096x4096px), 8k (8192x8192px) |
| Color | sRGB |
| Tileable | Yes |
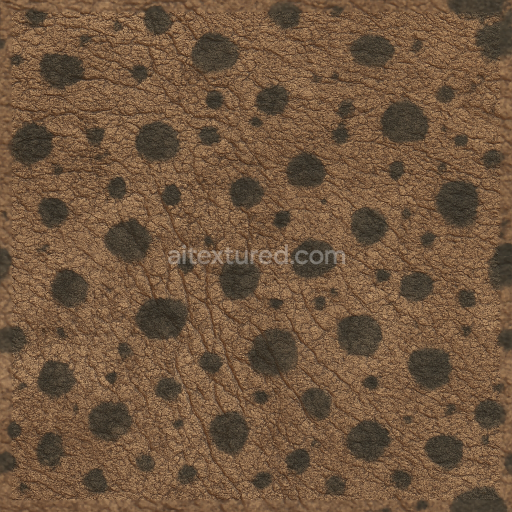
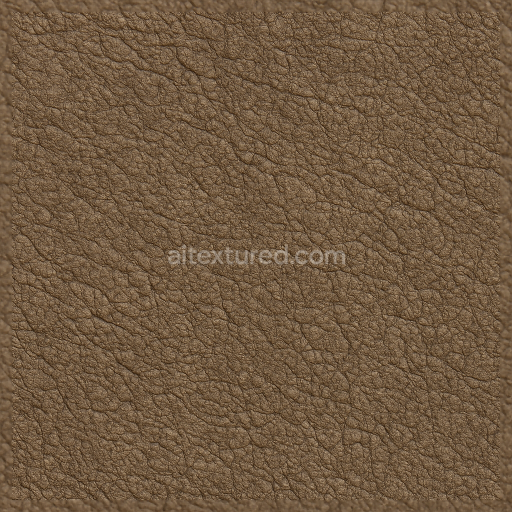
This seamless 8K PBR texture captures the intricate shell surface of a turtle, characterized by its armored hide composed of overlapping horny plates and rough, scaly skin. The geometric form presents a natural tessellation of polygonal scutes—each plate exhibiting subtle convex curvature with irregular edges and pitted surfaces that reflect the biological growth patterns typical of reptilian shells. The base material resembles a dense, keratinous substrate with embedded mineral deposits, giving the shell both rigidity and toughness. This composite structure is reinforced by fibrous binders within the keratin matrix, contributing to the complex micro-roughness and subtle porosity visible across the surface.
Colorwise, the texture displays a muted palette of earthy browns, olive greens, and grays, with natural pigment variations that simulate melanin distribution and environmental weathering effects. These pigments lie primarily within the BaseColor (Albedo) channel, offering color depth without overwhelming saturation. The Normal map intricately defines the rough scales and pitted skin, enhancing the perception of depth and curvature across the plates. Roughness values vary across the texture to replicate the heterogeneous surface finish—some plates appear smoother and slightly polished due to natural abrasion, while others maintain a matte, weathered finish. The Metallic channel remains near zero, reflecting the organic non-metallic nature of the turtle shell, while Ambient Occlusion accentuates crevices and seams between scutes, adding realism to shadowing.
The Height/Displacement map is finely tuned to enhance the layered relief of the scaly skin and armored plates, emphasizing the rugged texture and subtle undulations typical of a turtle’s carapace. This level of detail ensures photorealistic shading and silhouette definition when used with parallax or tessellation techniques in advanced rendering engines. The texture is optimized for seamless tiling, enabling coverage of large surfaces without visible repetition, which is essential for applications requiring extensive organic armor surfaces.
Designed with compatibility in mind, this texture works efficiently across Blender, Unreal Engine, and Unity, supporting PBR workflows that leverage high-resolution maps for precise material definition. For practical use, it is recommended to carefully adjust the UV scale to preserve the natural size and proportions of the shell’s scutes. Additionally, fine-tuning roughness values can help balance the interplay between matte and glossy areas, while blending height and normal maps can improve depth perception without overwhelming surface detail. This approach ensures a versatile, physically accurate material suitable for detailed reptilian creature models and realistic environmental assets.
Import the texture maps into Blender with sRGB color space for albedo/base color and Non-Color for normal, roughness, metallic, AO, height, and ORM maps. Connect normal maps through a Normal Map node, then adjust UV scale with a Mapping node so the material repeats naturally on your model.
For the full step-by-step setup, see How to Use Seamless Textures in Blender. Browse related material examples in wood, concrete, and metal.
Yes. This texture is designed as a seamless tileable PBR material, so it can repeat across large surfaces without visible borders.
You can download PNG/WEBP versions and use 1K, 2K, 4K and 8K download options when available on the page.
Yes. The download options and engine-mapped ZIP workflow are designed for Blender, Unreal Engine, Unity Standard, URP and HDRP material pipelines.
Yes. The texture is available under the AITextured free commercial license. Review the license page for redistribution and AI-training restrictions.


Build, preview, and export seamless PBR materials. Generate full map sets from a single image, inspect them in a real-time WebGL viewer, and re-package maps for Unreal, Unity, and Blender—directly in your browser.
AI text-to-texture: type a prompt and get a seamless, tileable base image ready for PBR workflows (great starting point for materials).
Create a full PBR set (Normal, Roughness, AO, Metallic, etc.) from a single image. Seamless and tiling-friendly.
Instant WebGL viewer: inspect materials on a sphere, plane, and cube. Check tiling and lighting in real time.
Re-packages maps per engine: Unreal (BaseColor + ORM), Unity (Mask/MetallicSmoothness), Blender (separate channels).
PNG ↔ JPG ↔ SVG: fast convert, SVG rasterize, embed/trace options, quality & background controls.