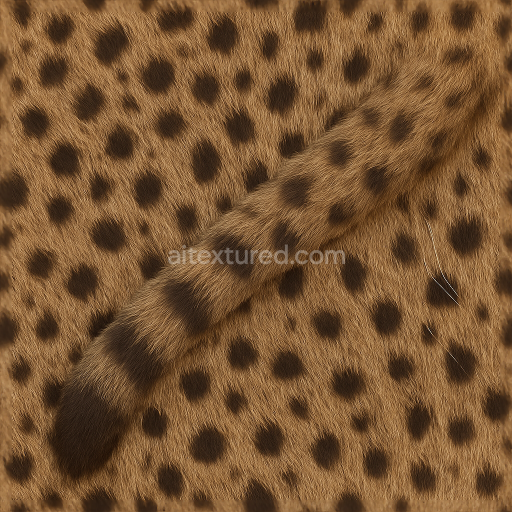
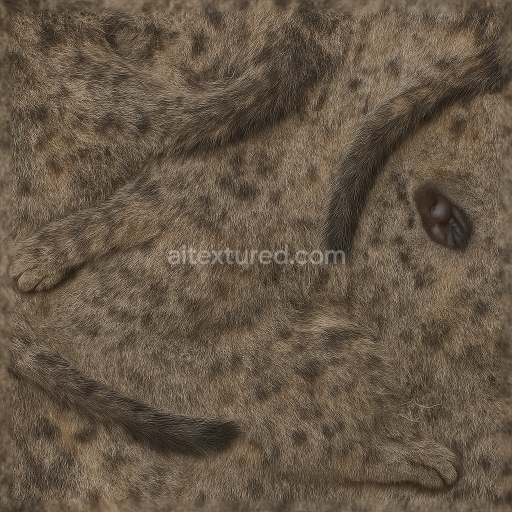
Spotted Fur Dense Fur Mammal Skin Fur Undercoat Whiskers Tail Fur
Seamless texture (tileable) · PNG, WEBP, PBR ZIP. License: AITextured Free Commercial License (FCL) v1.1. Free personal and commercial use. Raw resale, standalone redistribution, mirroring/scraping, competing asset packs, and AI/ML training are not allowed without written permission. Attribution is not required, but appreciated..

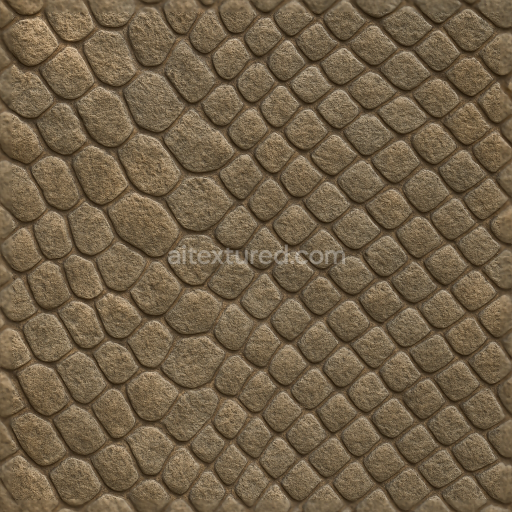
| ID | seamless-3d-texture-pbr-8k-spotted-hide-thick-skin-leathery-skin-rough-hide-cracked-skin-wrinkled-skin-pitted-skin |
|---|---|
| Category | Animal skin |
| Formats | PNG, WEBP, PBR ZIP |
| Size | 1k (1024x1024px), 2k (2048x2048px), 4k (4096x4096px), 8k (8192x8192px) |
| Color | sRGB |
| Tileable | Yes |
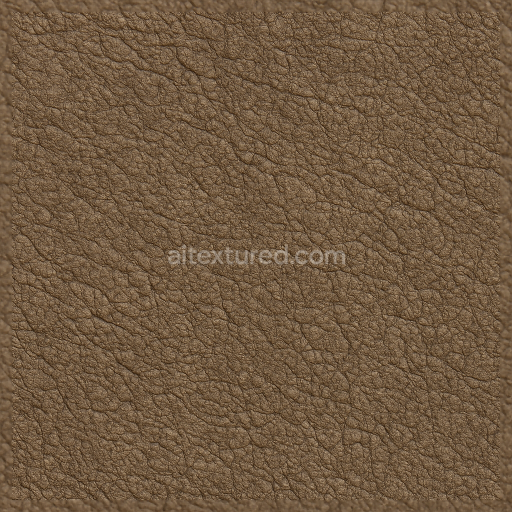
This seamless 8K PBR texture showcases a richly detailed spotted hide characterized by thick, leathery skin with pronounced roughness and visible signs of natural wear. The base material is a dense collagen-rich dermal layer typical of large mammals, providing a firm yet flexible substrate. Embedded within are irregular grain patterns formed by tightly packed protein fibers, which create a pitted and wrinkled surface topology. The skin’s cracked and weathered appearance results from natural aging and environmental exposure, introducing subtle fractures and crevices that break uniformity and add depth to the form.
The texture’s composition reveals a complex interplay between the primary skin matrix and surface deposits. The substrate acts as a fibrous network, while the outer epidermal layer contributes pigments responsible for the spotted coloration—ranging from muted tans to darker browns—distributed unevenly to simulate a natural mottled pattern. Surface finish is predominantly matte with areas of slight sheen where the leathery skin is less weathered, enhancing visual realism. These features are faithfully captured across multiple PBR channels: the BaseColor map conveys the nuanced pigments; Normal and Height maps define the intricate wrinkles, pits, and cracks; Roughness controls the tactile feel from smooth to coarse patches; Ambient Occlusion adds subtle shading in crevices; Metallic is kept minimal to zero, reflecting the organic, non-metallic nature of the hide.
Designed for seamless tiling, this texture maintains consistency even when repeated over expansive 3D surfaces, making it suitable for detailed creature models or large mammalian skins in Blender, Unreal Engine, and Unity projects. The 8K resolution ensures exceptional clarity and fine detail visibility, supporting close-up renders without pixelation. The roughness variations and displacement data allow for realistic light interaction, emphasizing the skin’s tactile qualities and enhancing the perception of depth and volume in digital environments.
When applying this texture, consider adjusting the UV scale to balance detail density with model size, avoiding overly stretched or compressed appearances. Fine-tuning the roughness map can help simulate different levels of skin hydration or dryness, while blending the height and normal maps can improve surface detail fidelity without excessive geometry. This approach ensures the texture adapts well across various lighting conditions and rendering engines, providing a versatile and physically accurate material representation.
Import the texture maps into Blender with sRGB color space for albedo/base color and Non-Color for normal, roughness, metallic, AO, height, and ORM maps. Connect normal maps through a Normal Map node, then adjust UV scale with a Mapping node so the material repeats naturally on your model.
For the full step-by-step setup, see How to Use Seamless Textures in Blender. Browse related material examples in wood, concrete, and metal.
Yes. This texture is designed as a seamless tileable PBR material, so it can repeat across large surfaces without visible borders.
You can download PNG/WEBP versions and use 1K, 2K, 4K and 8K download options when available on the page.
Yes. The download options and engine-mapped ZIP workflow are designed for Blender, Unreal Engine, Unity Standard, URP and HDRP material pipelines.
Yes. The texture is available under the AITextured free commercial license. Review the license page for redistribution and AI-training restrictions.


Build, preview, and export seamless PBR materials. Generate full map sets from a single image, inspect them in a real-time WebGL viewer, and re-package maps for Unreal, Unity, and Blender—directly in your browser.
AI text-to-texture: type a prompt and get a seamless, tileable base image ready for PBR workflows (great starting point for materials).
Create a full PBR set (Normal, Roughness, AO, Metallic, etc.) from a single image. Seamless and tiling-friendly.
Instant WebGL viewer: inspect materials on a sphere, plane, and cube. Check tiling and lighting in real time.
Re-packages maps per engine: Unreal (BaseColor + ORM), Unity (Mask/MetallicSmoothness), Blender (separate channels).
PNG ↔ JPG ↔ SVG: fast convert, SVG rasterize, embed/trace options, quality & background controls.