
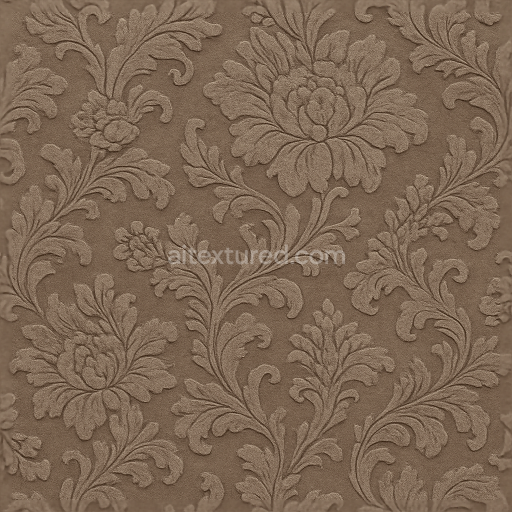
Wallpaper Displaying Vintage Baroque Damask Weave Plush Textile
Seamless texture (tileable) · PNG, WEBP, PBR ZIP. License: AITextured Free Commercial License (FCL) v1.1. Free personal and commercial use. Raw resale, standalone redistribution, mirroring/scraping, competing asset packs, and AI/ML training are not allowed without written permission. Attribution is not required, but appreciated..
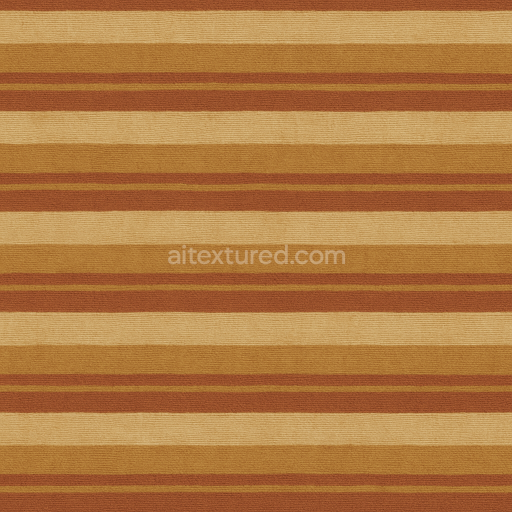
| ID | seamless-3d-texture-pbr-8k-retro-stripes-wallpaper-with-chevron-pattern-and-raised-flocked-velvet-finish |
|---|---|
| Category | Wallpaper |
| Formats | PNG, WEBP, PBR ZIP |
| Size | 1k (1024x1024px), 2k (2048x2048px), 4k (4096x4096px), 8k (8192x8192px) |
| Color | sRGB |
| Tileable | Yes |
This seamless 3D texture presents a meticulously crafted wallpaper design featuring a retro-inspired chevron pattern composed of alternating stripes. The geometric form is defined by crisp angular chevrons arranged in a continuous interlocking fashion that creates dynamic visual movement. The base material simulates a high-quality vinyl substrate chosen for its durability and subtle flexibility which provides a stable foundation for the intricate raised flocked velvet finish. Embedded within the substrate are fine textile fibers that mimic flocked particles lending a soft plush tactile sensation and contributing to a slightly textured surface profile. The wallpaper’s porosity is minimal reflecting its indoor application and resistance to moisture while the surface finish balances a low-gloss velvet sheen with selectively raised flocked areas enhancing depth and realism.
The composition relies on a layered approach where the base vinyl layer acts as the primary structural medium bonded with a synthetic adhesive binder that secures the flocked velvet fibers onto the surface. These fibers create micro-aggregates that catch light differently from the smoother vinyl emphasizing the raised chevron stripes and imparting a subtle tactile contrast. Pigmentation is carefully applied through a combination of base color pigments and translucent dyes facilitating a rich retro palette dominated by muted earth tones and soft pastels typical of mid-century aesthetics. This coloration is mapped to the BaseColor (Albedo) channel while the Normal map captures the precise raised flocked geometry and sharp chevron edges to simulate depth and light interaction accurately. The Roughness map varies across the surface with flocked areas showing higher roughness values for a matte velvet effect contrasted by smoother vinyl stripes exhibiting lower roughness for a gentle gloss. Metallic values remain near zero to reflect the non-metallic nature of the materials and Ambient Occlusion enhances shadowing within the chevron grooves and fiber clusters. Height and Displacement maps emphasize the raised flocked texture providing realistic depth when used with parallax or tessellation techniques.
Rendered at an ultra-high 8K resolution this texture delivers exceptional detail suitable for close-up inspection in real-time environments. Its PBR workflow ensures compatibility and seamless integration with major 3D platforms such as Blender Unreal Engine and Unity enabling artists and developers to maintain consistent material behavior under various lighting conditions. The seamless design guarantees pattern continuity without visible borders or repetition artifacts facilitating effortless UV mapping for large-scale applications like accent walls or immersive interior scenes. For optimal usage it is recommended to carefully adjust the UV scale to preserve the intricate chevron detail without pixelation. Additionally fine-tuning the roughness map can help balance the velvet’s softness against the subtle gloss of the vinyl substrate while blending height and normal maps allows for enhanced parallax effects that emphasize the flocked relief without overstating geometric displacement.
Import the texture maps into Blender with sRGB color space for albedo/base color and Non-Color for normal, roughness, metallic, AO, height, and ORM maps. Connect normal maps through a Normal Map node, then adjust UV scale with a Mapping node so the material repeats naturally on your model.
For the full step-by-step setup, see How to Use Seamless Textures in Blender. Browse related material examples in wood, concrete, and metal.
Yes. This texture is designed as a seamless tileable PBR material, so it can repeat across large surfaces without visible borders.
You can download PNG/WEBP versions and use 1K, 2K, 4K and 8K download options when available on the page.
Yes. The download options and engine-mapped ZIP workflow are designed for Blender, Unreal Engine, Unity Standard, URP and HDRP material pipelines.
Yes. The texture is available under the AITextured free commercial license. Review the license page for redistribution and AI-training restrictions.


Generate, preview, and export seamless PBR materials for Blender, Unity, and Unreal Engine—directly in your browser.
AI text-to-texture: type a prompt and get a seamless, tileable base image ready for PBR workflows (great starting point for materials).
Create a full PBR set (Normal, Roughness, AO, Metallic, etc.) from a single image. Seamless and tiling-friendly.
Instant WebGL viewer: inspect materials on a sphere, plane, and cube. Check tiling and lighting in real time.
Re-packages maps per engine: Unreal (BaseColor + ORM), Unity (Mask/MetallicSmoothness), Blender (separate channels).
PNG ↔ JPG ↔ SVG: fast convert, SVG rasterize, embed/trace options, quality & background controls.