
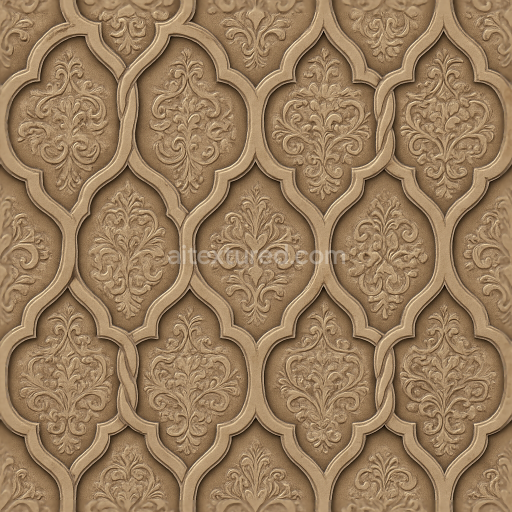
Wallpaper With Tropical Botanical Ivy Vine Leafy Canvas Texture
Seamless texture (tileable) · PNG, WEBP, PBR ZIP. License: AITextured Free Commercial License (FCL) v1.1. Free personal and commercial use. Raw resale, standalone redistribution, mirroring/scraping, competing asset packs, and AI/ML training are not allowed without written permission. Attribution is not required, but appreciated..

| ID | seamless-3d-texture-pbr-8k-wallpaper-with-abstract-distressed-faux-leather-grain |
|---|---|
| Category | Wallpaper |
| Formats | PNG, WEBP, PBR ZIP |
| Size | 1k (1024x1024px), 2k (2048x2048px), 4k (4096x4096px), 8k (8192x8192px) |
| Color | sRGB |
| Tileable | Yes |
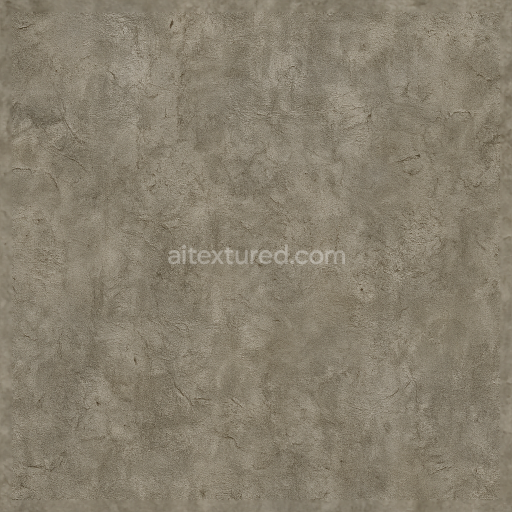
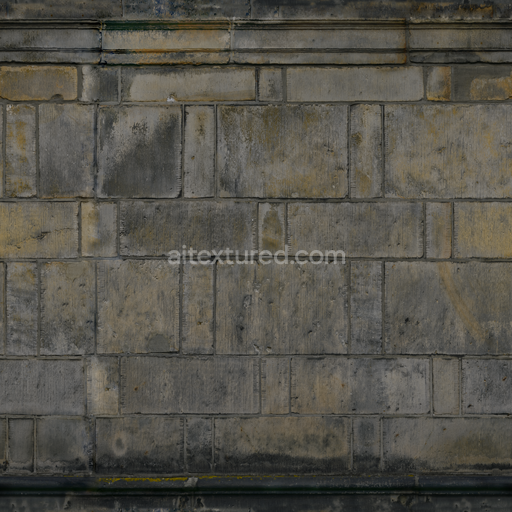
This seamless 3D texture presents a high-resolution 8K wallpaper featuring an abstract distressed pattern rendered on a faux leather material base. The underlying substrate mimics a synthetic leather composite typically composed of a textile or vinyl backing layered with polyurethane binders that simulate natural leather fibers. This structure creates a flexible yet durable surface enhanced by fine grain aggregates that replicate the subtle irregularities and pores found in genuine leather. The distressed effect is achieved through simulated micro-cracks and worn patches distributed across the surface contributing to a weathered tactile appearance. The geometric form is organic and irregular with no repeating motifs emphasizing the abstract nature of the faux leather grain rather than a strict pattern like hexagonal or woven textures.
From a material standpoint the surface finish is matte with soft gloss highlights reflecting the semi-polished faux leather topcoat which subtly catches light while maintaining a natural non-reflective quality. Colorants embedded within the polyurethane layer create a warm earthy tone palette that varies slightly to emphasize depth and wear. These pigments influence the BaseColor (Albedo) channel providing a realistic coloration that blends seamlessly with the Normal map to enhance surface detail. The Normal and Height channels work together to define the intricate surface relief of the distressed grain and crack formations while the Roughness channel controls the interplay of light by simulating the varying degrees of surface smoothness and roughness typical of aged leather. The Metallic channel remains minimal or near zero reflecting the non-metallic nature of the faux leather and Ambient Occlusion adds subtle shadowing in recessed areas to increase depth perception.
This texture is optimized for physically based rendering workflows making it fully compatible with popular 3D engines such as Blender Unreal Engine and Unity. The 8K resolution ensures that every fine detail—from micro-scratches to grain patterns—is captured crisply even when applied to large surfaces or close-up views. The seamless tiling functionality guarantees smooth repetition without visible borders essential for wallpaper applications covering extensive areas. Practical usage advice includes adjusting the UV scale to avoid overly stretched details and fine-tuning the Roughness map to control how matte or glossy the surface appears in different lighting environments. Additionally blending the Height map with Normal details can enhance the perception of depth without excessive geometry displacement optimizing performance while maintaining visual fidelity.
Import the texture maps into Blender with sRGB color space for albedo/base color and Non-Color for normal, roughness, metallic, AO, height, and ORM maps. Connect normal maps through a Normal Map node, then adjust UV scale with a Mapping node so the material repeats naturally on your model.
For the full step-by-step setup, see How to Use Seamless Textures in Blender. Browse related material examples in wood, concrete, and metal.
Yes. This texture is designed as a seamless tileable PBR material, so it can repeat across large surfaces without visible borders.
You can download PNG/WEBP versions and use 1K, 2K, 4K and 8K download options when available on the page.
Yes. The download options and engine-mapped ZIP workflow are designed for Blender, Unreal Engine, Unity Standard, URP and HDRP material pipelines.
Yes. The texture is available under the AITextured free commercial license. Review the license page for redistribution and AI-training restrictions.


Generate, preview, and export seamless PBR materials for Blender, Unity, and Unreal Engine—directly in your browser.
AI text-to-texture: type a prompt and get a seamless, tileable base image ready for PBR workflows (great starting point for materials).
Create a full PBR set (Normal, Roughness, AO, Metallic, etc.) from a single image. Seamless and tiling-friendly.
Instant WebGL viewer: inspect materials on a sphere, plane, and cube. Check tiling and lighting in real time.
Re-packages maps per engine: Unreal (BaseColor + ORM), Unity (Mask/MetallicSmoothness), Blender (separate channels).
PNG ↔ JPG ↔ SVG: fast convert, SVG rasterize, embed/trace options, quality & background controls.