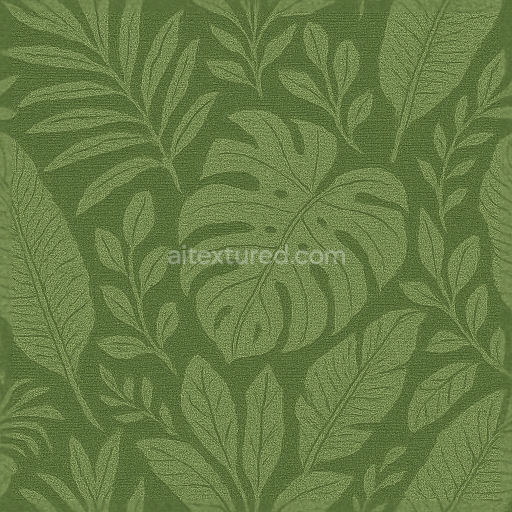
Wallpaper With Tropical Leafy Botanical Canvas Matte Finish
Seamless texture (tileable) · PNG, WEBP, PBR ZIP. License: AITextured Free Commercial License (FCL) v1.1. Free personal and commercial use. Raw resale, standalone redistribution, mirroring/scraping, competing asset packs, and AI/ML training are not allowed without written permission. Attribution is not required, but appreciated..

| ID | seamless-3d-texture-pbr-8k-art-nouveau-botanical-ivy-wallpaper-with-textured-woven-silk-sheen-and-metallic-accents |
|---|---|
| Category | Wallpaper |
| Formats | PNG, WEBP, PBR ZIP |
| Size | 1k (1024x1024px), 2k (2048x2048px), 4k (4096x4096px), 8k (8192x8192px) |
| Color | sRGB |
| Tileable | Yes |
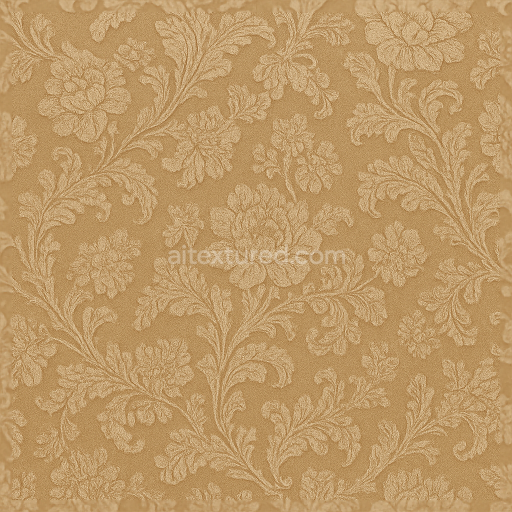
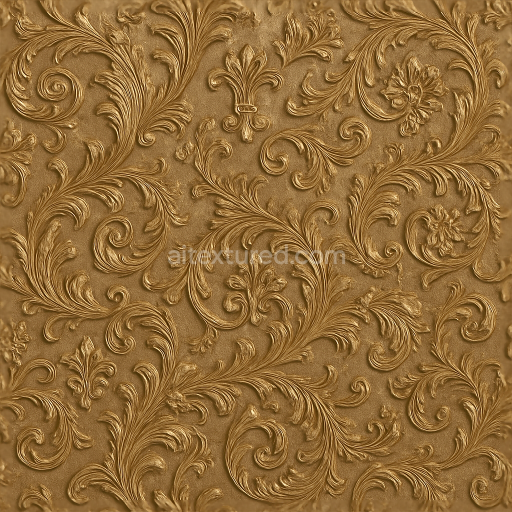
This wallpaper texture features a seamless 3D pattern inspired by Art Nouveau botanical ivy motifs rendered at an impressive 8K resolution for ultra-detailed visualization. The base material simulates a finely woven silk substrate characterized by subtle fiber interlacing and a slight natural sheen that reflects light softly creating a luxurious yet understated glow. The silk weave’s intricate geometry is captured through the Normal and Height maps emphasizing the tactile depth of the fabric’s threads and folds while the BaseColor channel conveys rich natural tones of deep greens and warm neutrals that evoke lush ivy foliage against a soft muted background.
The wallpaper’s composition includes a silk-like textile base combined with a durable adhesive binder that ensures the pattern’s crispness and longevity. Metallic accents are delicately integrated into the design represented in the Metallic PBR channel as fine highlights that catch ambient light without overpowering the silk sheen. These subtle metallic details add dimensionality and refinement enhancing the botanical elements with a soft reflective quality. The Roughness map balances smooth silk surfaces with slightly coarser woven textures providing realistic variations in light diffusion across the wallpaper’s surface. Ambient Occlusion enhances shadow depth within the weave and leaf contours amplifying the three-dimensional feel.
Structurally the wallpaper’s pattern is composed of overlapping ivy leaves and curling vines arranged in a flowing Art Nouveau style creating a rhythmic organic geometry. The form is neither rigid nor geometric but rather fluid and natural embodying the classic ornamental aesthetics of the period. The texture’s porosity is low consistent with silk’s dense fine weave which reduces weathering and wear appearance making it ideal for indoor use. The surface finish is gently polished with a woven texture’s characteristic graininess captured through displacement and normal maps that deliver convincing surface relief in real-time rendering applications.
Designed for seamless integration in 3D environments this PBR wallpaper texture is optimized for Blender Unreal Engine and Unity supporting workflows that demand high-fidelity materials. The 8K resolution ensures crisp detail even at close inspection suitable for large-scale interior visualizations. For practical use it is recommended to adjust UV tiling carefully to maintain the natural flow of the botanical pattern without distortion. Additionally fine-tuning the roughness map can help balance the silk’s sheen and metallic highlights depending on lighting conditions while blending height and normal maps can enhance surface depth without introducing artifacts in parallax occlusion setups.
Import the texture maps into Blender with sRGB color space for albedo/base color and Non-Color for normal, roughness, metallic, AO, height, and ORM maps. Connect normal maps through a Normal Map node, then adjust UV scale with a Mapping node so the material repeats naturally on your model.
For the full step-by-step setup, see How to Use Seamless Textures in Blender. Browse related material examples in wood, concrete, and metal.
Yes. This texture is designed as a seamless tileable PBR material, so it can repeat across large surfaces without visible borders.
You can download PNG/WEBP versions and use 1K, 2K, 4K and 8K download options when available on the page.
Yes. The download options and engine-mapped ZIP workflow are designed for Blender, Unreal Engine, Unity Standard, URP and HDRP material pipelines.
Yes. The texture is available under the AITextured free commercial license. Review the license page for redistribution and AI-training restrictions.


Generate, preview, and export seamless PBR materials for Blender, Unity, and Unreal Engine—directly in your browser.
AI text-to-texture: type a prompt and get a seamless, tileable base image ready for PBR workflows (great starting point for materials).
Create a full PBR set (Normal, Roughness, AO, Metallic, etc.) from a single image. Seamless and tiling-friendly.
Instant WebGL viewer: inspect materials on a sphere, plane, and cube. Check tiling and lighting in real time.
Re-packages maps per engine: Unreal (BaseColor + ORM), Unity (Mask/MetallicSmoothness), Blender (separate channels).
PNG ↔ JPG ↔ SVG: fast convert, SVG rasterize, embed/trace options, quality & background controls.