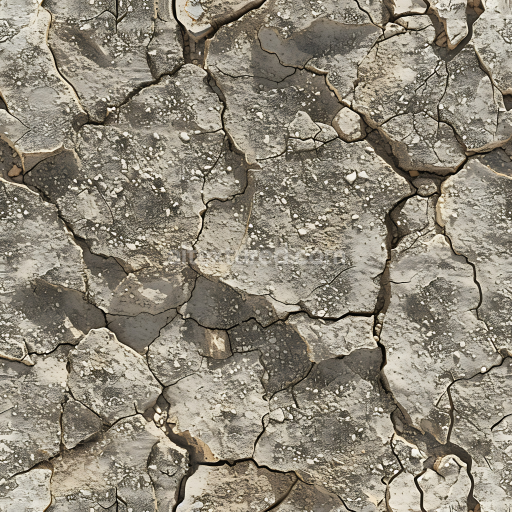
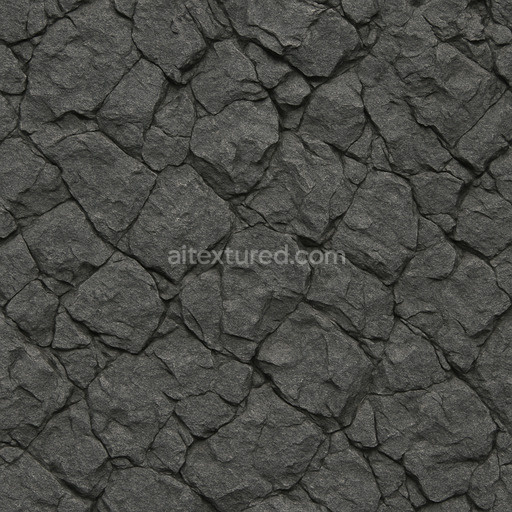
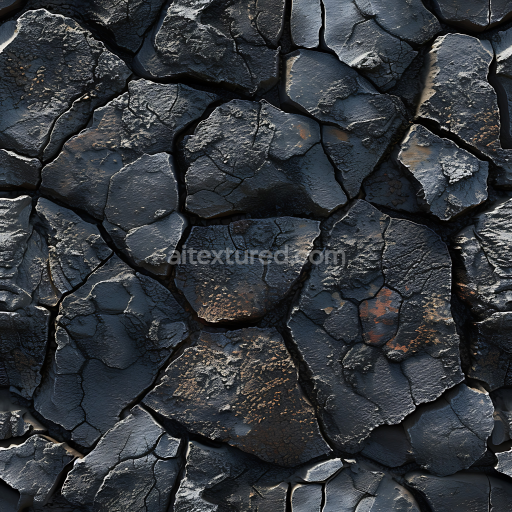
Cracked Dry Stone Ground Seamless Texture with Weathered Surface
Seamless texture (tileable) · PNG, WEBP, PBR ZIP. License: AITextured Free Commercial License (FCL) v1.1. Free personal and commercial use. Raw resale, standalone redistribution, mirroring/scraping, competing asset packs, and AI/ML training are not allowed without written permission. Attribution is not required, but appreciated..

| ID | seamless-3d-texture-pbr-8k-breccia-fractured-rough-natural-stone-surface |
|---|---|
| Category | Stone |
| Formats | PNG, WEBP, PBR ZIP |
| Size | 1k (1024x1024px), 2k (2048x2048px), 4k (4096x4096px), 8k (8192x8192px) |
| Color | sRGB |
| Tileable | Yes |
This seamless 8K PBR texture depicts breccia a natural stone characterized by its fractured angular fragments embedded within a rough grainy matrix. The base material primarily consists of coarse irregularly shaped rock fragments—often limestone chert or quartz—cemented together by a finer-grained sedimentary binder. This composite structure creates a distinctive geometric form where jagged clasts varying in size and shape are tightly packed producing an intricate mosaic pattern typical of breccia formations. The uneven surface exhibits natural porosity and subtle weathering effects with micro-cracks and crevices enhancing the tactile roughness and aged appearance of the stone.
The surface finish is raw and unpolished emphasizing the natural ruggedness of the rockface. Earthy color tones dominate the BaseColor (Albedo) map featuring warm grays muted browns and subtle reddish hues that reflect mineral impurities and oxidation processes within the stone. The Normal map captures the fractured relief and fine grain details providing depth and realistic light interaction for 3D rendering. Roughness values are calibrated to emphasize the coarse matte surface ensuring highlights are diffused rather than glossy while the Ambient Occlusion map accentuates crevices and shadowed indentations between the clasts. The texture contains no metallic components so the Metallic channel remains flat focusing on natural stone reflectivity. Height and Displacement maps are included to simulate the uneven fracture geometry and subtle elevation changes inherent to breccia.
Designed for seamless tiling this texture can be repeatedly applied without visible seams or distortions allowing for extensive coverage in geological or architectural visualizations. Its high 8K resolution ensures exceptional detail fidelity suitable for close-up renders in Blender Unreal Engine and Unity where accurate material representation is essential. The texture’s comprehensive PBR setup supports realistic shading workflows enabling artists to achieve convincing natural stone surfaces with minimal adjustment.
For optimal results it is recommended to carefully adjust the UV scale to maintain the natural grain size avoiding overly large or small repetitions that can break immersion. Additionally fine-tuning the roughness map can enhance the worn weathered character of the stone—reducing roughness slightly in raised areas to simulate polished edges caused by erosion. When integrating this texture into scenes with complex lighting blending height and normal maps can improve surface detail perception especially in parallax or displacement-enabled shaders providing a more convincing fractured stone effect.
Import the texture maps into Blender with sRGB color space for albedo/base color and Non-Color for normal, roughness, metallic, AO, height, and ORM maps. Connect normal maps through a Normal Map node, then adjust UV scale with a Mapping node so the material repeats naturally on your model.
For the full step-by-step setup, see How to Use Seamless Textures in Blender. Browse related material examples in wood, concrete, and metal.
Yes. This texture is designed as a seamless tileable PBR material, so it can repeat across large surfaces without visible borders.
You can download PNG/WEBP versions and use 1K, 2K, 4K and 8K download options when available on the page.
Yes. The download options and engine-mapped ZIP workflow are designed for Blender, Unreal Engine, Unity Standard, URP and HDRP material pipelines.
Yes. The texture is available under the AITextured free commercial license. Review the license page for redistribution and AI-training restrictions.

Build, preview, and export seamless PBR materials. Generate full map sets from a single image, inspect them in a real-time WebGL viewer, and re-package maps for Unreal, Unity, and Blender—directly in your browser.
AI text-to-texture: type a prompt and get a seamless, tileable base image ready for PBR workflows (great starting point for materials).
Create a full PBR set (Normal, Roughness, AO, Metallic, etc.) from a single image. Seamless and tiling-friendly.
Instant WebGL viewer: inspect materials on a sphere, plane, and cube. Check tiling and lighting in real time.
Re-packages maps per engine: Unreal (BaseColor + ORM), Unity (Mask/MetallicSmoothness), Blender (separate channels).
PNG ↔ JPG ↔ SVG: fast convert, SVG rasterize, embed/trace options, quality & background controls.