
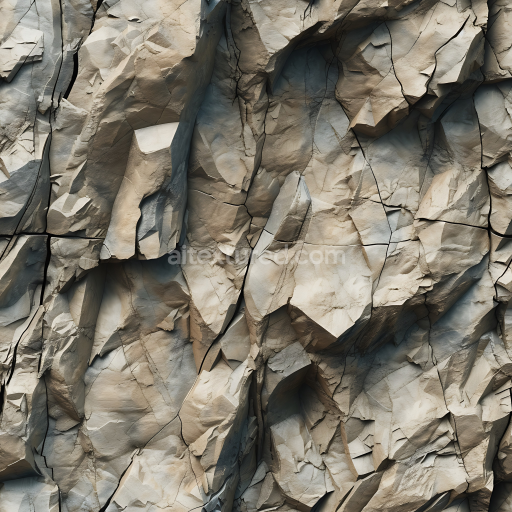
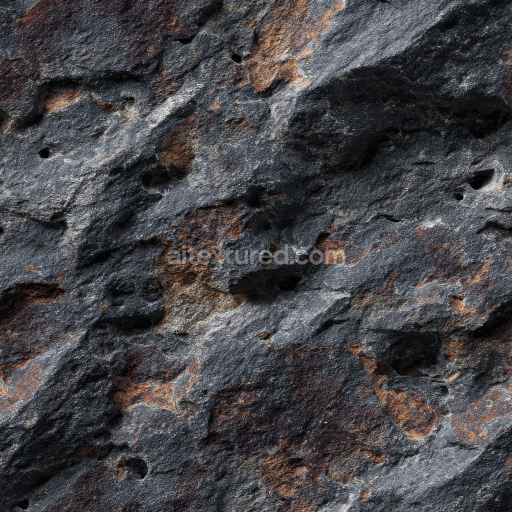
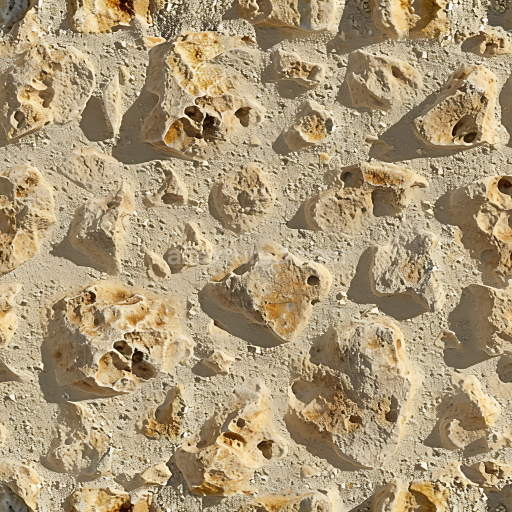
stone PBR texture featuring natural multicolor rocky ground
Seamless texture (tileable) · PNG, WEBP, PBR ZIP. License: AITextured Free Commercial License (FCL) v1.1. Free personal and commercial use. Raw resale, standalone redistribution, mirroring/scraping, competing asset packs, and AI/ML training are not allowed without written permission. Attribution is not required, but appreciated..

| ID | seamless-3d-texture-pbr-8k-limestone-weathered-stone-rough-stone-porous-stone |
|---|---|
| Category | Stone |
| Formats | PNG, WEBP, PBR ZIP |
| Size | 1k (1024x1024px), 2k (2048x2048px), 4k (4096x4096px), 8k (8192x8192px) |
| Color | sRGB |
| Tileable | Yes |
This seamless 8K PBR texture represents a weathered limestone surface with a naturally rough and porous stone appearance. Limestone a sedimentary rock primarily composed of calcium carbonate exhibits a granular and uneven substrate formed by compacted marine organisms' skeletal fragments. Over time exposure to environmental conditions results in distinctive weathering patterns including micro-cracks pitting and subtle erosion all of which contribute to the stone’s characteristic porous texture. The surface finish is matte and unpolished reflecting the stone’s aged and naturally worn state rather than a refined or brushed look. This texture captures the intricate interplay of light and shadow on the uneven stone face emphasizing its rugged form and irregular grain.
The material’s composition is defined by a compact yet porous matrix where the calcium carbonate base is interspersed with fine sediment grains and occasional fossilized inclusions. The porous nature is evident through numerous small holes and crevices which enhance the tactile roughness and depth. The color palette ranges from pale beige to soft gray tones with subtle variations caused by natural pigmentation and weathering effects such as mineral stains and surface discoloration. These variations are faithfully represented in the BaseColor (Albedo) channel while the Normal and Height maps provide detailed surface relief highlighting cracks fissures and stone grain. The Roughness channel accurately simulates the surface’s diffuse reflection properties ensuring non-metallic matte characteristics while the Metallic channel remains low or zero reflecting the stone’s non-metallic composition. Ambient Occlusion enhances depth perception in crevices and recessed areas reinforcing the stone’s three-dimensional form.
Designed for high-fidelity applications this 3D texture integrates seamlessly into Blender Unreal Engine and Unity workflows. Its 8K resolution ensures exceptional detail retention even at close camera distances making it suitable for realistic rock faces ancient stone walls architectural facades or outdoor environmental assets. The seamless tiling capability allows for extensive surface coverage without visible repetition or edge artifacts supporting large-scale digital environments or scanned asset workflows.
For optimal results it is advisable to adjust the UV scaling to balance detail density and texture repetition according to the scene’s scale. Additionally fine-tuning the roughness map can help simulate varying degrees of surface moisture or wear while blending the height map with normal maps can enhance depth perception without excessive geometry displacement. This approach ensures the weathered limestone texture maintains authenticity and physical plausibility across diverse rendering engines and lighting conditions.
Import the texture maps into Blender with sRGB color space for albedo/base color and Non-Color for normal, roughness, metallic, AO, height, and ORM maps. Connect normal maps through a Normal Map node, then adjust UV scale with a Mapping node so the material repeats naturally on your model.
For the full step-by-step setup, see How to Use Seamless Textures in Blender. Browse related material examples in wood, concrete, and metal.
Yes. This texture is designed as a seamless tileable PBR material, so it can repeat across large surfaces without visible borders.
You can download PNG/WEBP versions and use 1K, 2K, 4K and 8K download options when available on the page.
Yes. The download options and engine-mapped ZIP workflow are designed for Blender, Unreal Engine, Unity Standard, URP and HDRP material pipelines.
Yes. The texture is available under the AITextured free commercial license. Review the license page for redistribution and AI-training restrictions.
Build, preview, and export seamless PBR materials. Generate full map sets from a single image, inspect them in a real-time WebGL viewer, and re-package maps for Unreal, Unity, and Blender—directly in your browser.
AI text-to-texture: type a prompt and get a seamless, tileable base image ready for PBR workflows (great starting point for materials).
Create a full PBR set (Normal, Roughness, AO, Metallic, etc.) from a single image. Seamless and tiling-friendly.
Instant WebGL viewer: inspect materials on a sphere, plane, and cube. Check tiling and lighting in real time.
Re-packages maps per engine: Unreal (BaseColor + ORM), Unity (Mask/MetallicSmoothness), Blender (separate channels).
PNG ↔ JPG ↔ SVG: fast convert, SVG rasterize, embed/trace options, quality & background controls.