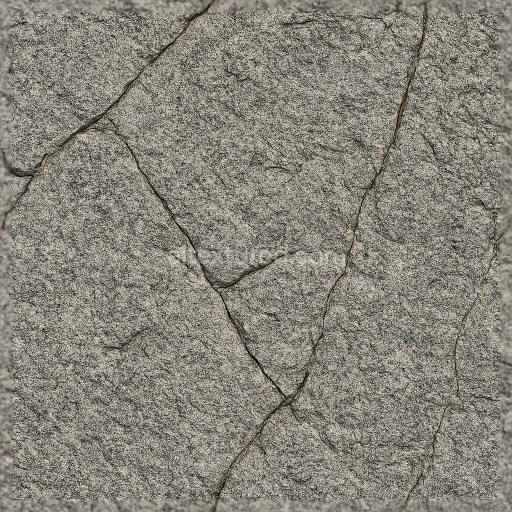
This seamless 3D texture presents a highly detailed rough granite stone surface rendered at an impressive 8K resolution, designed to replicate the natural complexity of granite in digital environments. The material composition reveals a dense, coarse-grained igneous rock substrate, primarily composed of interlocking quartz, feldspar, and mica crystals. These mineral grains contribute to the texture’s characteristic mottled appearance, with visible stone grains and subtle color variations ranging from muted grays and earthy browns to occasional flecks of darker minerals. The stone’s surface exhibits natural porosity and weathering effects, including fine cracks and stone pores that add to its authenticity and tactile realism.
The geometric form of this texture mimics irregular stone slabs commonly found in stone walls, floors, and cliffs, featuring a rugged, uneven surface topology. The pattern includes jagged stone cracks and fissures, which are intricately detailed in the height and normal maps, enhancing the illusion of depth and roughness. The rough granite’s finish is unpolished and coarse, emphasizing a natural, matte look that reflects light diffusely. This surface condition is effectively captured in the roughness map, which controls the scattering of light, while the ambient occlusion map accentuates recessed areas such as cracks and pores, providing additional shading realism.
From a physically based rendering (PBR) standpoint, the BaseColor (Albedo) map conveys the granite’s natural coloration without baked-in shadows or highlights, ensuring accurate lighting interaction in real-time engines. The Normal map encodes the fine surface details of stone grains and cracks to simulate micro-geometry. The Roughness channel defines the uneven, non-reflective nature of the granite, while the Metallic map remains near zero, reflecting the non-metallic composition of natural stone. Height or displacement maps offer precise elevation data, allowing for enhanced parallax or tessellation effects to further emphasize the granite’s three-dimensional form.
Optimized for use in Blender, Unreal Engine, and Unity, this texture supports seamless tiling across large surfaces without visible repetition or seams, making it suitable for extensive stone walls, floors, or cliff faces in architectural visualization, game environments, and digital landscaping. For practical application, it is recommended to carefully adjust the UV scale to maintain the granite’s natural grain size relative to the scene’s proportions. Additionally, tweaking the roughness value can help achieve the desired balance between matte and slightly reflective stone surfaces, while blending height and normal maps can enhance surface depth without excessive geometry complexity.
How to Use These Seamless PBR Textures in Blender
This guide shows how to connect a full PBR texture set to Principled BSDF in Blender (Cycles or Eevee). Works with any of our seamless textures free download, including PBR PNG materials for Blender / Unreal / Unity.
What’s inside the download
*_albedo.png — Base Color (sRGB)*_normal.png — Normal map (Non-Color)*_roughness.png — Roughness (Non-Color)*_metallic.png — Metallic (Non-Color)*_ao.png — Ambient Occlusion (Non-Color)*_height.png — Height / Displacement (Non-Color)*_ORM.png — Packed map (R=AO, G=Roughness, B=Metallic, Non-Color)

Quick start (Node Wrangler, 30 seconds)
- Enable the addon: Edit → Preferences → Add-ons → Node Wrangler.
- Create a material and select the Principled BSDF node.
- Press Ctrl + Shift + T and select the maps
albedo, normal, roughness, metallic (skip height and ORM for now) → Open.
The addon wires Base Color, Normal (with a Normal Map node), Roughness, and Metallic automatically.
- Add AO and Height using the “Manual wiring” steps below (5 and 6).
Manual wiring (full control)
- Create a material (Material Properties → New) and open the Shader Editor.
- Add an Image Texture node for each map. Set Color Space:
- Albedo → sRGB
- AO, Roughness, Metallic, Normal, Height, ORM → Non-Color
- Connect to Principled BSDF:
albedo → Base Colorroughness → Roughnessmetallic → Metallic (for wood this often stays near 0)normal → Normal Map node (Type: Tangent Space) → Normal of Principled.
If details look “inverted”, enable Invert Y on the Normal Map node.
- Ambient Occlusion (AO):
- Add a MixRGB (or Mix Color) node in mode Multiply.
- Input A =
albedo, Input B = ao, Factor = 1.0.
- Output of Mix → Base Color of Principled (replaces the direct albedo connection).
- Height / Displacement:
Cycles — true displacement
- Material Properties → Settings → Displacement: Displacement and Bump.
- Add a Displacement node: connect
height → Height, set Midlevel = 0.5, Scale = 0.02–0.08 (tune to taste).
- Output of Displacement → Material Output → Displacement.
- Add geometry density (e.g., Subdivision Surface) so displacement has polygons to work with.
Eevee (or lightweight Cycles) — bump only
- Add a Bump node:
height → Height.
- Set Strength = 0.2–0.5, Distance = 0.05–0.1, and connect Normal output to Principled’s Normal.
Using the packed ORM texture (optional)
Instead of separate AO/Roughness/Metallic maps you can use the single *_ORM.png:
- Add one Image Texture (Non-Color) → Separate RGB (or Separate Color).
- R (red) → AO (use it in the Multiply node with albedo as above).
- G (green) → Roughness of Principled.
- B (blue) → Metallic of Principled.
UVs & seamless tiling
- These textures are seamless. If your mesh has no UVs, go to UV Editing → Smart UV Project.
- For scale/repeat, add Texture Coordinate (UV) → Mapping and plug it into all texture nodes.
Increase Mapping → Scale (e.g., 2/2/2) to tile more densely.
Recommended starter values
- Normal Map Strength: 0.5–1.0
- Bump Strength: ~0.3
- Displacement Scale (Cycles): ~0.03
Common pitfalls
- Wrong Color Space (normals/roughness/etc. must be Non-Color).
- “Inverted” details → enable Invert Y on the Normal Map node.
- Over-strong relief → lower Displacement Scale or Bump Strength.
Example: Download Wood Textures and instantly apply parquet or rustic planks inside Blender for architectural visualization.
To add the downloaded texture, go to Add — Texture — Image Texture.

Add a node and click the Open button.

Select the required texture on your hard drive and connect Color to Base Color.


