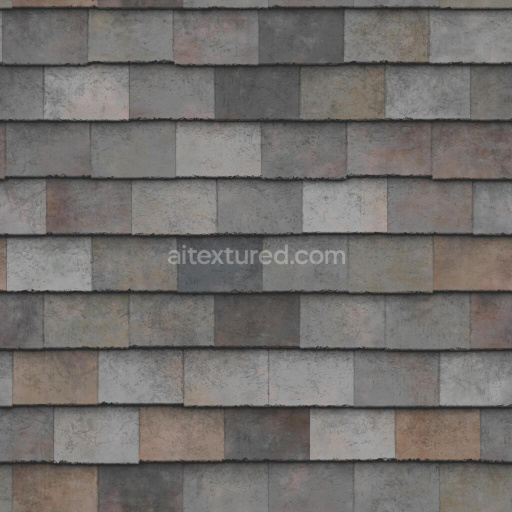
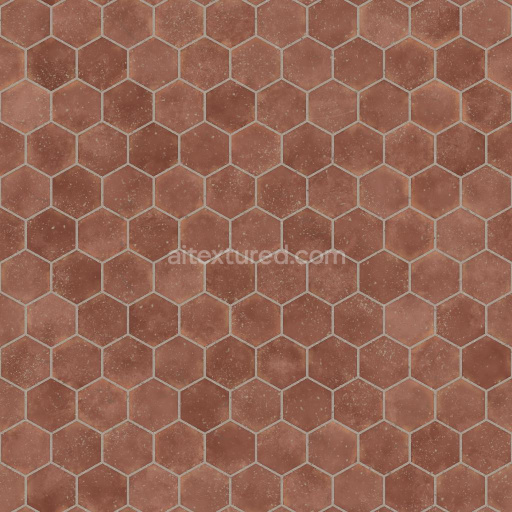
Seamless 8K PBR 3D Texture Of Matte Rough Handmade Ceramic Tile With Brown Tones And Vint…
Seamless texture (tileable) · PNG, WEBP, PBR ZIP. License: AITextured Free Commercial License (FCL) v1.1. Free personal and commercial use. Raw resale, standalone redistribution, mirroring/scraping, competing asset packs, and AI/ML training are not allowed without written permission. Attribution is not required, but appreciated..

| ID | seamless-8k-pbr-3d-texture-of-smooth-polished-ceramic-tile-with-floral-embossed-pattern-in-neutral-tones |
|---|---|
| Category | Tile |
| Formats | PNG, WEBP, PBR ZIP |
| Size | 1k (1024x1024px), 2k (2048x2048px), 4k (4096x4096px), 8k (8192x8192px) |
| Color | sRGB |
| Tileable | Yes |
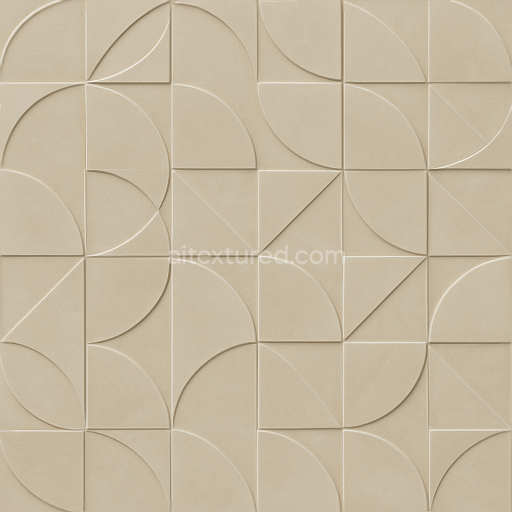
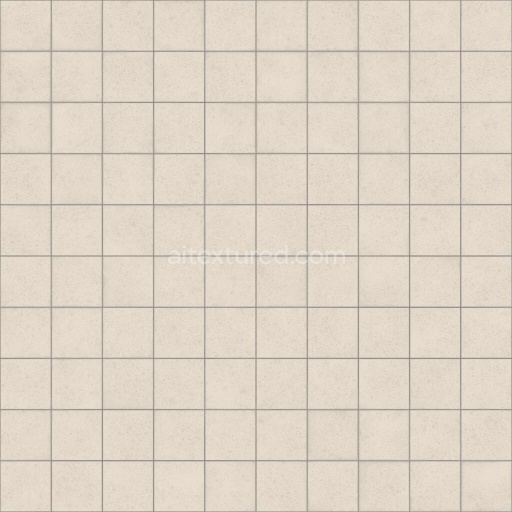
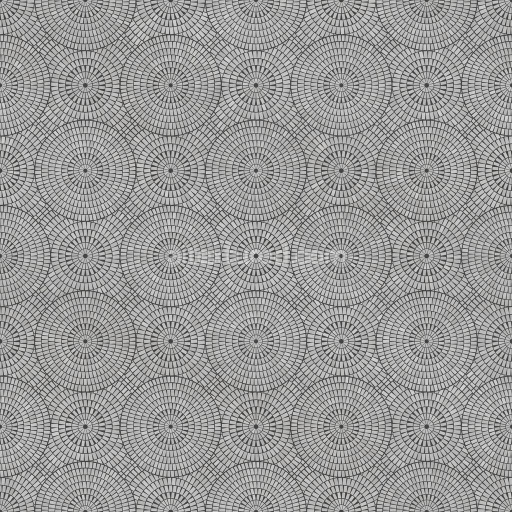
This seamless 8K PBR 3D texture represents a polished ceramic tile composed of a fine-grained clay substrate, meticulously fired and glazed to achieve a smooth, hard surface. The tile’s form is square, typical of classic indoor wall tiles, with an embossed floral pattern that adds subtle depth and tactile interest. The floral motifs are raised gently above the base plane, creating a low-relief geometric repetition that integrates harmoniously with the neutral color palette, which ranges from soft beige to light taupe. These neutral tones are achieved through ceramic pigments mixed into the glaze before firing, ensuring durability and colorfastness. The tile’s polished finish imparts a gentle gloss that enhances the embossed details by reflecting light delicately across the surface, adding sophistication without overwhelming shine.
From a material composition perspective, the ceramic tile’s substrate consists primarily of kaolin clay combined with quartz and feldspar aggregates, providing structural strength and low porosity. The glaze layer functions as both the surface finish and color carrier, incorporating fine mineral pigments and binders that vitrify during firing, resulting in a smooth, water-resistant surface. The embossed floral pattern is created by molding or pressing the clay before firing, giving the texture its characteristic relief. The tile exhibits minimal weathering, as expected for indoor use, maintaining its polished, smooth surface over time. In a PBR workflow, the BaseColor map captures the subtle variations in neutral hues and pigment distribution, while the Normal map emphasizes the raised floral embossing. The Roughness map is finely tuned to reproduce the polished finish’s gentle reflectivity, with lower roughness values on the smooth glaze and slightly higher values in crevices to simulate micro-shadowing. The Metallic channel remains at zero, reflecting the non-metallic nature of ceramic. Ambient Occlusion enhances the perceived depth of the embossing, and the Height/Displacement map accurately represents the floral relief for realistic parallax effects.
This texture is optimized at an 8K resolution, ensuring exceptional detail fidelity and crispness when applied to large surfaces or close camera angles. It is fully compatible with industry-standard 3D software such as Blender, Unreal Engine, and Unity, supporting advanced shader workflows that utilize all PBR channels for photorealistic rendering. The seamless nature of the pattern allows for continuous tiling without visible repetition seams, making it ideal for expansive indoor wall applications such as bathroom surrounds, kitchen backsplashes, or accent walls.
For practical use, it is advisable to carefully adjust the UV scale to maintain the natural proportions of the embossed floral pattern, avoiding distortion or unnatural repetition. Additionally, fine-tuning the Roughness map can help achieve the desired gloss level depending on lighting conditions, while blending the Height map with Normal maps can enhance the perception of depth without increasing geometric complexity. This approach maximizes visual realism while maintaining performance efficiency in real-time engines.
Import the texture maps into Blender with sRGB color space for albedo/base color and Non-Color for normal, roughness, metallic, AO, height, and ORM maps. Connect normal maps through a Normal Map node, then adjust UV scale with a Mapping node so the material repeats naturally on your model.
For the full step-by-step setup, see How to Use Seamless Textures in Blender. Browse related material examples in wood, concrete, and metal.
Yes. This texture is designed as a seamless tileable PBR material, so it can repeat across large surfaces without visible borders.
You can download PNG/WEBP versions and use 1K, 2K, 4K and 8K download options when available on the page.
Yes. The download options and engine-mapped ZIP workflow are designed for Blender, Unreal Engine, Unity Standard, URP and HDRP material pipelines.
Yes. The texture is available under the AITextured free commercial license. Review the license page for redistribution and AI-training restrictions.


Build, preview, and export seamless PBR materials. Generate full map sets from a single image, inspect them in a real-time WebGL viewer, and re-package maps for Unreal, Unity, and Blender—directly in your browser.
AI text-to-texture: type a prompt and get a seamless, tileable base image ready for PBR workflows (great starting point for materials).
Create a full PBR set (Normal, Roughness, AO, Metallic, etc.) from a single image. Seamless and tiling-friendly.
Instant WebGL viewer: inspect materials on a sphere, plane, and cube. Check tiling and lighting in real time.
Re-packages maps per engine: Unreal (BaseColor + ORM), Unity (Mask/MetallicSmoothness), Blender (separate channels).
PNG ↔ JPG ↔ SVG: fast convert, SVG rasterize, embed/trace options, quality & background controls.