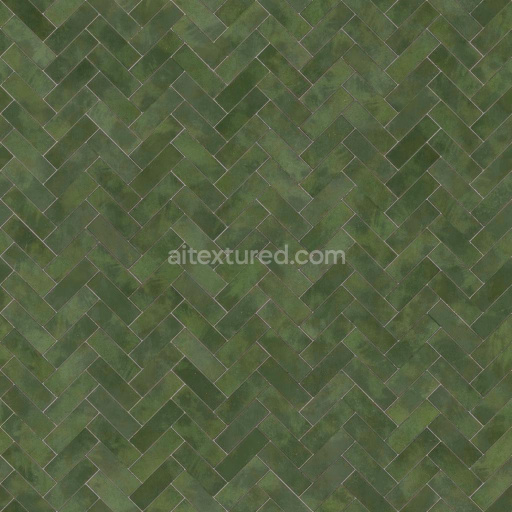
Herringbone Emerald Porcelain Tiles | Free PBR
Seamless texture (tileable) · PNG, WEBP, PBR ZIP. License: AITextured Free Commercial License (FCL) v1.1. Free personal and commercial use. Raw resale, standalone redistribution, mirroring/scraping, competing asset packs, and AI/ML training are not allowed without written permission. Attribution is not required, but appreciated..

| ID | seamless-8k-pbr-3d-texture-of-glossy-glazed-ceramic-tile-with-blue-tones-and-fish-scale-pattern |
|---|---|
| Category | Tile |
| Formats | PNG, WEBP, PBR ZIP |
| Size | 1k (1024x1024px), 2k (2048x2048px), 4k (4096x4096px), 8k (8192x8192px) |
| Color | sRGB |
| Tileable | Yes |
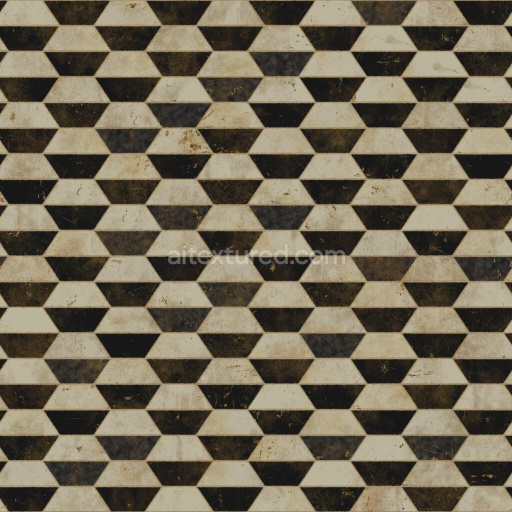
This seamless 8K PBR 3D texture presents a glossy, glazed ceramic tile surface characterized by an elegant fish scale pattern rendered in rich blue tones. The tiles are formed from a dense, high-quality ceramic substrate composed primarily of refined kaolin clay mixed with feldspar and quartz aggregates, providing a smooth yet robust base. This substrate is coated with a vitreous glaze that incorporates colorants—primarily cobalt oxide pigments—to achieve the vibrant blue hues. The glaze firing process vitrifies the surface, producing a non-porous, glass-like finish that enhances durability and water resistance, ideal for indoor wall applications such as bathrooms or decorative feature walls.
The geometric form follows a classic overlapping fish scale motif, where each tile is shaped as a curved, elongated semicircle, creating a rhythmic, tessellated pattern with subtle depth variations. The glossy glaze imparts a polished, reflective surface that interacts dynamically with light, emphasizing the curvature and relief of the scales. This effect is faithfully captured in the PBR workflow: the BaseColor map defines the saturated blue gradient and subtle pigment variations, while the Normal map simulates the gentle undulations and edges of the scales to create realistic light bouncing. The Roughness map is finely tuned to reflect the high-gloss finish, showing low roughness values with slight micro-variations to avoid a uniformly flat shine.
The Metallic channel remains unused, consistent with ceramic's non-metallic nature, ensuring accurate material representation. Ambient Occlusion enhances the subtle shadows between overlapping scales, deepening the perception of depth and layering. The Height/Displacement map provides precise surface relief, allowing for parallax and displacement effects in real-time engines or offline renders, further enhancing the tactile realism of the tile pattern. The texture’s seamless construction at 8K resolution guarantees crisp detail retention across large surfaces, making it fully optimized for major 3D software and engines including Blender, Unreal Engine, and Unity.
For practical application, it is recommended to adjust the UV scale to maintain the natural size of the fish scale pattern relative to the project environment. Slightly increasing the roughness value can help reduce excessive reflectivity under strong lighting conditions, while blending the height and normal maps carefully can enhance depth perception without causing rendering artifacts. This combination of high-resolution detail and physically accurate material properties ensures the texture performs reliably in both photorealistic visualization and real-time rendering scenarios.
Import the texture maps into Blender with sRGB color space for albedo/base color and Non-Color for normal, roughness, metallic, AO, height, and ORM maps. Connect normal maps through a Normal Map node, then adjust UV scale with a Mapping node so the material repeats naturally on your model.
For the full step-by-step setup, see How to Use Seamless Textures in Blender. Browse related material examples in wood, concrete, and metal.
Yes. This texture is designed as a seamless tileable PBR material, so it can repeat across large surfaces without visible borders.
You can download PNG/WEBP versions and use 1K, 2K, 4K and 8K download options when available on the page.
Yes. The download options and engine-mapped ZIP workflow are designed for Blender, Unreal Engine, Unity Standard, URP and HDRP material pipelines.
Yes. The texture is available under the AITextured free commercial license. Review the license page for redistribution and AI-training restrictions.


Build, preview, and export seamless PBR materials. Generate full map sets from a single image, inspect them in a real-time WebGL viewer, and re-package maps for Unreal, Unity, and Blender—directly in your browser.
AI text-to-texture: type a prompt and get a seamless, tileable base image ready for PBR workflows (great starting point for materials).
Create a full PBR set (Normal, Roughness, AO, Metallic, etc.) from a single image. Seamless and tiling-friendly.
Instant WebGL viewer: inspect materials on a sphere, plane, and cube. Check tiling and lighting in real time.
Re-packages maps per engine: Unreal (BaseColor + ORM), Unity (Mask/MetallicSmoothness), Blender (separate channels).
PNG ↔ JPG ↔ SVG: fast convert, SVG rasterize, embed/trace options, quality & background controls.