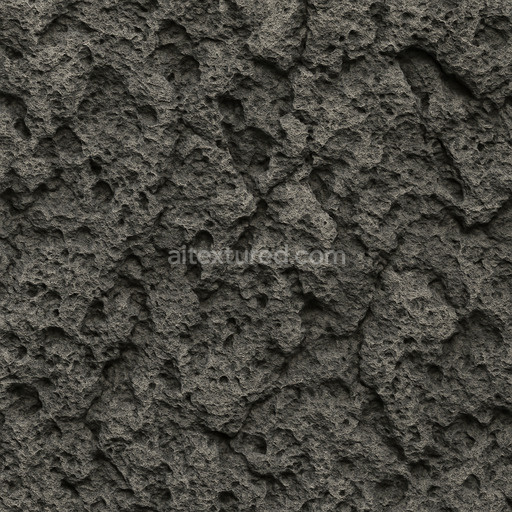
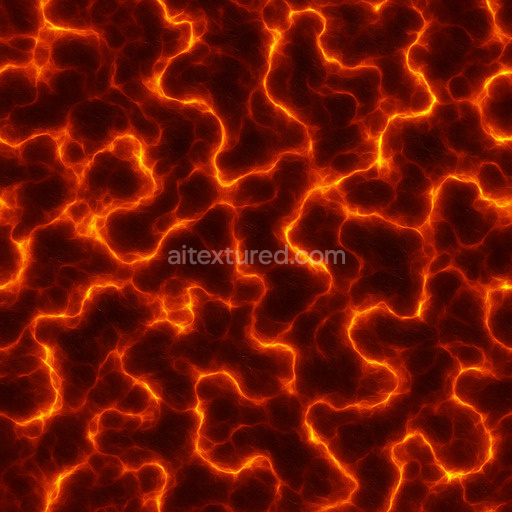
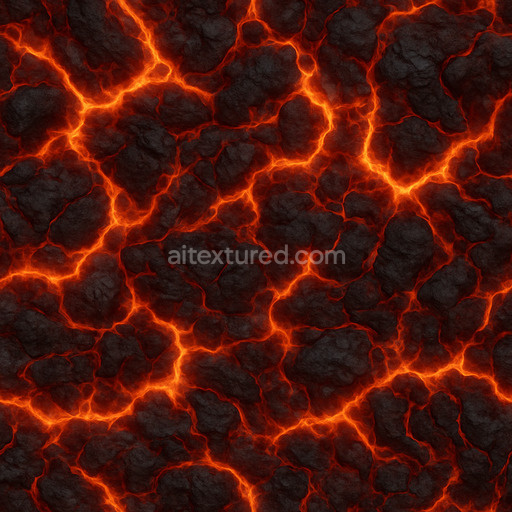
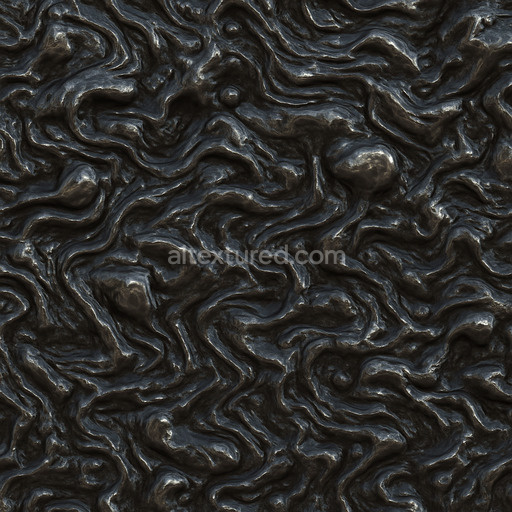
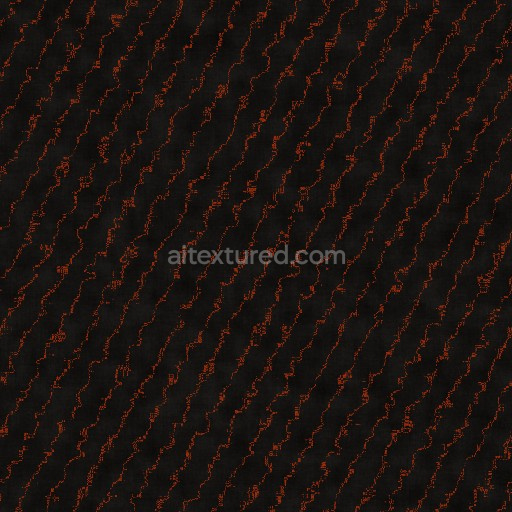
Ancient Volcanic Rock Texture
Seamless texture (tileable) · PNG, WEBP, PBR ZIP. License: AITextured Free Commercial License (FCL) v1.1. Free personal and commercial use. Raw resale, standalone redistribution, mirroring/scraping, competing asset packs, and AI/ML training are not allowed without written permission. Attribution is not required, but appreciated..

| ID | futuristic-lava-texture |
|---|---|
| Category | Lava |
| Formats | PNG, WEBP, PBR ZIP |
| Size | 1k (1024x1024px), 2k (2048x2048px), 4k (4096x4096px), 8k (8192x8192px) |
| Color | sRGB |
| Tileable | Yes |
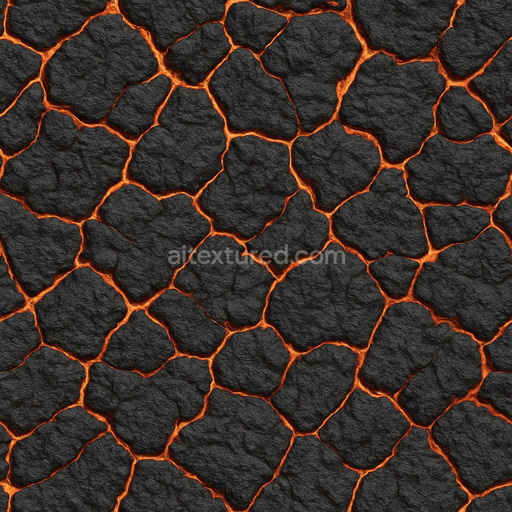
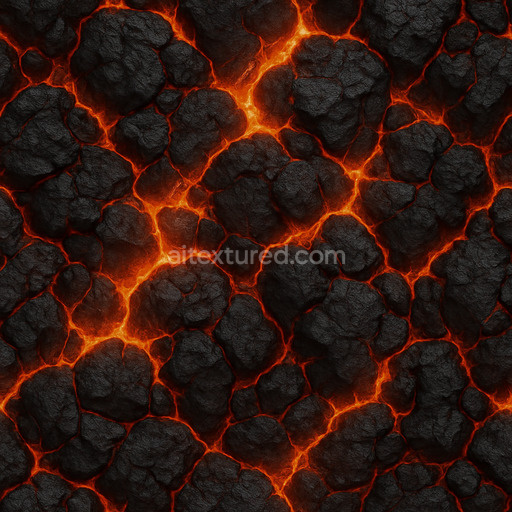
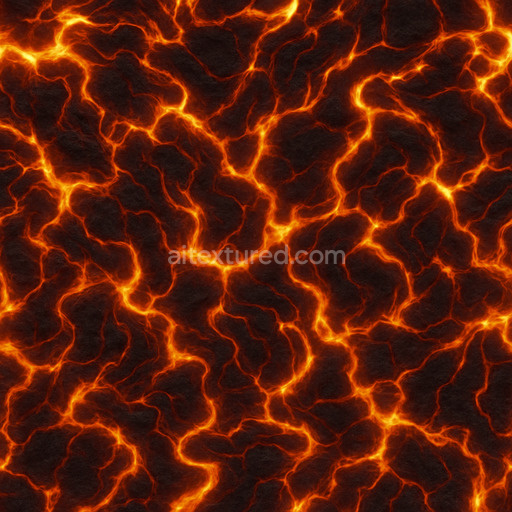
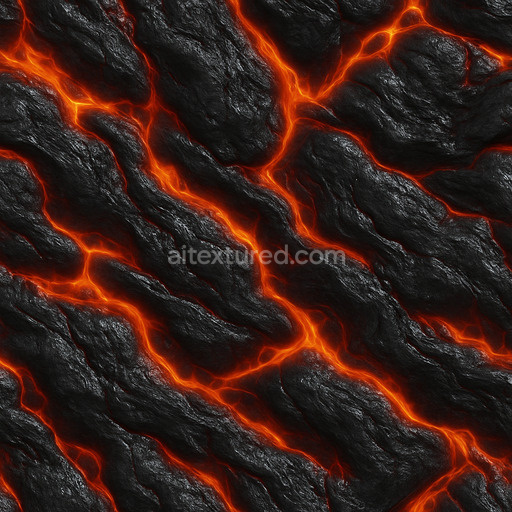
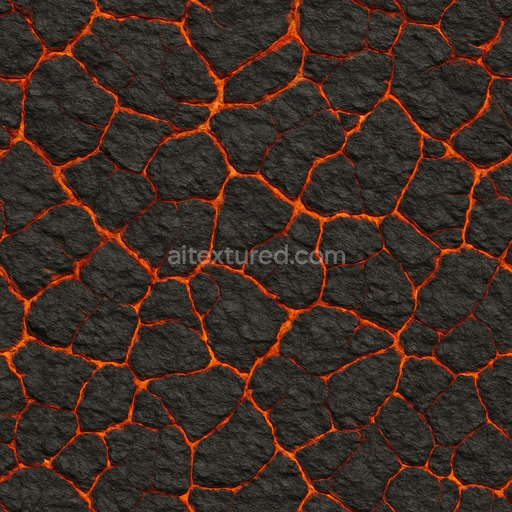
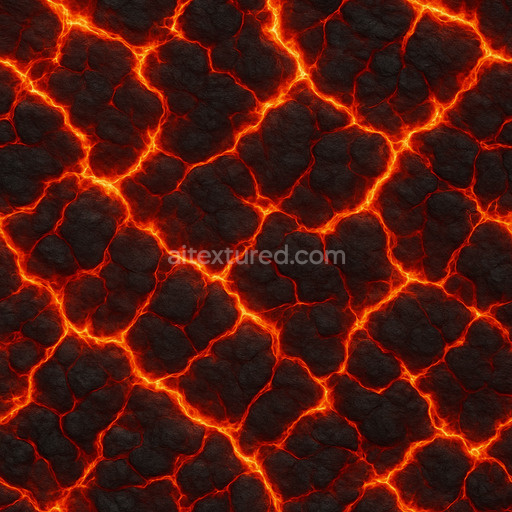
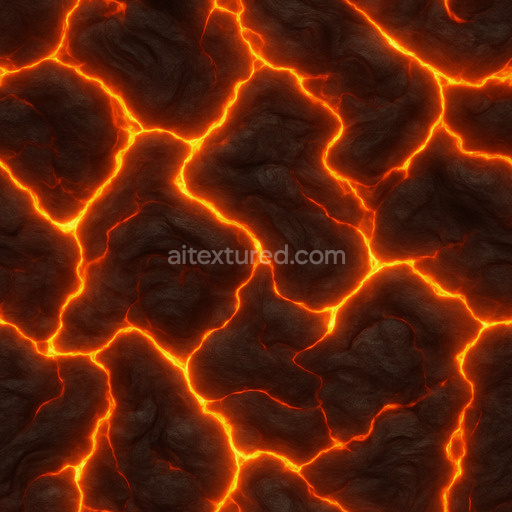
The Futuristic Lava Texture is a meticulously crafted high-resolution seamless texture designed to evoke the dynamic and otherworldly appearance of molten lava fused with sci-fi aesthetics. Its base substrate mimics a mineral-rich igneous rock surface interlaced with crystallized polymer-like veins that create a striking interplay of organic and synthetic elements. The texture’s composition includes fine-grained aggregates and subtle fibrous patterns that suggest layered mineral deposits while binders resembling high-temperature ceramics contribute to a stable weather-resistant surface. The finish is predominantly matte with occasional glossy fissures simulating cooled lava flows punctuated by glowing molten channels. Colorants are carefully balanced between deep reds vibrant oranges and dark charcoals enhanced by oxide-like layers that add depth and variation across the surface.
In physically based rendering (PBR) terms this tileable futuristic lava texture delivers exceptional detail across multiple channels. The BaseColor/Albedo captures the vivid pigmentation and the organic-synthetic contrast without overwhelming saturation allowing realistic lighting interaction. The Normal map accentuates the fine surface relief with crisp ridges and subtle cracks that enhance tactile perception. Roughness is finely tuned to replicate the varying surface finishes from smooth glassy lava pools to rough weathered rock ensuring believable light diffusion. The Metallic channel remains minimal reflecting the non-metallic nature of the substrate but lending slight specular highlights to the polymeric veins. Ambient Occlusion adds depth to crevices and fissures improving volumetric shading while the Height/Displacement map supports realistic parallax effects for immersive close-up views. All channels are rendered at up to 8K resolution preserving clarity and detail when applied to expansive surfaces.
Optimized for seamless tiling this texture is ideal for covering vast areas in real-time scenes cinematic renders level dressing and material studies without visible repetition or artifacts. It integrates smoothly into popular 3D platforms such as Blender Unity and Unreal Engine streamlining your workflow with out-of-the-box compatibility and rapid iteration cycles. For best results consider adjusting the UV scale to balance detail density and performance depending on your scene’s requirements. Additionally subtle roughness tuning can emphasize the contrast between polished and matte areas while a light parallax effect using the height map can enhance surface breakup without overloading rendering resources making this futuristic lava texture a versatile asset for sci-fi environments and advanced material design.
This seamless futuristic lava texture features a generated futuristic lava texture design with detailed lava textures optimized for PBR materials allowing for accurate 3D preview and realistic surface interaction.
Import the texture maps into Blender with sRGB color space for albedo/base color and Non-Color for normal, roughness, metallic, AO, height, and ORM maps. Connect normal maps through a Normal Map node, then adjust UV scale with a Mapping node so the material repeats naturally on your model.
For the full step-by-step setup, see How to Use Seamless Textures in Blender. Browse related material examples in wood, concrete, and metal.
Yes. This texture is designed as a seamless tileable PBR material, so it can repeat across large surfaces without visible borders.
You can download PNG/WEBP versions and use 1K, 2K, 4K and 8K download options when available on the page.
Yes. The download options and engine-mapped ZIP workflow are designed for Blender, Unreal Engine, Unity Standard, URP and HDRP material pipelines.
Yes. The texture is available under the AITextured free commercial license. Review the license page for redistribution and AI-training restrictions.

Generate, preview, and export seamless PBR materials for Blender, Unity, and Unreal Engine—directly in your browser.
AI text-to-texture: type a prompt and get a seamless, tileable base image ready for PBR workflows (great starting point for materials).
Create a full PBR set (Normal, Roughness, AO, Metallic, etc.) from a single image. Seamless and tiling-friendly.
Instant WebGL viewer: inspect materials on a sphere, plane, and cube. Check tiling and lighting in real time.
Re-packages maps per engine: Unreal (BaseColor + ORM), Unity (Mask/MetallicSmoothness), Blender (separate channels).
PNG ↔ JPG ↔ SVG: fast convert, SVG rasterize, embed/trace options, quality & background controls.